The following setups need to be performed in advance of the user acceptance testing process. This should be performed in your training database before attempting in your production database.
Prior to setting up, please contact support@happen.biz to obtain the Shippit script and import it via the scripting engine.
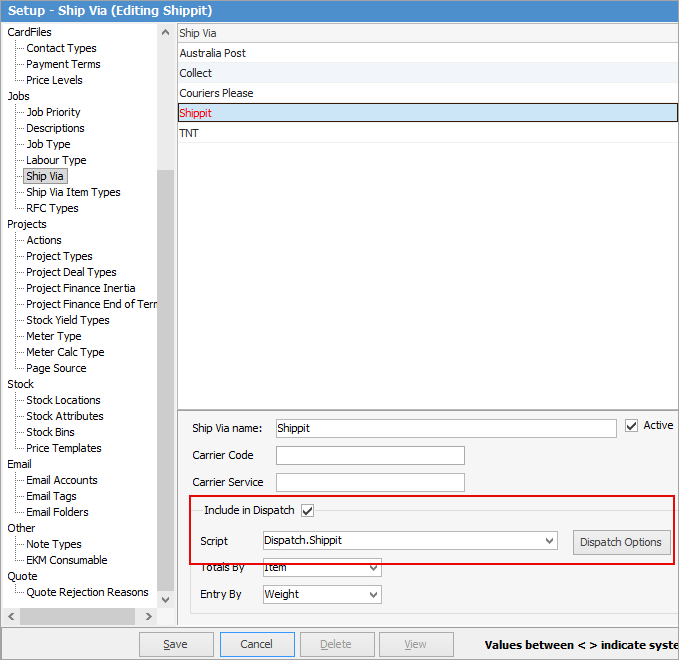
Enter details and select the Dispatch.Shippit script. Tick Include in Dispatch. Enter Carrier Code and Carrier Service if required, but not necessary.
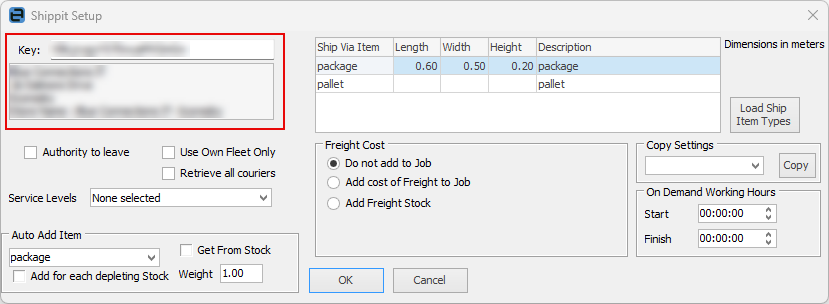
Click on Dispatch Options and enter the Key provided to you by Shippit. This will also populate the store field below.
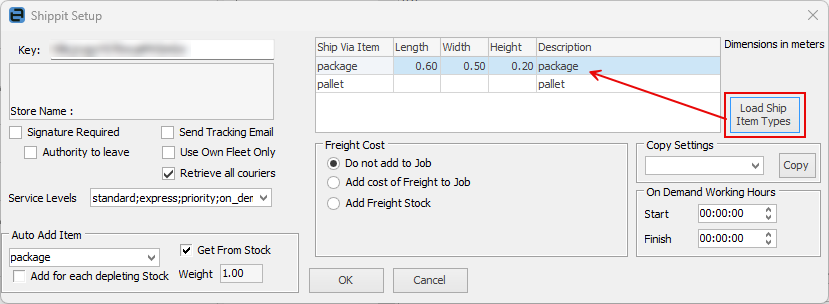
Click Load Ship Item Types and
Freight can be added either as a stock line, or in the Freight section of a job/invoice, if required.
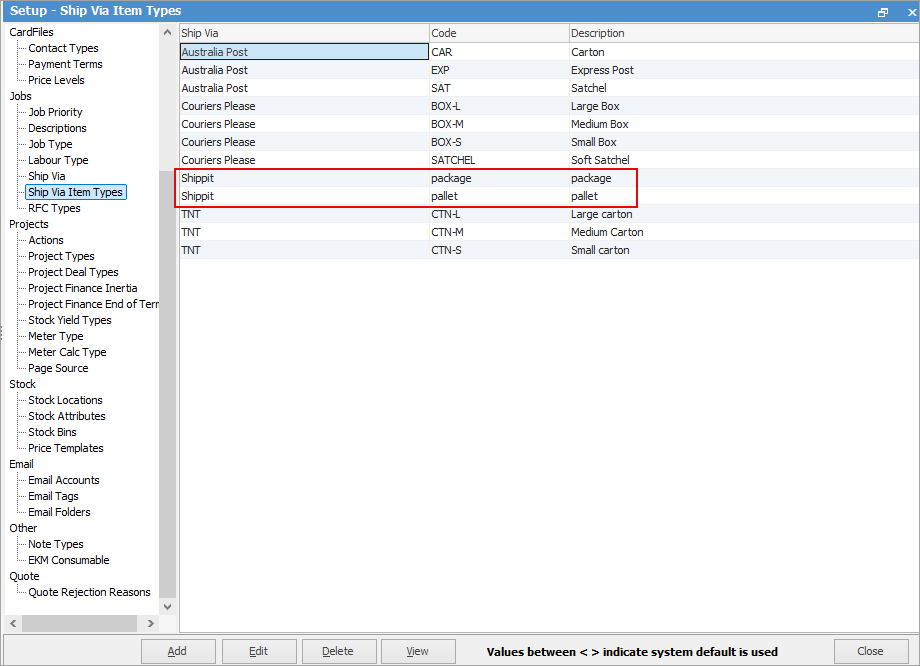
Go to Tools > Setups > Jobs > Ship Via Types and add types for Shippit.
|

It is important to ensure all is working as expected on one shipment to begin with.
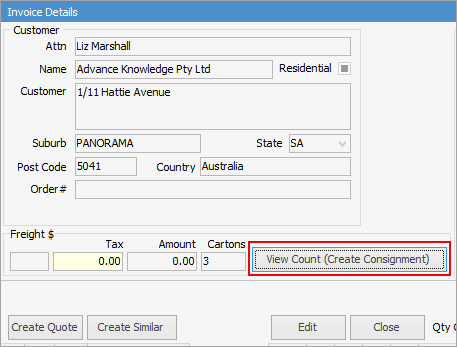
Job Creation Create a test job and and go to the Invoice Details tab at the bottom, then click Edit. In the ship area, change the Ship Via field to Shippit.

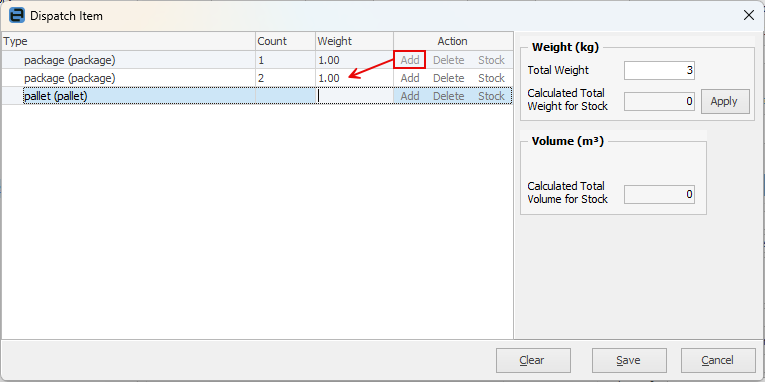
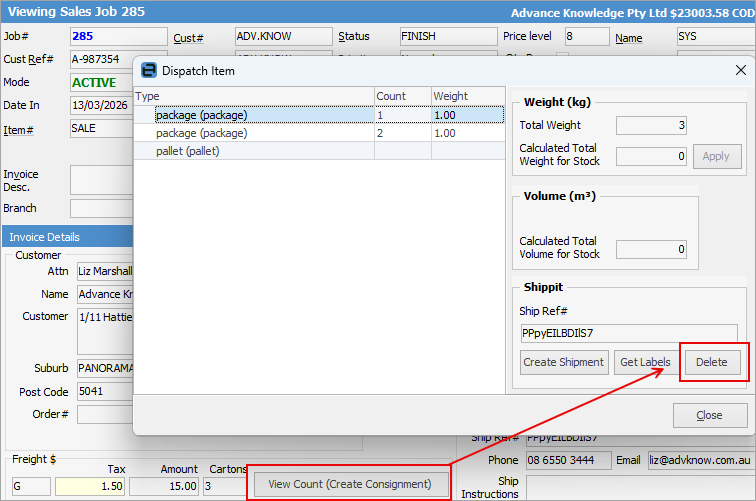
Enter Package Counts The Enter Count button will appear on the left for you to enter information about the freight and count. If you need additional services of the same type, you can click Add in the Action column to create an another line. This is also where you can remove any items from the consignment by clicking Delete.
Create the consignment and print the label In View mode, select View Count (Create Consignment).
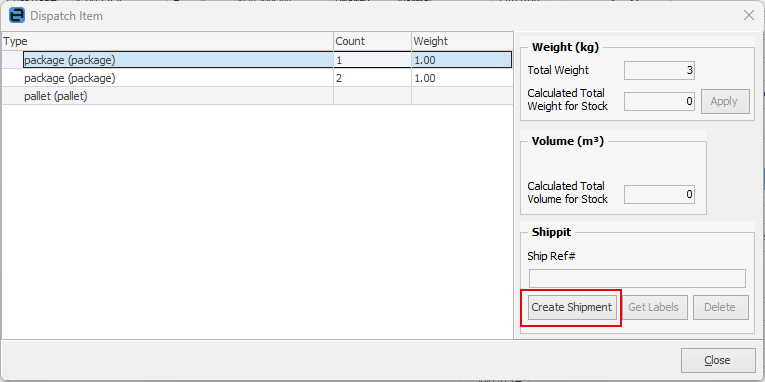
Select Create Shipment.
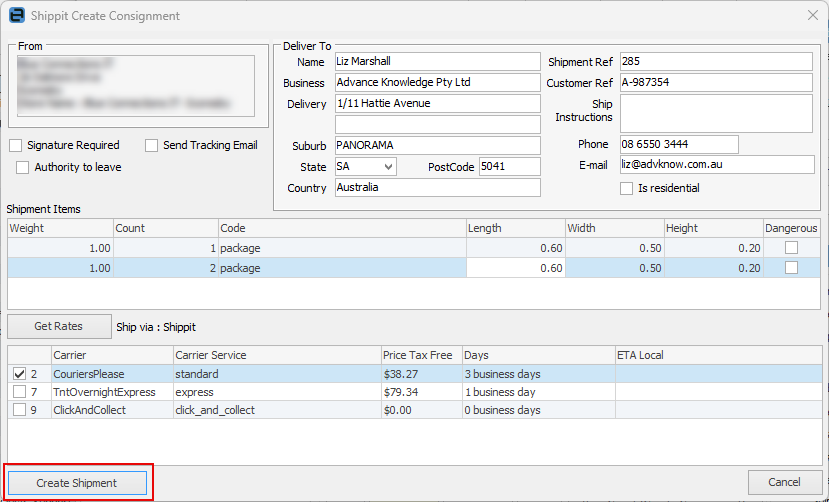
Check the details that will be sent to Shippit.
Select Create Shipment.
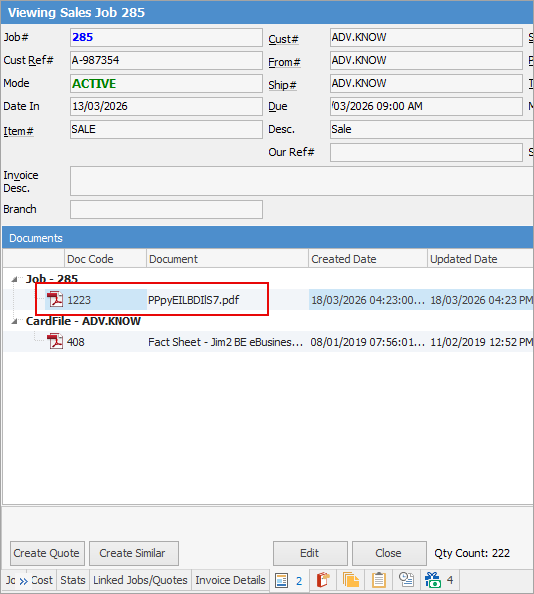
The shipping reference will be added for the job, and the shipment will be lodged with Shippit and Jim2 will ask to print labels (in PDF format), which will be created and attached to the job on the Documents tab in Jim2.

The above process is performed throughout the day up until you decide to create a manifest for a group of deliveries. The process is not complete until a manifest has been performed. You can have as many manifests per day as you require.
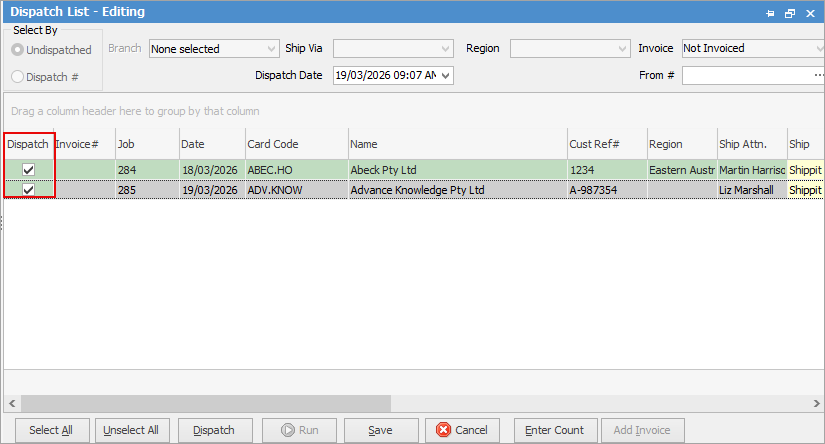
Manifest the Shipments On the ribbon, go to Jobs > Dispatch and select Run to return records based on the selected filter. See here for more information on dispatch.
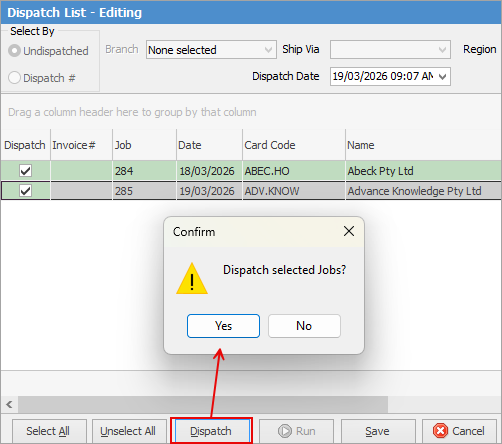
Select Edit at the bottom of the list and you will be able to select some or all of the shipments to be included in this manifest session, by ticking the Dispatch box. Select Dispatch once you have made your selections.
Click Yes to confirm.
The Manifest will be presented for printing and will also be linked to all applicable jobs for future reference. Select OK and you will be taken to the Dispatch list and session for the shipment you have just processed.
Deleting Shipments You can delete shipments via the Create Shipment button on the Invoice Details tab of the job in question whilst in View mode.
 |
Further information