
Prerequisites
Before continuing, please read the Managing Your Website Overview and Design Mode Introduction.
If you have installed the eBusiness Service sample website, this contains all the webpage setups.
Customer view

When you are logged on as a customer, you are able to see Service Request, Service Request List, View Service Request.

Service request
▪Customers are able to add service requests (jobs).
▪When a service request is added, we can set a specific:
–Job Item
–Job Status
▪The fields on this form can be customised for your specific requirements. Fields that can be specified include:
Multiple columns can be added to a comment, so any generic field name can be made up and will go into a comment. For example, if you had a custom requirement that needs customers to specify their computer name, this would be added to comments.
Jef can be configured to allow/require service meters when submitting a service request:

Service Request Settings

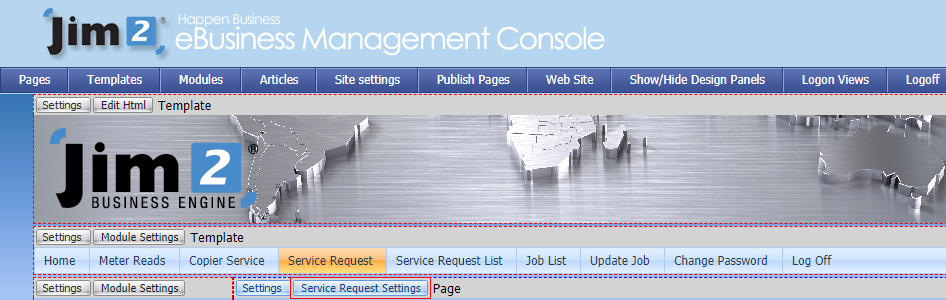
To view the service request settings:
1.Log on as Administrator.
2.Go into Design Mode.
3.Click Logon View > Contact View.
4.Go to the Service Request page.
5.Click Service Request Settings.
The top fields are as follows:
▪Name – this is the Named Module Settings, which means this module with these settings can be put on multiple pages.
▪Job Item – this is the Item that the job is created under.
▪Jim Status – this is the Status that the job is created under.
▪Hide Job No tick box.
▪View Job Url – this is the URL (for hyperlink) that is used after a customer has entered a new service and they click View Job.
▪Job List Url – this is the URL (for hyperlink) that is used after a customer has entered a new service and they click Job List Url.
▪Fields – these are the fields you want on the service request form.
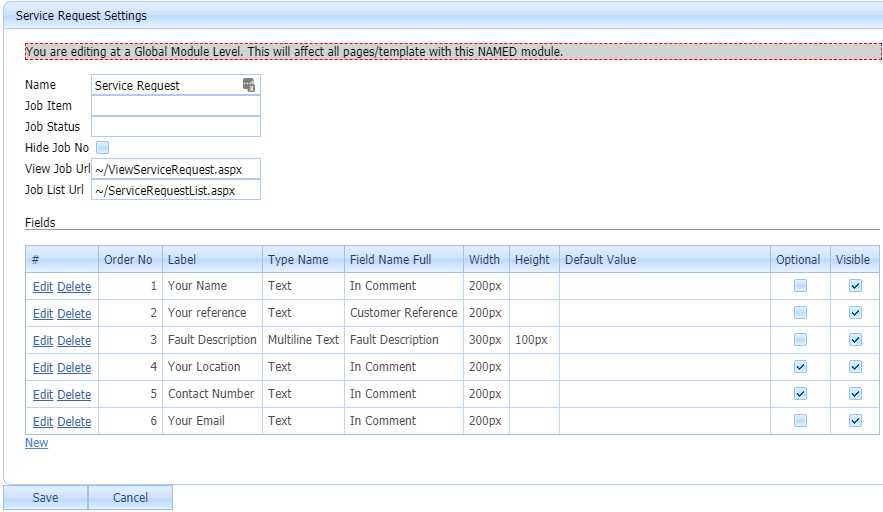
Service Request Fields
▪Order Number – is the order in which the fields appear on the form.
▪Label – this is the text that is used to describe the field to the customer.
▪Type Name – this can be either text, multiline text or drop-down list.
–Text – a normal Text Box.
–Multiline Text – this enables the customer to enter multiple lines of text.
–Drop-down List – this lets you set a range of values that users can input from a drop-down list. This is good for fields such as Job Status, Priority, etc.
▪Field Name Full
–Status – This is the job status, if you want to let the customer choose from a list of statuses.
–Customer Reference – goes into the Customer Reference field on the job.
–Priority – goes into the Priority field on the job. It is best used with a drop-down list.
–Type – this maps to the Type field on the job. It is best used with a drop-down list.
–Invoice Description
–Fault Description
–In Comment – this field will go into a comment on the new job. This field can appear multiple times on the Job form with different labels.
▪Width, Height – set the width and height. Multiline Texts are typically set to have a larger height.
▪Default Value – This is the default value that is set when a customer starts a new service request.
▪Optional – if this is not ticked, a user must enter a value for this field.
▪Visible – this hides a field from the customer. Typically, you would do this so that you can enter a value for a field without letting the customer see this value.
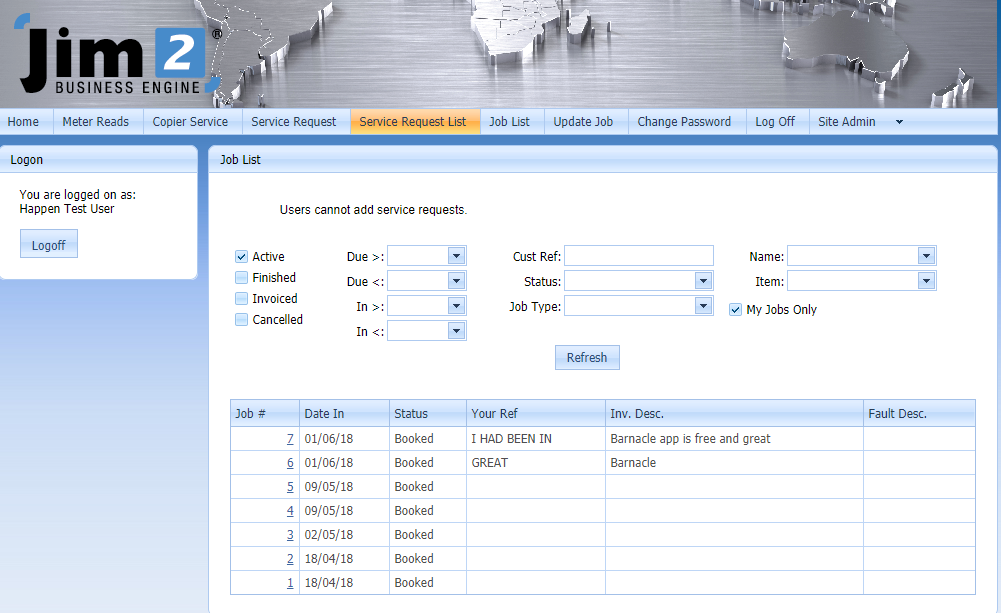
Service Request List
The Service Request List is a Job List that is customised for the customer.
Service Request List Settings
To view the Service Request List settings:
1.Log on as Administrator.
2.Go into Design Mode.
3.Click Logon View > Contact View.
4.Go to the Service Request List page.
5.Click Job List Settings.
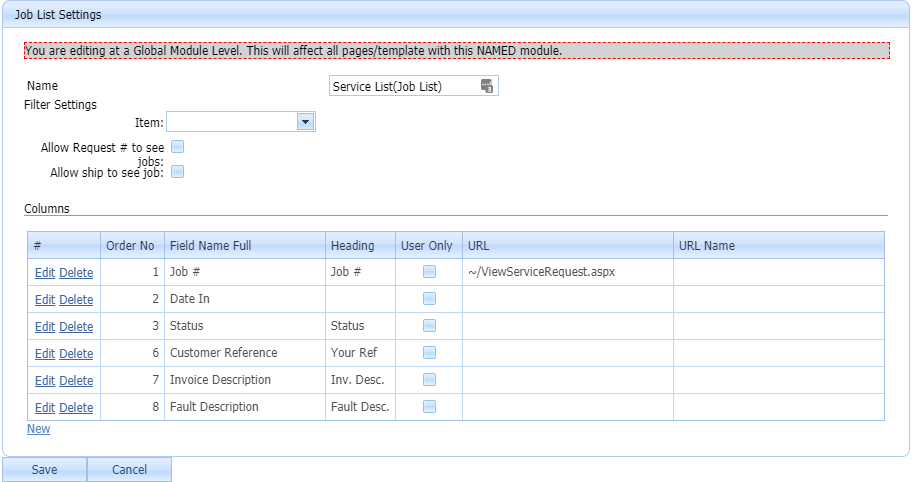
The fields are as follows:
▪Name – this is the Named Module Settings, which means this module with these settings can be put on multiple pages.
▪Item – it is possible to force the customer to use a specific job Item, therefore they will only see jobs with that specific Item.
▪Allow Request # to see jobs: tick box
▪Allow ship to see job: tick box.
▪Columns – these are the columns that you want listed for a customer.
–Order No – the order in which the fields appear on the form
–Field Name Full – for example, job number, date in, status, etc.
–Heading – for example, Status, Your Ref.
–User Only – if this is ticked, the field will be displayed to users only.
–Url – is used for Job#. You need to enter the URL of your Update Job/Service Request Page.
–Url Name – name displayed in the grid when a URL is used.
View Service Request
The View Service Request is an UpdateJob module that has been customised for the customer. The customer is able to:
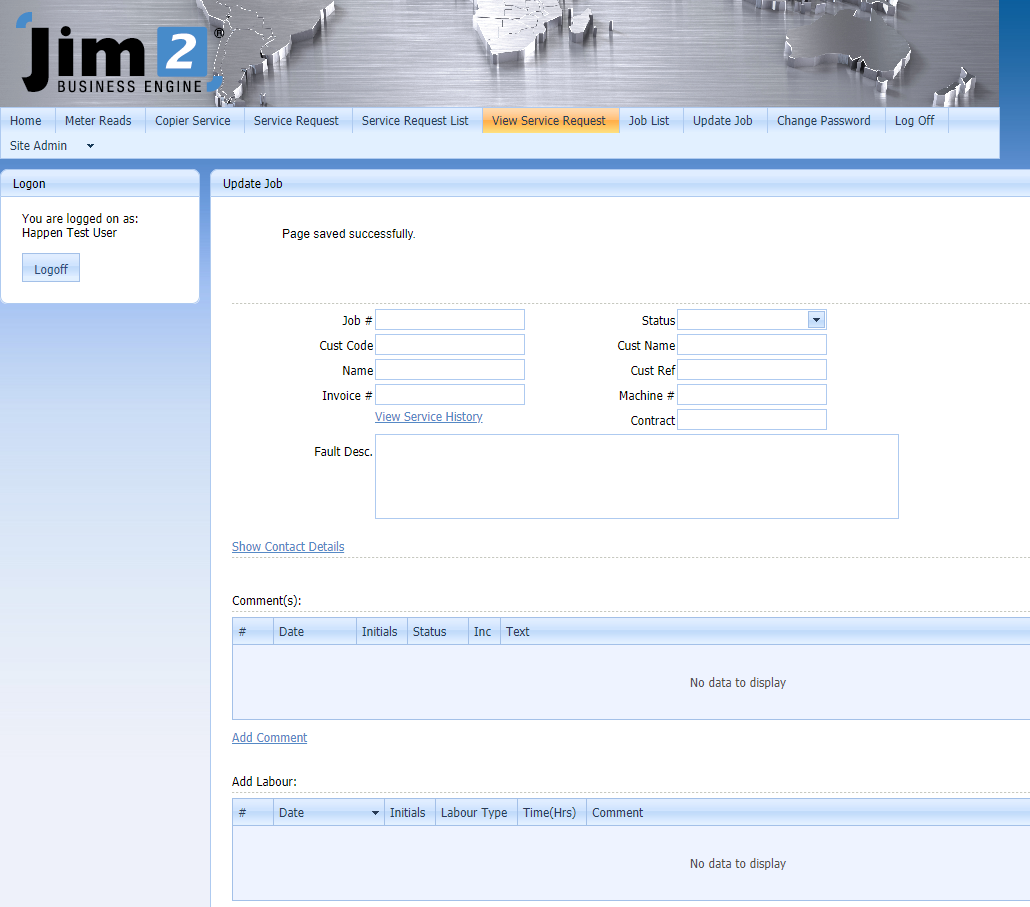
▪View the job information.
▪View comments that are flagged as Inc.
▪Add comments to a job.
When customers add comments, emails can be sent to the Name on the job, account manager, and other specified emails.
When customers add comments, the job status can be changed to a status that you have defined. This allows you to create a job list with all the updated jobs.
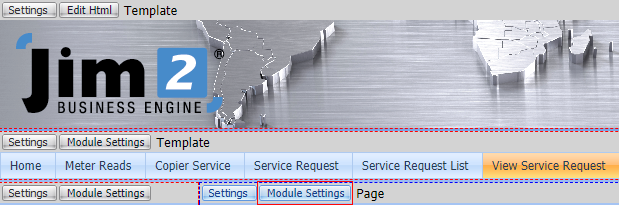
View Service Request Settings

To view the View Service Request settings:
1.Log on as Administrator.
2.Go into Design Mode.
3.Click Logon View > Contact View.
4.Go to the View Service Request page.
5.Click Module Settings.
Details of Settings:
▪Submit Redirect Page – is the page that the customer is redirected to after they update the job.
▪Status on Cust Comment – this is the status that the job is changed to when a customer comments on a job.
▪Email Name Cust Comment – if this is ticked, the person named on the job will be emailed when a customer adds a comment to a job.
▪Email Mng Cust Comment – if this is ticked, the account manager on the job will be emailed when a customer adds a comment to a job.
▪Email on Cust Comment – here, you can add an extra email address that is sent when a customer adds a comment to a job.
▪Cust can see Contact – tick if you wish the customer to see the contact information.
▪Label – enter relevant information here.
▪Hide – (OurRef, ItemCode, Type, DateDue, AccMng, Invoice Desc, SerialNo, ItemDesc, JobType) will hide these fields on the form.
Jim2 User View
The Jim2 user can see the job list and also the Update Job.

Jim2 User Update Job
When logged on as a user, you can do the following.
▪View Job Information:
–Job Header Information
–Contact details for the Job
–Google Maps links for the Address
–Current comments on the Job
–Current Labour on the Job.
▪Update Job Information:
–The Status for the Job
–The Fault Description on the Job
–Add comments to the Job
–Add Labour to the Job.
Further information: