
Before you can actually import contacts into Jim2, you must prepare the data first. The following is a list of Jim2 Contacts fields.
If more types are required, add a new line in the spreadsheet for that contact type using the same CardCode and Name.
For example:
▪First import Contact Types: Phone, Email, Mobile.
▪Second import Contact Types: Web, Email Accounts, etc. using the same Contact Type fields, ie. Contact Type, Contact Type 2, etc.
|
This spreadsheet allows for importing multiple contacts. |

Happen provides a spreadsheet template that you can use to import your data into Jim2, so please contact support@happen.biz to obtain it.
 |
It's very important to get the data right at this stage – the way you want to spell it, the way you want it to look, all the records verified. It's a lot easier and quicker to amend it now in a spreadsheet than later when it's in database form. |
Explanation of Fields in the Contacts Template
Field |
Description/Use |
Data Type |
# of Chars |
Example |
|---|---|---|---|---|
CardCode |
Jim2 card code |
String |
10 |
ADV.KNOW |
Primary Contact |
Make primary |
Boolean |
T/F |
T |
Title |
Salutation |
String |
4 |
Mr, Mrs. |
First Name |
Christian name |
String |
25 |
Jim |
Middle Name |
Middle name |
String |
25 |
Alexander |
Last Name |
Surname |
String |
25 |
|
Display Name |
Display name |
String |
51 |
Jim Jones |
Gender |
Gender |
String |
1 |
M or F |
JobTitle |
Position |
String |
50 |
Manager |
Department |
Department |
String |
50 |
Production |
Contact Type |
Contact type, ie. phone |
String |
20 |
Phone |
Value1 |
Enter the contact details |
String |
10 |
02 8765 8765 |
Comments 1 |
Enter additional information |
String |
25 |
Away on Tuesdays |
Contact Type 2 |
Contact type, ie. Mobile |
String |
20 |
Mobile |
Value 2 |
Contact details |
String |
10 |
0400 000 111 |
Comments 2 |
Enter additional information |
String |
25 |
Don't call after hours |
Contact Type 3 |
Contact type, ie. Email |
String |
25 |
|
Value 3 |
Contact details |
String |
- |
jim@advance.com.au |
Comments 3 |
Enter additional information |
String |
25 |
Retiring soon. |
Save your template as a spreadsheet file and close a spreadsheet.
Now you are ready to do the import. It's best when doing the import (for speed and good database practice) to choose a reasonably quick machine/server and not have users actually logged on to the database.

Go to Tools > Import Data.
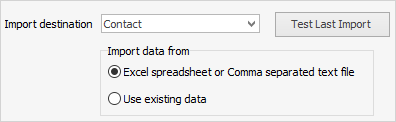
Select Contact for your import destination, then click Next. Choose the a spreadsheet file you have created, then click Open source file. Click Next and the Map fields screen will display.
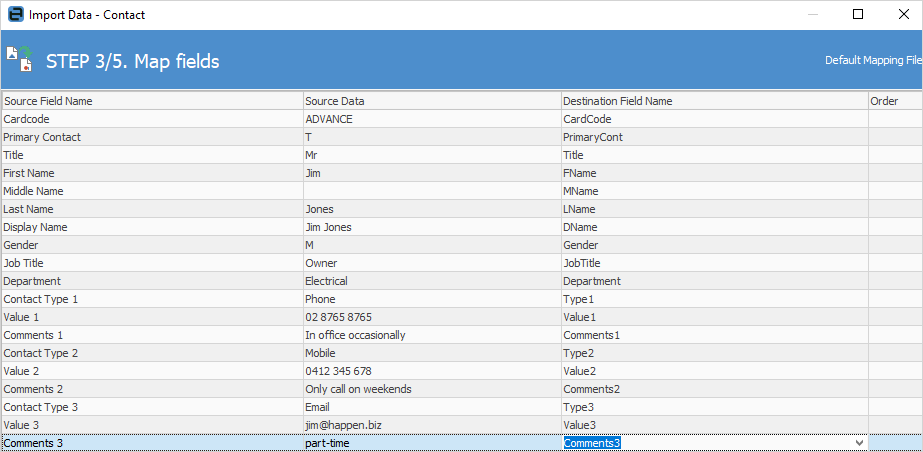
Map Source Field Name to Destination Field Name as above.
Click Next, then Load data to grid from source.
If data has been entered and mapped correctly, you will receive confirmation that the data test was successful.
Click Next. Click Import Data and Close.
Further information: