
Go to Tools > Setups > Project Types. Click Add and name the type MS Prepaid, selecting System type as MS Prepaid Labour.
Add the Managed Service type if not already created.

Go to Projects > Template List, and click Run.

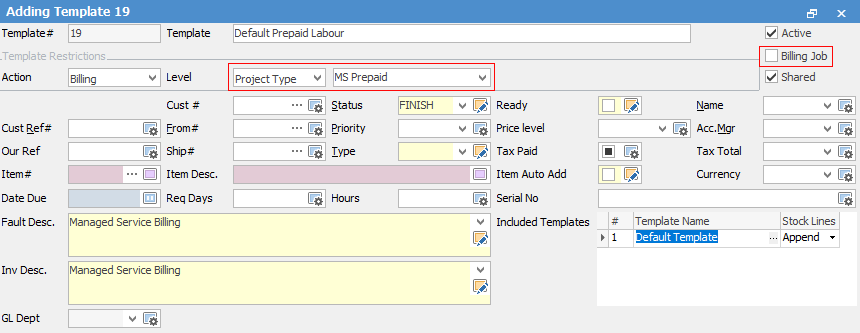
▪Add a new Project Template called Default Prepaid Labour Template, by Creating Similar from the Managed Services Default Template.
▪Update and save the template as appropriate to your requirements.
▪Ensure Billing Job is not ticked, as this template will be used for non-billing job creation.
▪Leave Shared ticked, as it will be used to create the jobs.
▪If applicable, add the Default Template as a contained template.
|
When Creating Similar templates, ensure you update the Action restriction to MS Prepaid (as per image above). |
|
You will see some letters underlined in the field names within the header, eg. Status. Using Alt+ the underlined letter will jump you to the field beside that heading. |
As the income from prepaid labour hours is considered a liability until it is used, we will add a new liability account to the general ledger, and a new stock GL group to link some journal stock codes.
Go to Accounts > General Ledger and create a general ledger account in Liability for Prepaid Labour. This account will reflect the amount of prepaid labour that has been sold to customers, but has not yet been delivered as services.
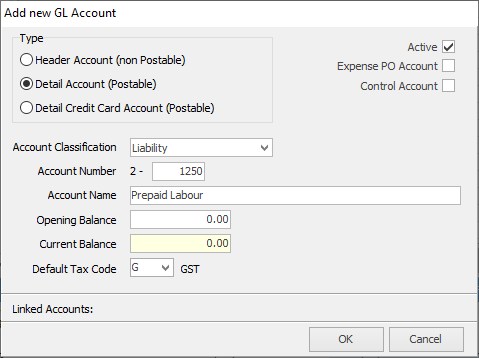
On the ribbon, go to Tools > Setups > Accounting > Stock GL Groups and create a stock GL group for Prepaid Labour Blocks. Use the above liability account. This will be a Journal stock type.

This is our recommended setup, however you may wish to discuss this with your accountant prior to setting up.
Create a stock GL group for the Prepaid Labour for Service Jobs. This will be a Labour stock type.

Go to Stock > Add Stock and create a stock code for invoicing prepaid labour blocks to the customer. This is a Journal stock type. Unit Measure 1 should be HOUR, and This Stock I Sell In also HOUR. On the Details tab, please ensure Decimal Places (Qty) is set to 2.
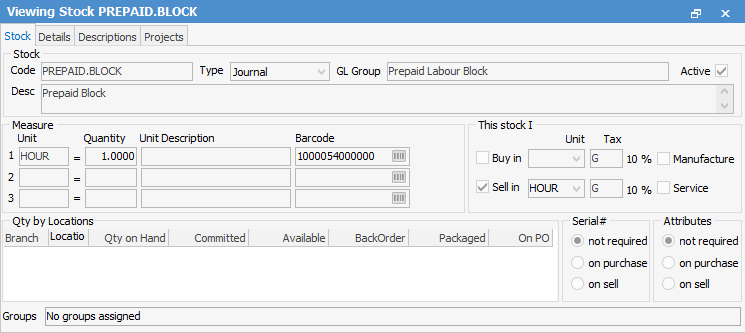
Create a stock code for drawing down on the prepaid blocks on service jobs. This is stock type Labour. Unit Measure should be HOUR, and This Stock I Sell in also HOUR. On the Details tab, please ensure Decimal Places (Qty) is set to 2.

If your prepaid blocks have an expiry date, create a stock code for expiring prepaid blocks. Unit Measure 1 should be HOUR, and This Stock I Sell In also HOUR. This is the same Stock GL group as for Blocks above.

Create a sales job type Item called Prepaid Labour Invoicing (Prepaid).

Go to Projects > Add Project and select type MS Prepaid.

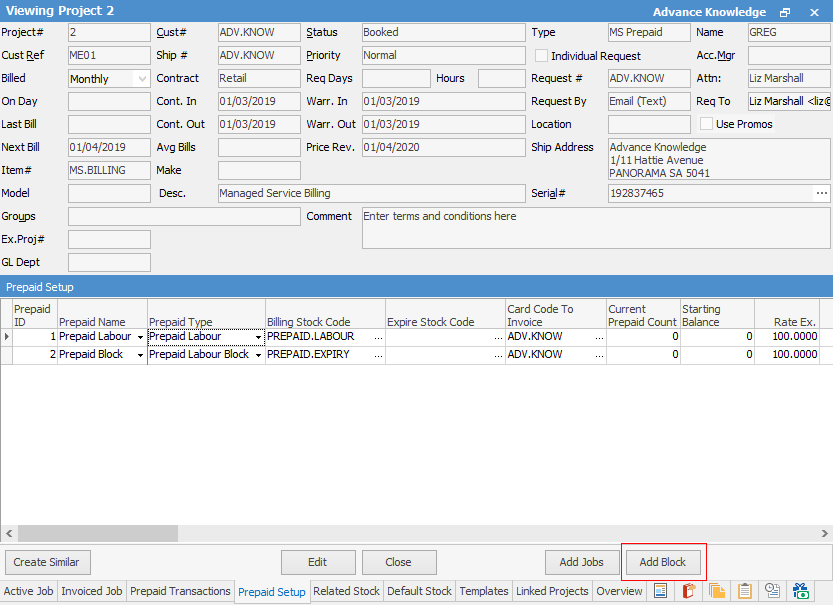
Below is an Expiring Block setup. In this scenario, blocks of 60 are sold to a customer at $100 ex GST, which expire monthly. In this case, as we are billing the block for the first time, we would need to enter today's date into the Next Expire Date field. When the first block is billed, Jim2 will advance this date according to the Expires Frequency selection.

The following fields exist in the Prepaid Setup tab:
Field |
Explanation |
Prepaid ID |
Automatically generated by Jim2. |
Prepaid Name |
Appears on jobs and invoices explaining a block purchase or labour draw-down. |
Prepaid Type |
Predefined prepaid types. Valid types are Prepaid Labour, Prepaid Labour Block. |
Billing Stock Code |
The stock code to invoice for this line, as per earlier setup. |
Expire Stock Code |
Optional. The stock code to invoice for expired blocks, as per earlier setup. |
Card Code to Invoice |
Which customer should be invoiced for this line. |
Current Prepaid Count |
Calculated by Jim2. Shows the amount of blocks invoiced to date for this line. |
Starting Balance |
Only required if the contract has an opening balance of blocks. New contracts start at 0. |
Rate Ex |
The rate per block excluding GST. |
Rate Inc |
The rate per block including GST. |
Prepaid Left |
Calculated by Jim2. The amount of blocks remaining for this line. |
Last Billed By |
Calculated by Jim2. Contains the initials of the user who last billed this line. |
Hide On Invoice |
Whether this line should show on an invoice. Options are Hide, Don't Hide or Partial Hide. |
Linked Prepaid ID |
Indicates which line this line is linked to. Prepaid blocks should be linked to the prepaid labour ID. |
Prepaid Blocks |
Only required on the prepaid block line. Specifies how many block hours are purchased at a time. |
Next Expire Date |
Optional. The date that these block hours will expire. Typically, a calculated date of Block Invoice Date + Expires Frequency. This field can be manually entered if there are opening balance blocks. |
Expires Frequency |
Optional. If blocks expire, how often do they expire. eg. monthly, quarterly, yearly? |
Now that we have set up a prepaid contract, we need to locate it when the customer calls. Create a Project list and select the customer card code. If the customer has multiple contracts, we can select the prepaid contract using the Type field.
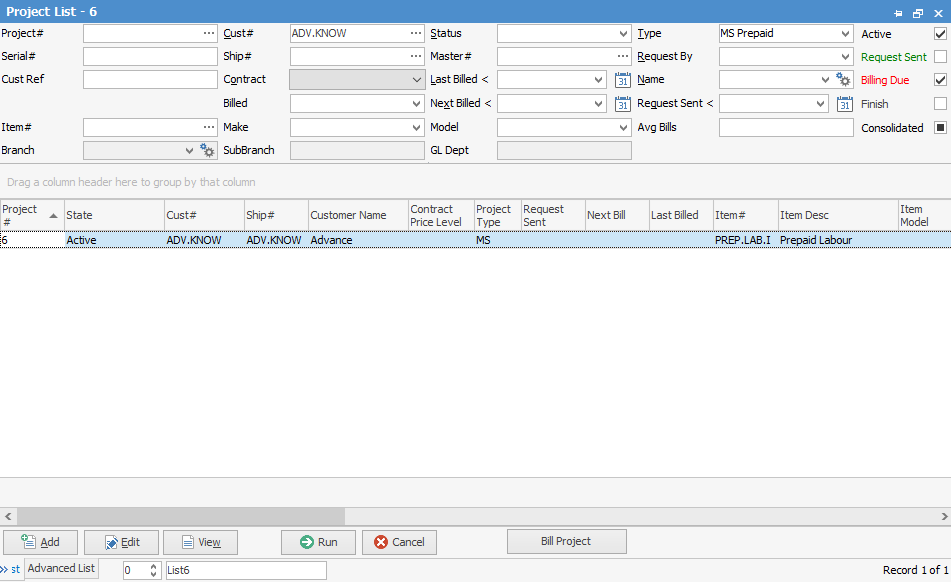
Open the contract and click Add Block at the bottom of the screen.
We are now presented with the Prepaid Billing screen which requires us to click Generate Job if everything is in order.
|
The number of hours left on the prepaid contract displays in both the Project running totals and job Prepaid Block screen.

Un-invoiced jobs are included when calculating prepaid labour remaining. |
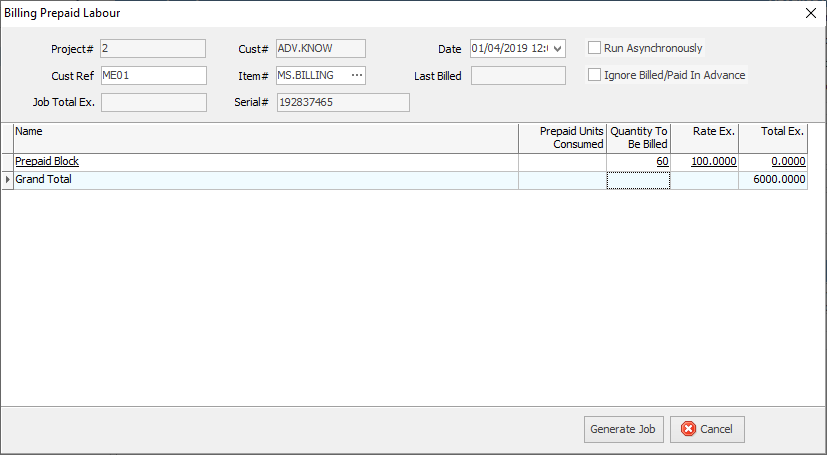
Showing ex GST amounts.
Jim creates a Ready billing job against the Project for the initial block purchase, and we now need to invoice it. You will find the Billing job in the Active Jobs tab of the Project.

Once we invoice the block of hours, our Prepaid Setup on the contract now shows us we have 60 block hours available, and they expire on 01/04/2019.

We are now ready to start adding service jobs to the contract, and draw down on the block. From the Project, click Add Jobs at the bottom of the screen.

Enter the job details as per a normal service job, noting that some fields have been pre-filled already. In this case, select Onsite and book the job into the system. Assuming the job is now finished, we can prepare this job for invoicing. Actual labour hours on this job equal 1 hour. All that is missing is the billable labour on the lob. At the bottom of the job, select Prepaid Labour.

Enter the amount of hours used, then click Add to Job.
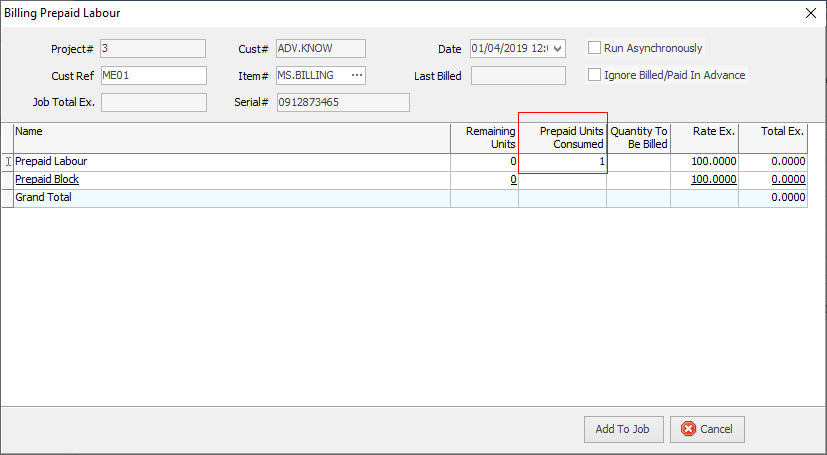
If there are insufficient prepaid block hours left, Jim2 will bill a new block of hours automatically. In this case there will be a new Ready billing job in the Active Jobs tab of the Project.
The service job now has billable hours recorded against it, and we also automatically draw down on the prepaid block hours. By default, the draw-down is hidden from the customer, however the Hide ield can be changed if required, prior to invoicing. In this case, it is hidden as we are only charging for the power supply and drawing down on prepaid labour.
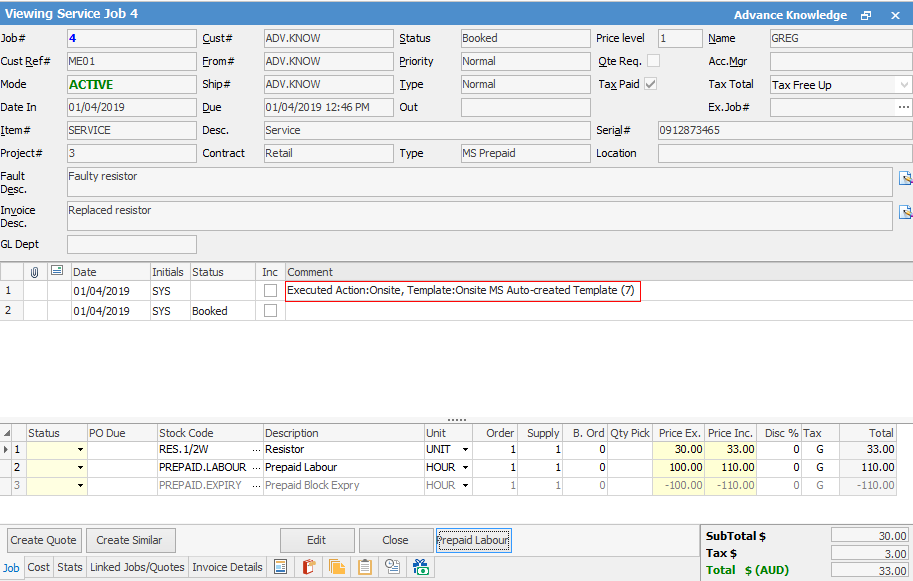
Once the job is invoiced, you will now see 1 block hour used and prepaid remaining hours of 59.

Jim2 will bill a new block of hours by default when there are insufficient block hours remaining, or the prepaid block hours have expired.
If the current block hours are past their expiry date, then Jim2 will automatically expire them. This is hidden by default on the customer's service invoice.

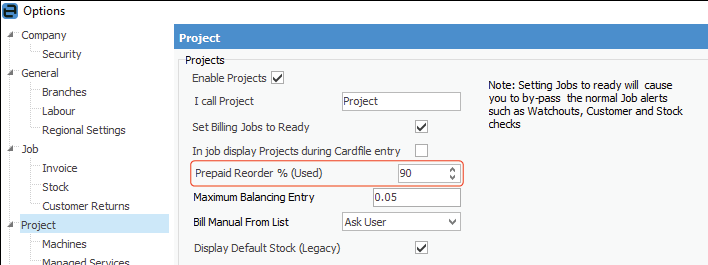
If you wish to top up prepaid labour prior to the customer reaching zero block hours, you can set the Prepaid reorder % in Tools > Options > Managed Services (or Project). In this example, Jim2 will reorder another block when the customer reaches 90% used of prepaid blocks = 6 blocks remaining.
Further information:
Create Recurring Managed Service Jobs

