
Bulk Payments are used to receive bulk debtor payments from a third party, ie. a finance company or Paypal, etc., and can also be used to generate payments when direct debiting customers. Creditors payments are also supported.
 |
Active purchase orders (ie. not on FINISH) can also be selected. |


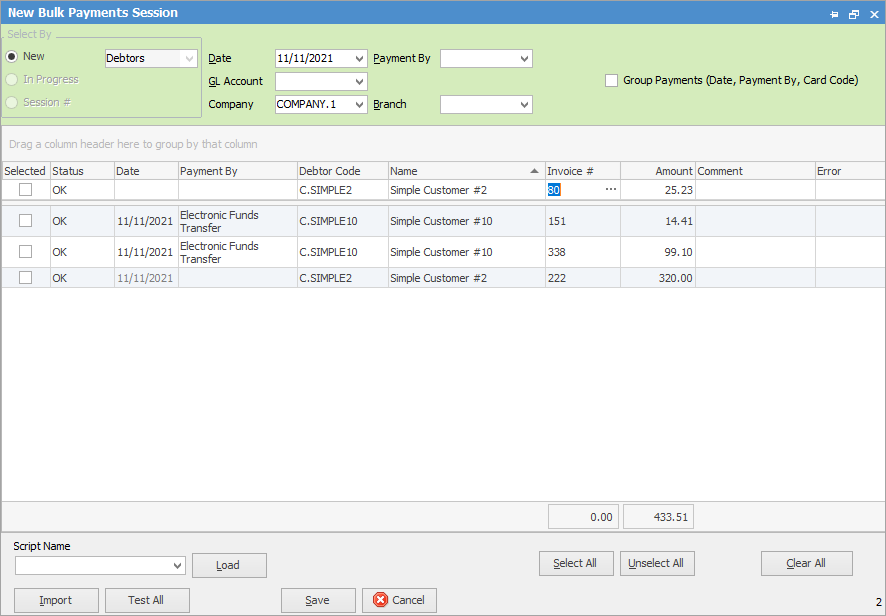
On the ribbon, go to Accounts > Bulk Payments. This allows adding multiple debtor payments, either manually or via a bulk payments import spreadsheet. Please contact support@happen.biz if the generic spreadsheet is not suitable and a custom import script is required.
Field |
Explanation |
|---|---|
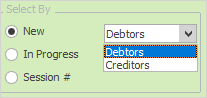
Select by |
New – choose from Debtors or Creditors
 |
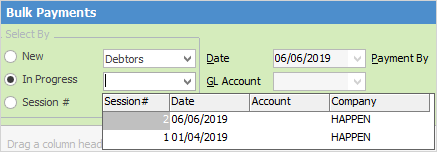
In progress – open bulk payments already in progress that are not finalised.
 |
|
Session # – open a previous bulk payments session. |
|
Date |
This will default to today's date, however it can be changed. |
Payment By |
Choose the payment method from the dropdown options:

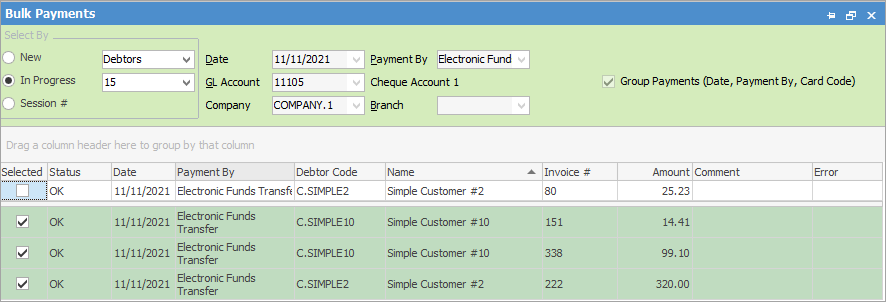
Further filtering can be achieved by ticking Group Payments (Date, Payment By, Card Code). |
GL Account |
Select the general ledger account for this transaction. |
Group payments |
Group payments by the methods shown here to allow for making one lump sum payment, rather than individual payments according to single invoices. Tick this after the spreadsheet has been loaded or the information has been entered. |
Grid Fields
Field |
Explanation |
||
|---|---|---|---|
Selected |
Ticking this box imports only those ticked.
 |
||
Status |
Defaults to OK.
|
||
Date |
Date payment made. |
||
Payment By |
Method of payment. |
||
Debtor Code |
Select the customer card code(s). |
||
Name |
Automatically populates with the customer name. |
||
Invoice# |
Enter the invoice number. |
||
Amount |
Enter the amount.
|
||
Comment |
Enter comment. |
||
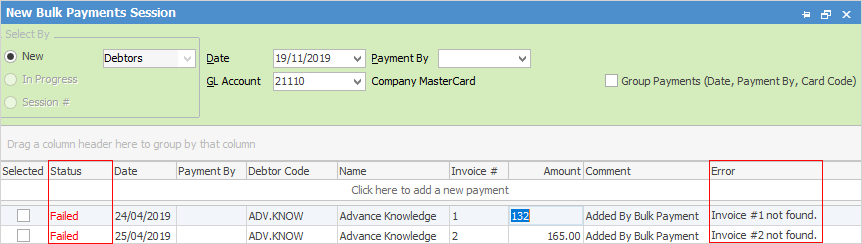
Error |
If there is an error, ie. can't find invoice number, etc. It will show in this field for amending. |
||
On Creditors form Purchase # |
When on Creditors screen, an extra column will show the purchase order number. |
Bulk payments support multiple dates and payment methods. Jim2 includes the ability to generate one credit (eg. bank transaction) and automatically apply that credit to multiple invoices. The credits generated can then be uploaded to the bank via Jim2’s Electronic Payments function.
It is also possible to show PO status for Creditors.
Bulk payments can be saved at any point, then imported later.
Example 1
Several customers are direct debited 14 days after sending them their invoice.
▪Invoice the customers normally at the start of the month, with payment terms of Direct Debit 14 days from invoice date.
▪Generate payments using Bulk Payments either manually, via spreadsheet import or via a custom script, using a payment type that is flagged as Electronic Payments. Contact support@happen.biz for information on the custom script.
▪From Electronic Payments, generate an ABA file to upload to the bank.
Example 2
Customers pay via BPAY and a file is downloadable from the bank.
▪Download the BPAY payments file from the bank.
▪Generate payments using Bulk Payments either manually, via spreadsheet import or via a custom script, using a suitable payment type (eg. BPAY).
▪Debtors credits will be created and can be applied to the related invoice(s).
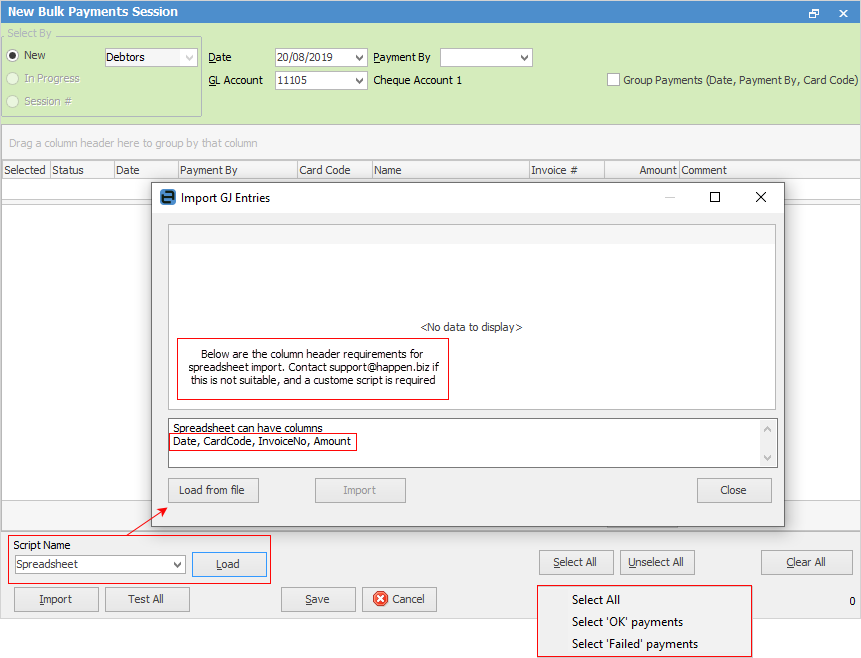
Import a spreadsheet
A system script called Spreadsheet can be chosen and imported by clicking Load. Please contact Happen Support if the generic spreadsheet is not suitable, and a custom import script is required.
When importing bulk payments, active purchase orders will be placed on FINISH. Purchase orders can be auto-matched to current amount in purchase order selection screen – from oldest to newest only.
Select All will bring up the choices to select all, only those that are okay for payment, or only failed payments.
Tick Show selected only to show only imported bulk payments in a session.
Sorting, searching and grouping are available as per other lists in Jim2. Select the column header in the grid, then drag it to the Group By area to group.
|
Some letters in the field names within the header are underlined, eg. GL Account. Using Alt+ the underlined letter will jump to the field beside that heading. |

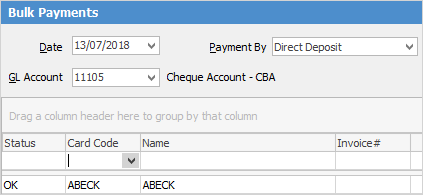
Manually add/alter bulk payments
Whilst bulk payments would normally be imported, there may be times where manual payments need to be added. Alterations to amounts and invoice numbers can also be made when necessary. The Date field defaults to today's date, however any date can be selected here. Choose the GL Account and Payment By method. Choose the customer card code(s) using the dropdown options at the right side of the Card Code field. Use Enter or tab to allow selection of further card codes.
Once all payments have been entered, click Import at the bottom of the form.
Right click options in the grid
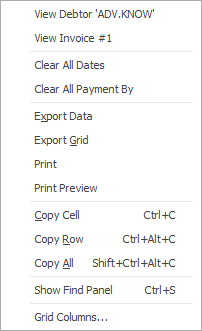
Right Click Option |
Explanation |
||
|---|---|---|---|
View Creditor or Debtor |
Opens the creditor/debtor form. |
||
View Invoice # |
Opens the creditor form with the payment number highlighted. |
||
Opens the purchase order relating to this payment. This includes purchase orders that are active and/or finished.
You also have the ability to auto match purchase orders to the current amount in the purchase order selection – this will be from oldest to newest only. |
|||
Clear All Dates |
Allows clearing of all dates within the session in progress. |
||
Clear All Payment By |
Allows clearing of all payment by within the session in progress. |
||
Export Grid |
Exports the grid to a spreadsheet. This is particularly useful if the grid has more than one header row, as it will export all header rows. |
||
Print the list. |
|||
Print Preview |
Preview the list to be printed. |
||
Copy Cell |
Copy the highlighted cell. |
||
Copy Row |
Copy the highlighted row. |
||
Copy All |
Copy all, which can then be pasted into a spreadsheet. |
||
Show Find panel |
Brings up the Find panel:

|
||
Grid Columns... |
Allows adding more columns. Also allows removal of columns. Select the column to add, then drag it to the position required in the columns within the grid. To remove, click and drag to the Grid Columns... window, or drag down away from the header area. |