This is for on premises only – not Jim2 Cloud.

Assuming a self-signed certificate is ok, use PowerShell to create it.
Example:
$rootcert = New-SelfSignedCertificate -CertStoreLocation cert:\LocalMachine\My -DnsName "Jim2 API Self Signed CA" -KeyUsage DigitalSignature,CertSign
New-SelfSignedCertificate -CertStoreLocation cert:\LocalMachine\My -DnsName "DNS or IP " -Signer $rootcert -KeyUsage KeyEncipherment,DigitalSignature -NotAfter (Get-Date).AddYears(10)
This will generate the Thumbprint you need in the next step
Thumbprint Subject ---------- -------
74F0BD2BBCB98202363EB53BDAB1CC5402146C96 CN=xxx.xxx.xxx.xxx.xx |
Admin Command Prompt on Jim2 Server:
NETSH HTTP
Use the SHOW Command to check for existing configurations:
SHOW urlacl SHOW sslcert
Run these commands, being sure to use values applicable to your setup:
The IP or DNS needs to match that of the certificate. The IP Port needs to available and matched the one setup in JES Config.
add sslcert hostnameport=test.happenlocal:44X certhash=74F0BD2BBCB98202363EB53BDAB1CC5402146C96 appid={21AB409C-FAE1-4F71-9971-E86180CC7FF8} certstorename=MY
add sslcert ipport=xxx.xxx.xxx.xxx:44X certhash=74F0BD2BBCB98202363EB53BDAB1CC5402146C96 appid={21AB409C-FAE1-4F71-9971-E86180CC7FF8} certstorename=MY
add sslcert ipport=0.0.0.0:44X certhash=74F0BD2BBCB98202363EB53BDAB1CC5402146C96 appid={21AB409C-FAE1-4F71-9971-E86180CC7FF8} certstorename=MY
Certhash = the thumbprint from step 1 Appid = use the above is fine.
You only need a host entry if you are using it, an IP & 0.0.0 entry will suffice if not needed.
Add urlacl url=https://*:44X/Jim_Test/ user="NT AUTHORITY\System"
|

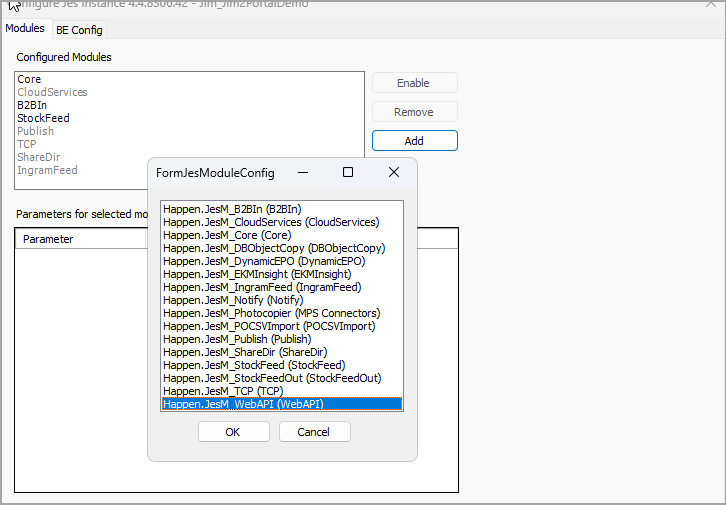
Configure JES – Add the WebAPI Module
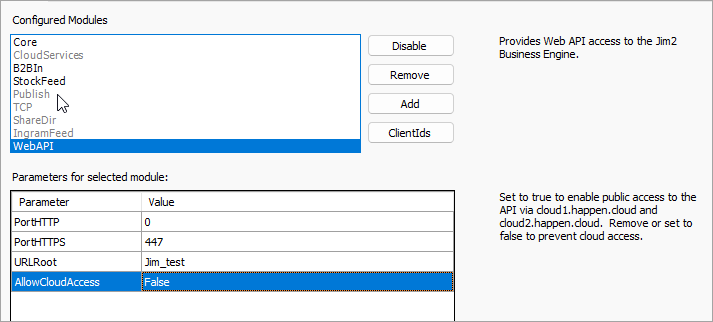
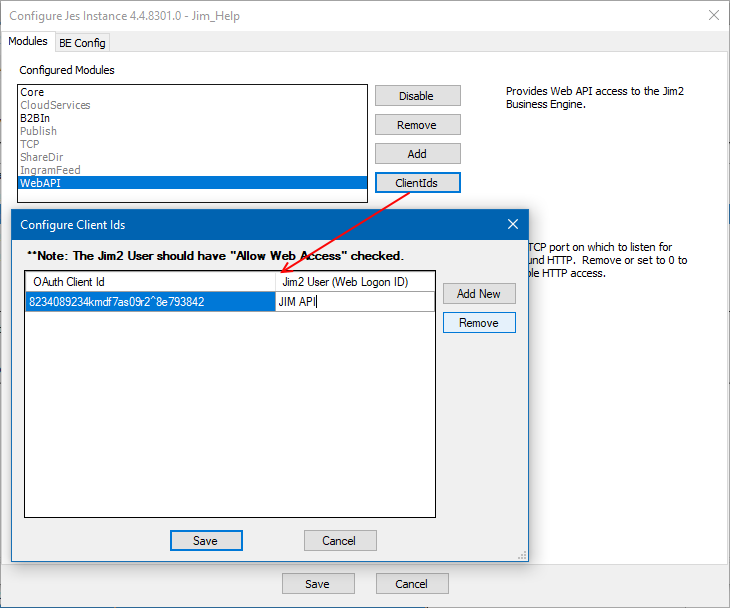
OAthKey can be whatever you want – It is the “ClientID” in the postman example.
Save and restart Jes.
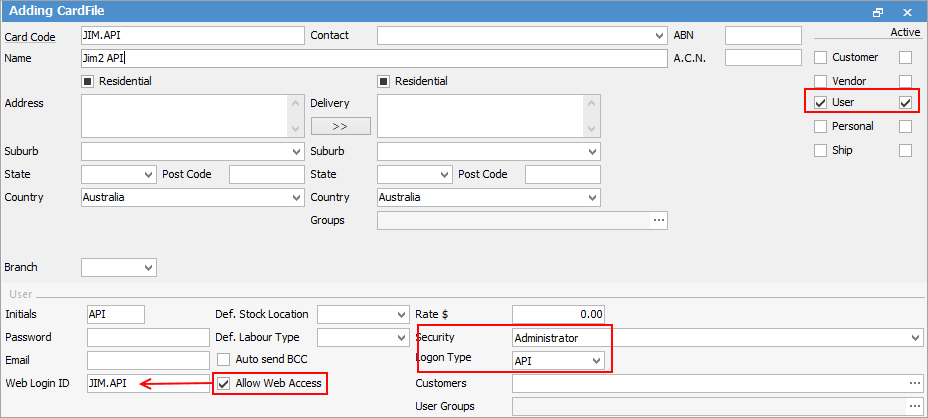
The Jim2 Users web login comes from here:
When you save, you will be prompted for a password, you will need this – it is the Client Secret in the postman example. |
Further information