This example will explain the concepts and process of configuring non-billing based templates for use in Service Level Agreement-based job creation and updates.
In this example, create a new set of templates that can be used for quickly creating or updating jobs with correct Service Level Agreement (SLA) job data. The fields used will be specific to the business and data capture requirements.
On the ribbon, go to Tools > Setups >Projects > Actions
Create an Action Group Called SLA and configure to only allow execution at Action Level Only.

Create a new action called SLA-Remote linked to the Action group SLA above, and restrict the template so it can only be executed from the Action Group at Template Level.

Create a new action called SLA-Onsite linked to the Action group SLA above and restrict the template so it can only be executed from the Action Group at Template Level.

On the ribbon, go to Items and add two Items called SLA-ONSITE and SLA-REMOTE.
On the ribbon, go to Tools > Setups > Jobs > Job Priority and add the following:
•SLA-Low
•SLA-Normal
•SLA-High
•SLA-Urgent
On the ribbon, go to Tools > Setups > Jobs > Job Type and add the following:
•SLA-ONSITE
•SLA-REMOTE
Create the following templates via Projects > Template List.

Click Add, then configure name, and save the first template.
Use the Create Similar function and save the additional templates, updating each as appropriate.
Template Name |
Item |
Due Date |
Priority |
Job Type |
|---|---|---|---|---|
SLA:Onsite:Low – 7 Days |
SLA-ONSITE |
Now + 7 Days |
SLA-Low |
SLA-ONSITE |
SLA:Onsite:Normal – 8 Hours |
SLA-ONSITE |
Now + 8 Hours |
SLA-Normal |
SLA-ONSITE |
SLA:Onsite:High – 4 Hours |
SLA-ONSITE |
Now + 4 Hours |
SLA-High |
SLA-ONSITE |
SLA:Onsite:Urgent – 2 Hours |
SLA-ONSITE |
Now + 2 Hours |
SLA-Urgent |
SLA-ONSITE |
SLA:Remote:Low – 7 Days |
SLA-REMOTE |
Now + 7 Days |
SLA-Low |
SLA-REMOTE |
SLA:Remote:Normal – 8 Hours |
SLA-REMOTE |
Now + 8 Hours |
SLA-Normal |
SLA-REMOTE |
SLA:Remote:High – 4 Hours |
SLA-REMOTE |
Now + 4 Hours |
SLA-High |
SLA-REMOTE |
SLA:Remote:Urgent – 2 Hours |
SLA-REMOTE |
Now + 2 Hours |
SLA-Urgent |
SLA-REMOTE |
Example of SLA:Onsite:Low – 7 Days Setup
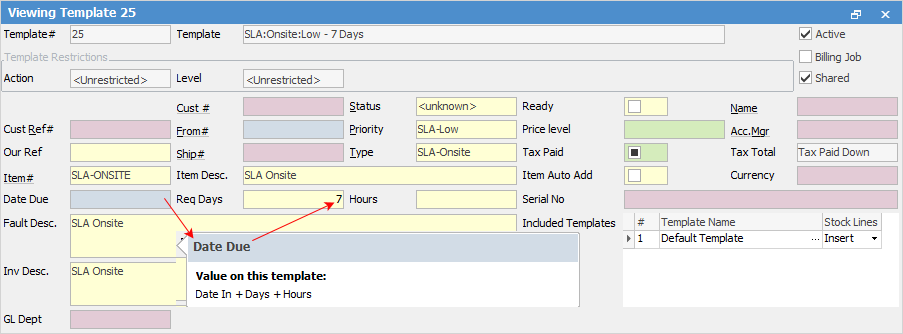
Link the new templates to the new Action using the Action Wizard.
Projects > Template Rules
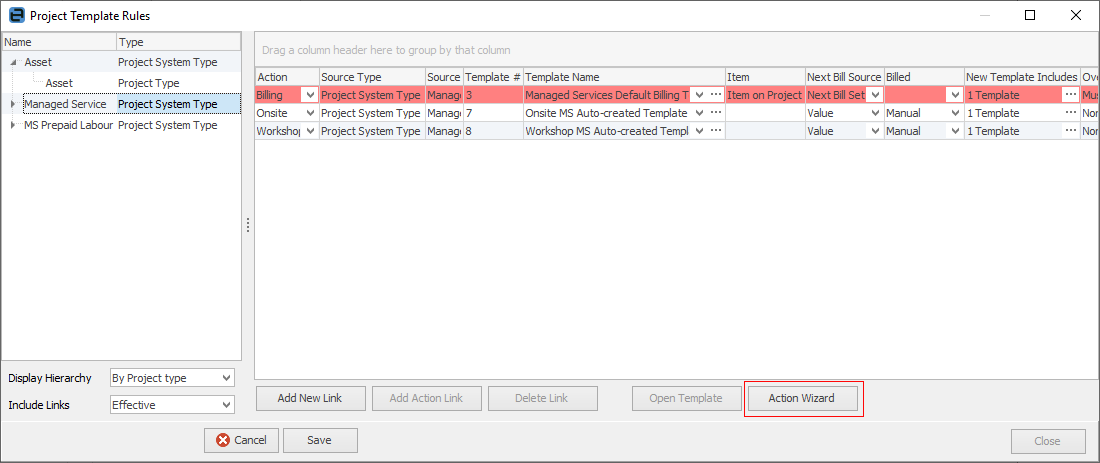
▪Click Edit, then Action Wizard.
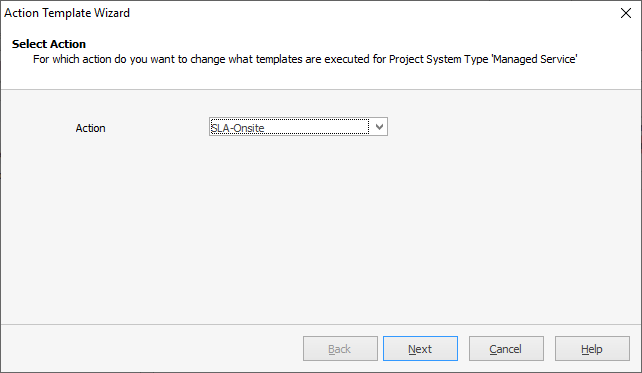
▪Choose SLA Onsite from the drop down list and click Next.
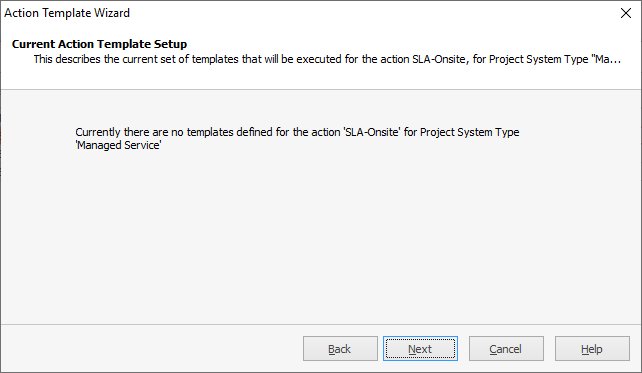
▪Click Next on the Current Action Template Setup (the first time there will be no option to select).
▪Click Next. Select Change so that only a particular template is executed, then Next.

▪Click Select Template.
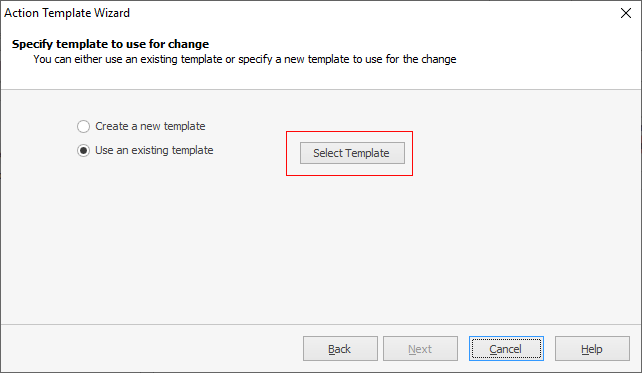
▪ From the list, select the first of the SLA Onsite templates created above.
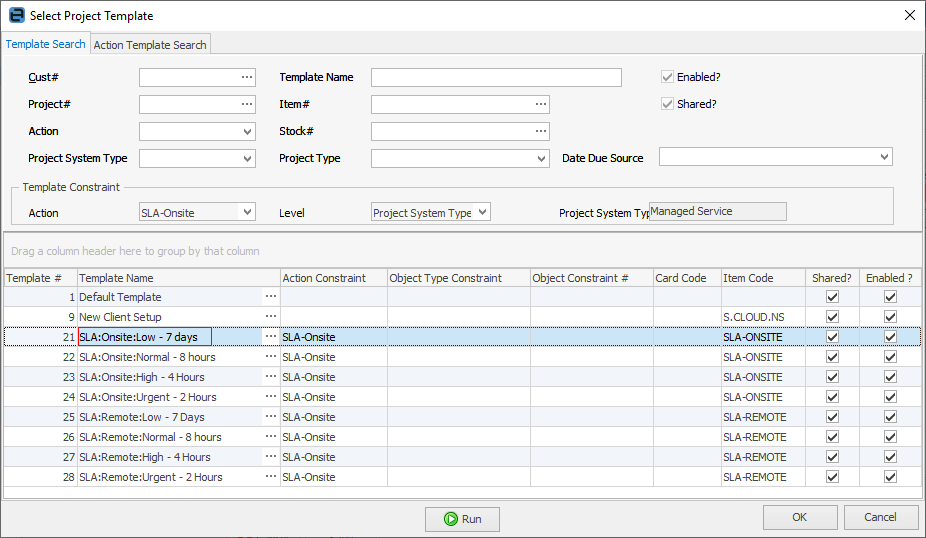
Click OK to continue.
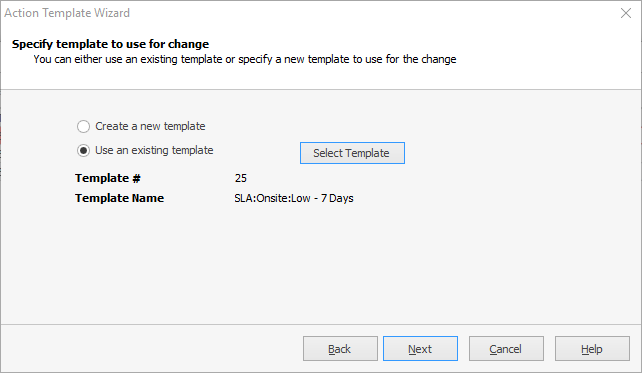
▪Click Next to confirm the selection.
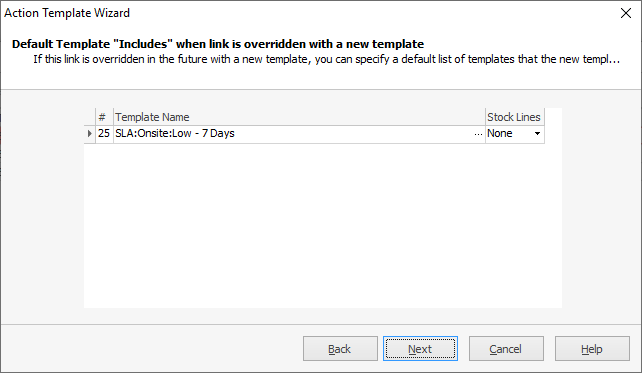
•Click Next.
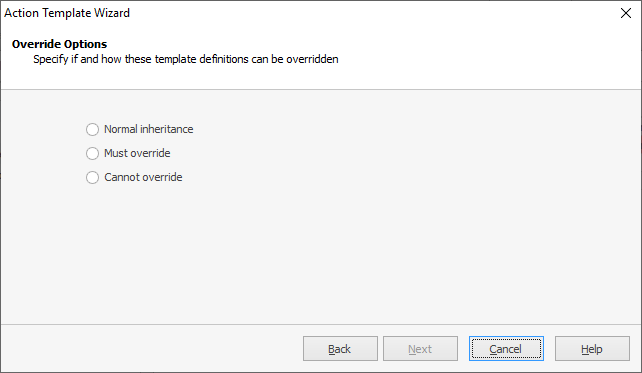
▪Choose one of the above three. Click Next.

▪Only the above is selectable. Click Next, then Finish to complete the configuration.
Now add the remaining templates:
▪Click the Action Wizard.
▪Choose SLA Onsite from the drop down list then click Next.
The template previously associated is now displayed.
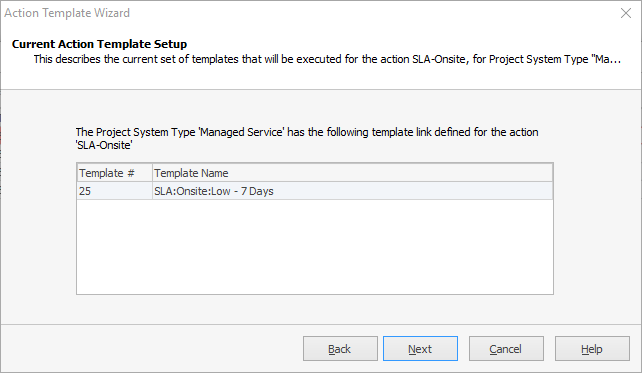
▪Click Next. Select Change so that an additional template is execusted as well as existing templates, then Next.
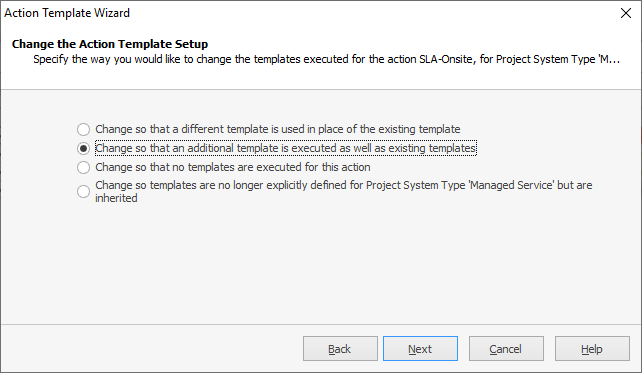
▪Click Select Template.

•Choose the next SLA template and click OK.
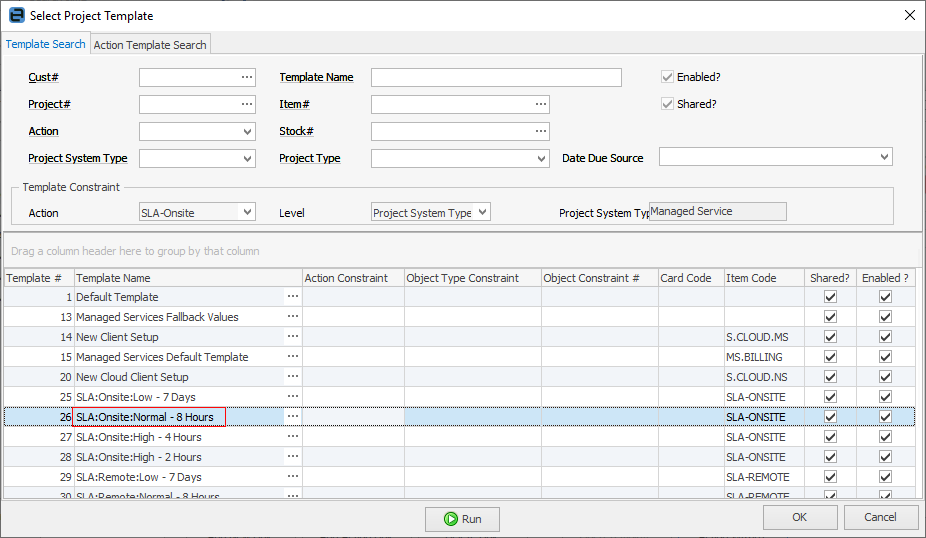
•Click Next.
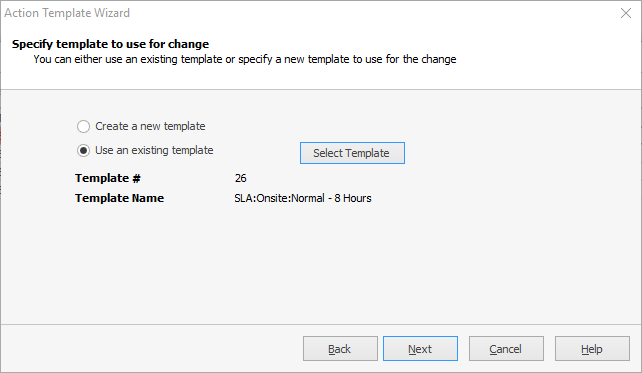
The new template will be displayed.
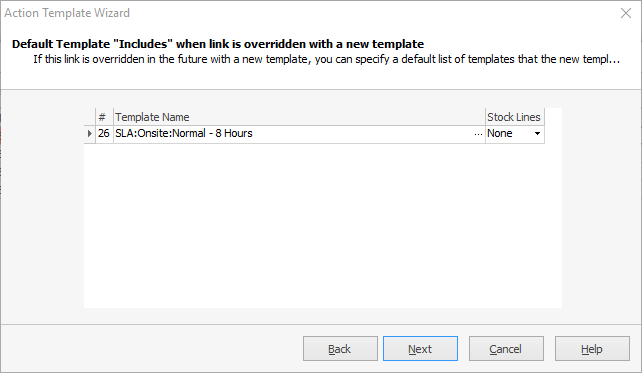
▪Click Next, and make a selection here. Click Next.

▪Only the below is selectable. Click Next, then Finish to complete the configuration.

▪Repeat the process for the remaining templates, then the same for the SLA-Remote Action.
▪Click Save when the template linking has been completed.
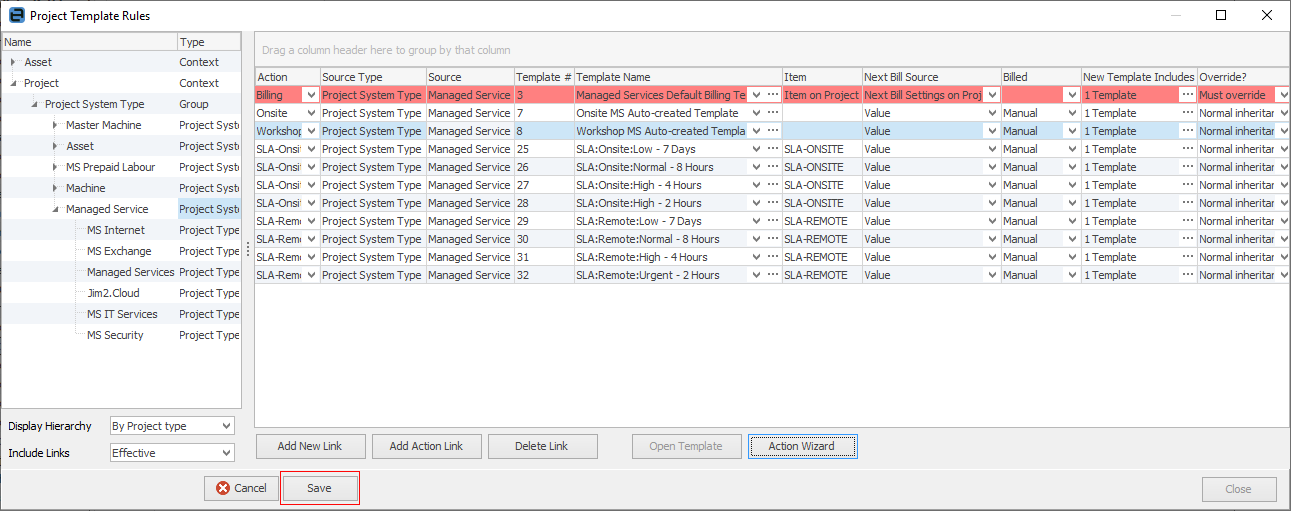
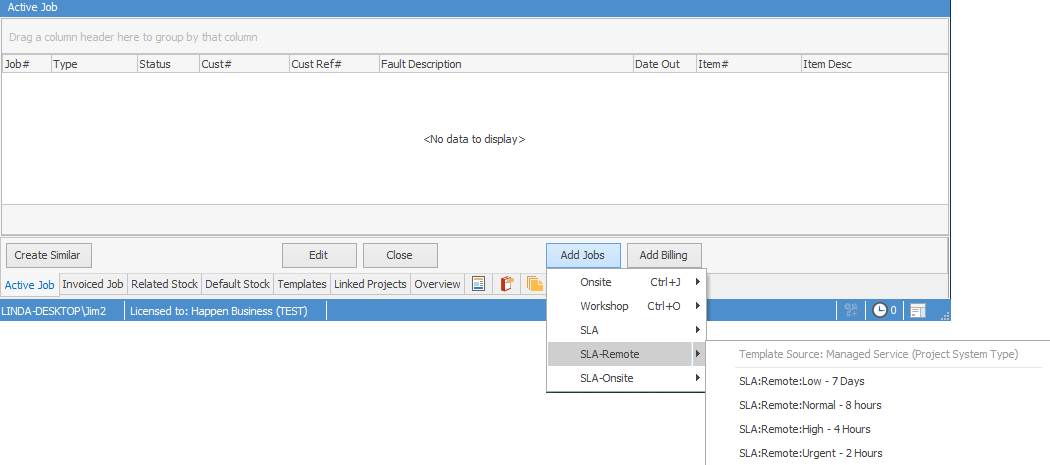
All Managed Service type contracts will now have the new SLA actions available at project list, project and job levels:
From within a related project job:
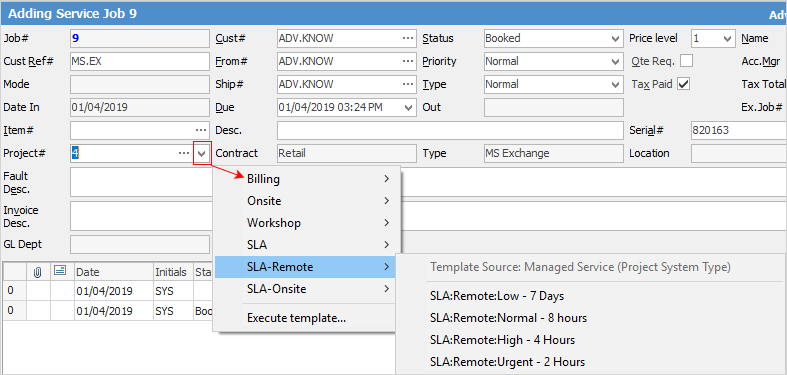
From within a Project, using the Add Jobs button:
How to
Project Job Implementation Templates Example
Project Template Creation Example 1