Go to Tools > Integration Configuration.
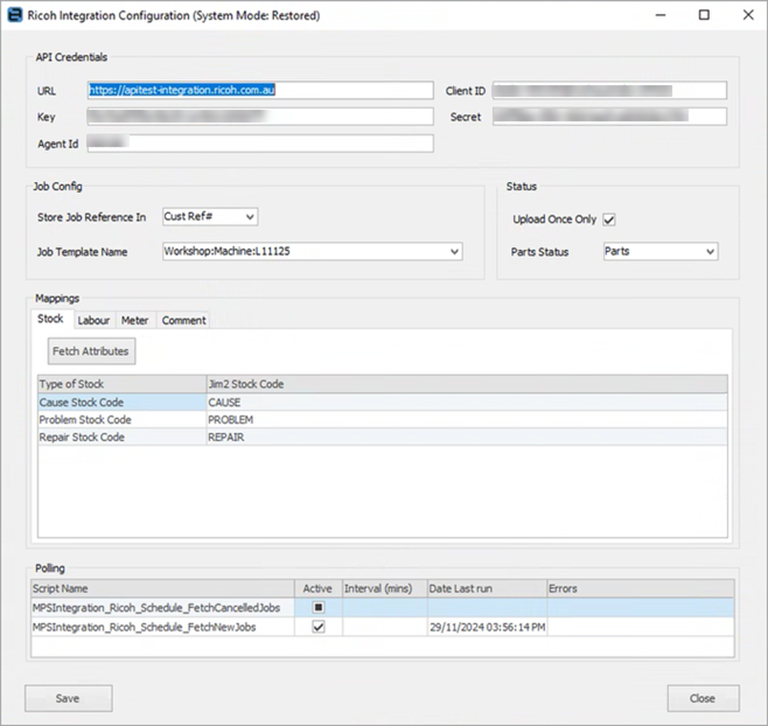 1.API Credentials Enter API credentials – This will need to be obtained from Ricoh.
2.Job config setup ▪Store Job Reference In – Select which field you would like to use to store the job reference number from Ricoh. ▪Job Template Name – Select the default project template you would like Jim2 to execute when job from Ricoh is created. 3.Status ▪Upload once only – Tick if you only want to send job data once when the job status is changed to ‘Parts’ (or whatever ‘return to fit’ status is selected in the integration config) for the first time. ▪Parts Status – Select the status to send to Ricoh when a job is waiting for parts (return to fit). 4.Mappings ▪Stock Tab – ‘Fetch Attributes’ will grab required codes from Ricoh and create new attributes in Tools > Setups > Stock Attributes. Three new non-depleting stock codes for ‘Cause’, ‘Problem’ and ‘Repair’ will need to be created and select/link corresponding attribute for each. ▪Labour Tab – Select all possible labour types for the API to pick up the start, end date and time from. One start and one end required. If more than one labour type is set up, the earliest start date and time will be used. ▪Meter Tab – Select the Jim2 meter type for black and colour service read reporting. ▪Comment Tab – Provides the ability to select whether certain info from Ricoh is required to be added to Comments grid. 5.Polling Select how often you would like to grab new and cancelled jobs from Ricoh. |
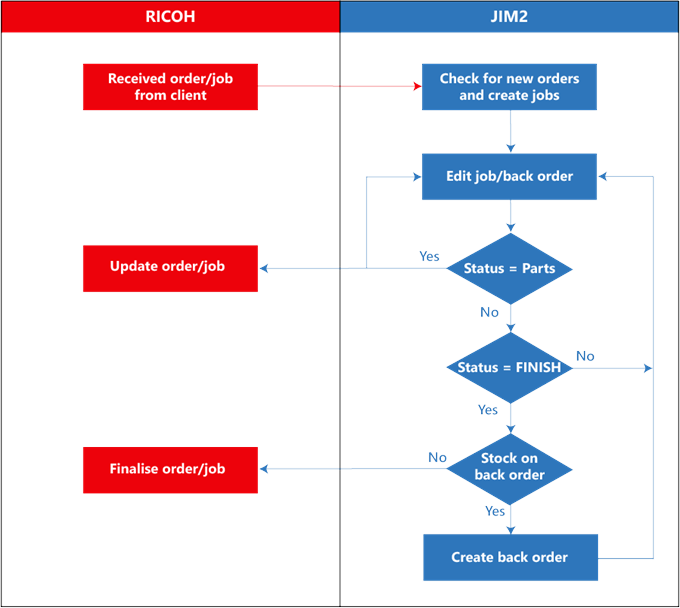 |
Parts Status When the job is on ‘Parts’ status (or whatever ‘return to fit’ status is selected in the integration config), the information highlighted below will be sent: ▪Ricoh job number, either Cust Ref# or Our Ref# as set up in the integration config. ▪All actual labour comments linked to the start date and time for your selected labour type(s) in the integration config will be correlated and sent as ‘activity comment’. 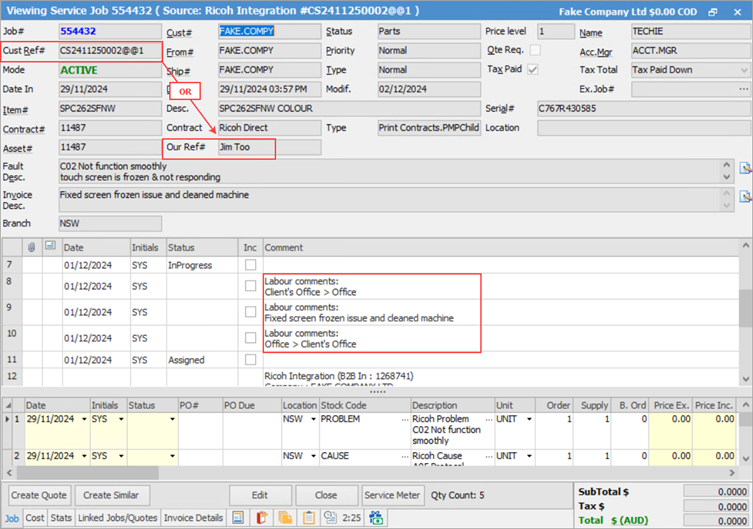 ▪The start date and time for your selected labour type(s) in config setup. If more than one labour type is set up in the integration config, the earliest will be used. 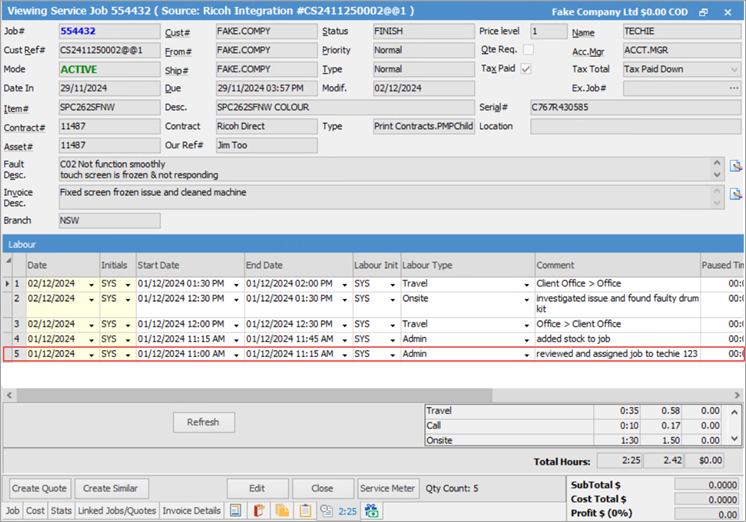
FINISH Status When the job is on FINISH status, the information highlighted below will be sent: ▪Ricoh job number, either from Cust Ref# or Our Ref# as set up in the integration config. ▪Selected ‘Cause’, ‘Problem’ and ‘Repair’ Codes. ▪Service meter reads. 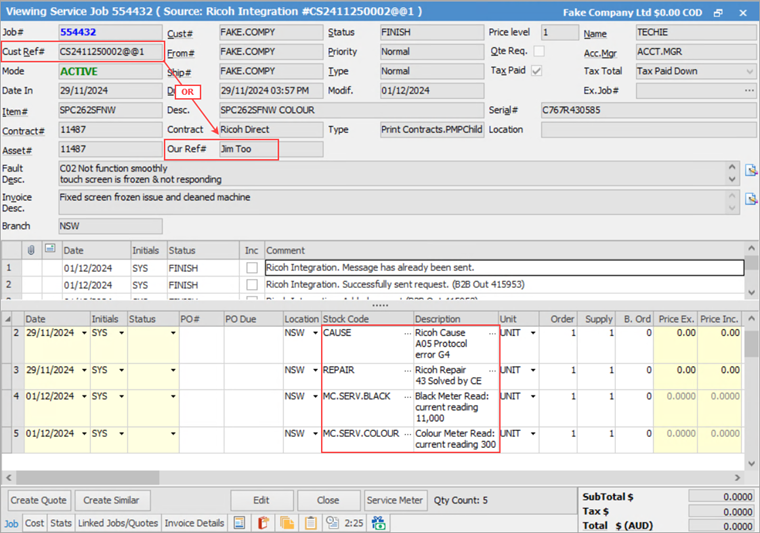 ▪The ‘invoice description’. ▪The start/end dates and times for your selected labour type(s) in config setup. If more than one labour type is set up in the integration config, the earliest will be used. 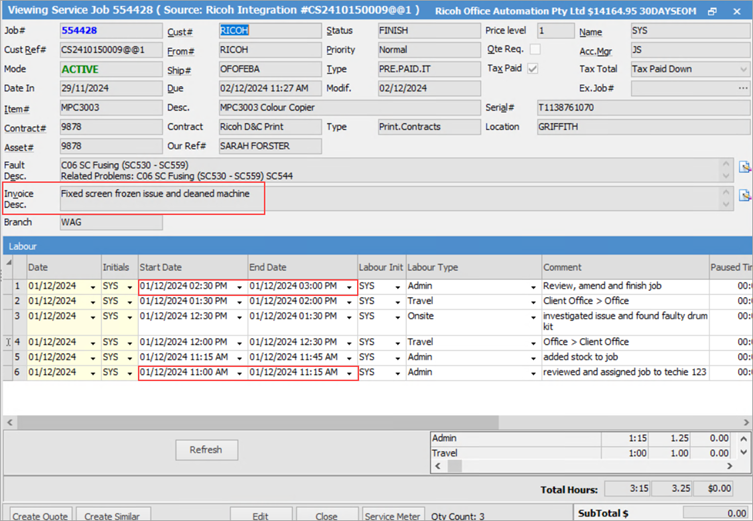 |
▪Jim2 Ricoh Direct Service Integration requires Jim2 Stock Attributes licencing. Jim2Cloud subscriptions include licencing of Stock Attributes functionality. Talk to your Account Manager if you require Stock Attributes to be added to your subscription. ▪Jim2 Version 4.5 Build 9208 or later is required to access integration. ▪Actual labour recording per Jim2 Job is required for this to work as designed. ▪If the Ricoh Job # stored in either Cust Ref or Our Ref is edited, the link to Ricoh will be broken. ▪Once ‘Parts’ or ‘FINISH’ status data is sent to Ricoh, any further changes are not sent, however a comment will be added to the job. ▪Parts (stock) details are not sent to Ricoh using this tool. ▪All communication to and from Ricoh via this tool is recorded in eBusiness Transactions and can be used for troubleshooting. |
Further information

