Stock or credits can be offered to a customer’s staff via Company Allowances so they can manage their own procurement, or have their procurement officer manage their stock allocation.
This is achieved by setting up a company in Jim2Commerce and associating employees to it. The next step is to create the allowances and associating product groups, to in turn associate the allowance to the staff member.
Following is the process.
▪Select Companies from the Menu, then New Company. 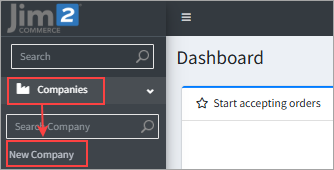 ▪Enter a name. ▪Tick Active. ▪Click Save. 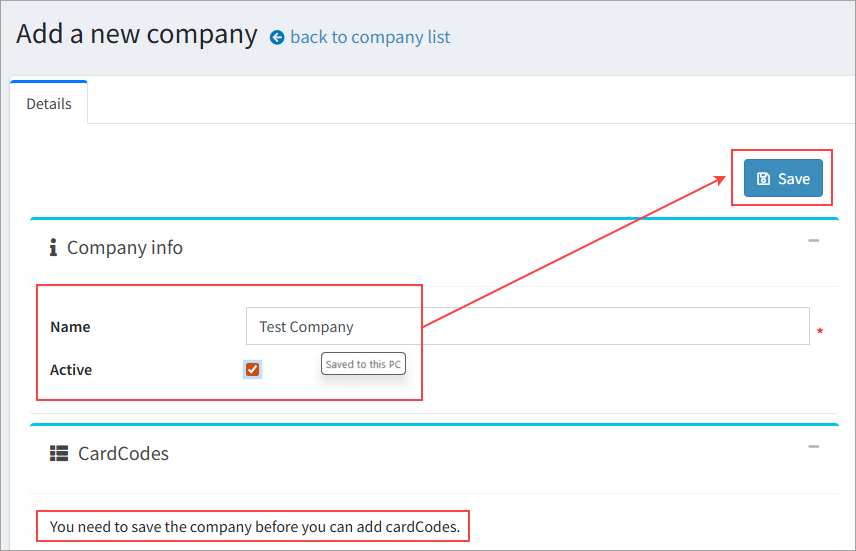
Add cardfiles (branches) (minimum of 1 is required) ▪In Settings, scroll down below Company info to locate the CardCodes section. ▪Click Add a new cardCode. ▪A window will pop up to allow you to search for card codes and tick them for use. Click Save when done, 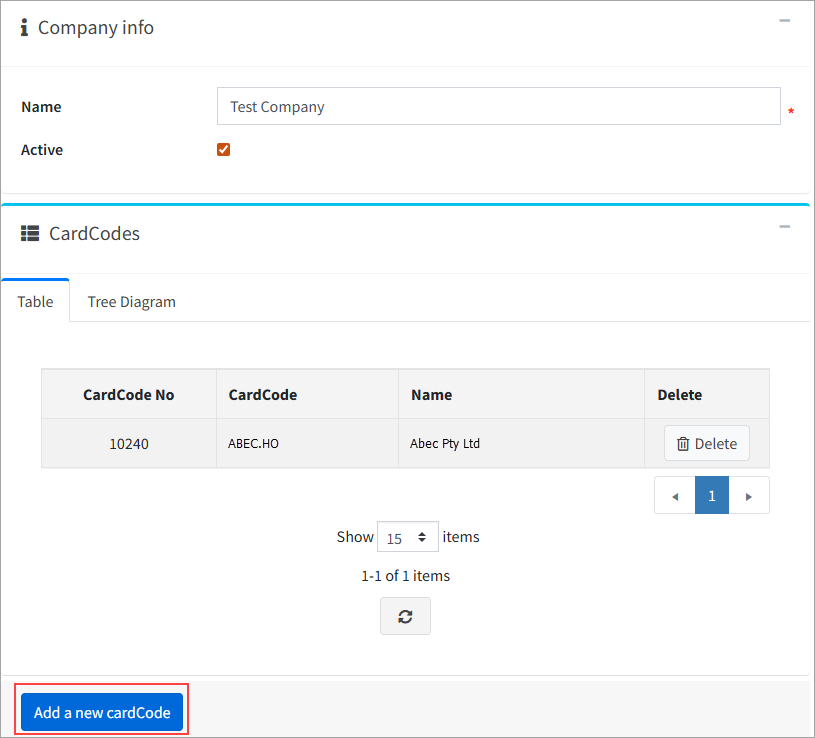 ▪These cardcodes are uploaded from Jim2 and should be branches that are associated with the company as parent/child card codes. –To have the card code be valid as a branch, there must be a contact set up as the primary contact. –This contact must have a first name, last name and contact type phone entered against their record.
Create Departments (optional) Departments allow you to set subgroups of employees that will have different sets of product groups to choose from. Department must already be set up in Jim2 as a card code and have the non-report group J2CDepartment:Name assigned to it. ▪In Settings, scroll down below CardCodes section to locate Departments. ▪Click Add a new department. ▪A window will pop up (similar to CardCodes one above) allowing you to search for card codes and tick them for use, then click Save.  ▪These are areas within the branches, usually for similar functions, eg Cleaners, Front of House, Engineers, etc.
Users that are assigned a department must have the department's card code added to the promo for them to see the contracted items.
Create Cost Centres Cost centres will allow you to set billable areas for staff that can be distinct from their branch and department. Cost centres must be set up in Jim2 as child card codes and have the non-report group set to J2CCostCenter:CostCentreName assigned to them. ▪In Companies, scroll down to Cost Centers. ▪Click Add a new cost center. ▪Search for card codes and tick them for use, then click Save. 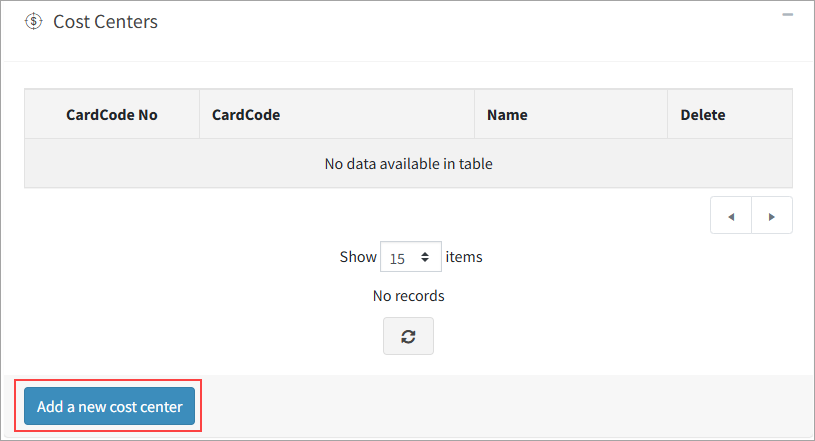 ▪These are the card codes that will be billed for the staff that are assigned to them. |
As many of the settings can change the employee import template, it is a good idea to set these before starting to import employees, and setting up product groups and allowances.
In Companies, go to the Settings tab.
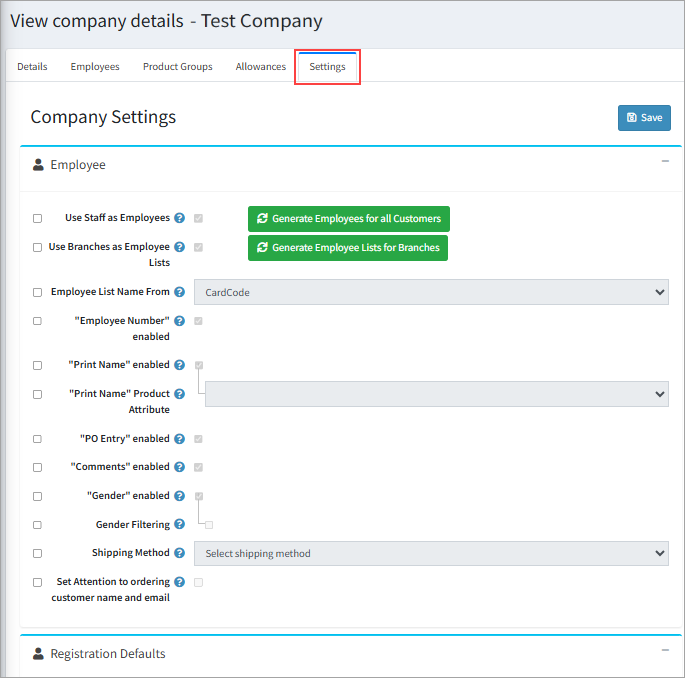
Employee Default Settings ▪Use Staff as Employees – Allows the generation of staff into the branches as employees based on the associated card codes. ▪Use Branches as Employee Lists – This will auto create the branches as employee lists in the employee page. ▪Employee list name from – Allows you to set the identifier that will be used to generate the employee lists, either card code or card name. ▪Employee Number Enabled – Allows you to set an employee number against the employees. ▪Print name enabled – Allows you to set a print name for the employee. ▪Print Name Product Attribute – This will set the default print name for the employee as per the attribute selected. ▪PO Entry – Allows the employee to add a PO number to the orders they are placing. ▪Comments Enabled – Enable the Comments box in the employee's record. ▪Gender Enabled – This will set whether gender is available as an option on employees. ▪Gender Filtering – This will allow the automated filtering of gender-based apparel for employees based on their set gender. ▪Shipping Method – This will set the default shipping method that will be used for the employee's orders. ▪Set Attention to Ordering Customer Name and Email – Adds the user that ordered the stock to the shipping label as ATTN:(name).
Registration Defaults Scroll down in the Settings screen to find the Registration Defaults area. ▪Company Registration Screen – Allows the company to display its own branded registration screen to allow their employees to sign up. ▪Do Not Send Employee Customers as Jim2 Contacts – Stops employees from being brought into Jim2 as contacts. ▪Default Customer Roles – Allows you to select customer roles that should be applied by default to employees for this company. ▪Contract Items Only – Stops employees from seeing any stock that is not set to be visible for that company. ▪Branch Address Only – Stops employees from sending stock to themselves, and only allows them to send it to the branch address they are associated with. ▪Show Department Employees by Branch – Allows department managers to see the list of all employees, rather than separated by branch. ▪Allow Managers to Add Employees – Allows managers to add employees. ▪Allow to Add by Excel – Allows adding by Excel spreadsheet. ▪Use Card Code for Branches – Use the card code instead of card name when referencing branches, including when using the downloaded excel templates. ▪Allow to Add Customer – Enables the ability to add the user as a customer as opposed to only being an employee listed against the company. This will make the user visible in the Customer section, and enable them to log in to the platform and order their own stock, rather than an employee that is only able to have stock ordered on their behalf. ▪Allow Allowance Section – Turns off the Allowance section within Company, if it is not intended to be used. ▪Limit to Managers Assigned Branches – Limits managers' abilities to add employees to branches they are not assigned to. ▪Employees can have their own global value – Allows staff to have their own global value set against allowances (not required if the allowance is using quantities). ▪Employees can have their own start and finish dates – Allows individual employees to have their own date ranges that are distinct from what is set against the allowance. |

Product Groups are sets of products that will be available for use in the Allowances section. It is a good idea to group these as similar products (Pants, Shirts, etc.) to allow for easier setup in the allowances section.
Create a Product Group ▪In Companies go to the Product Groups tab, and click Add Product Group. 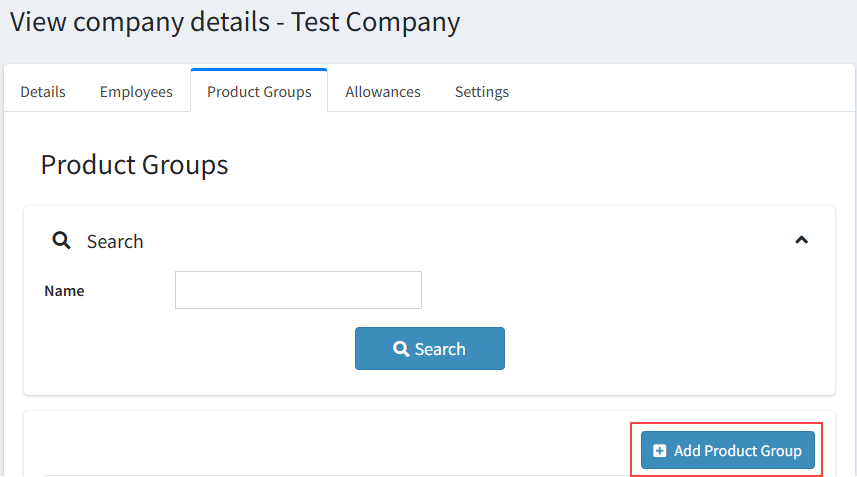 ▪Enter a Name. ▪Save.
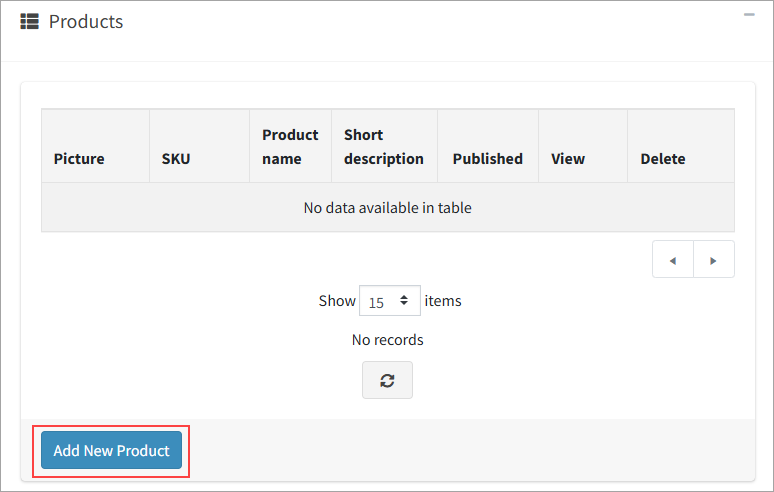
Edit Product Group ▪Select an icon to represent the product group. ▪You can set a colour to change the colour of the icon. ▪Set a display order (can be negative numbers). 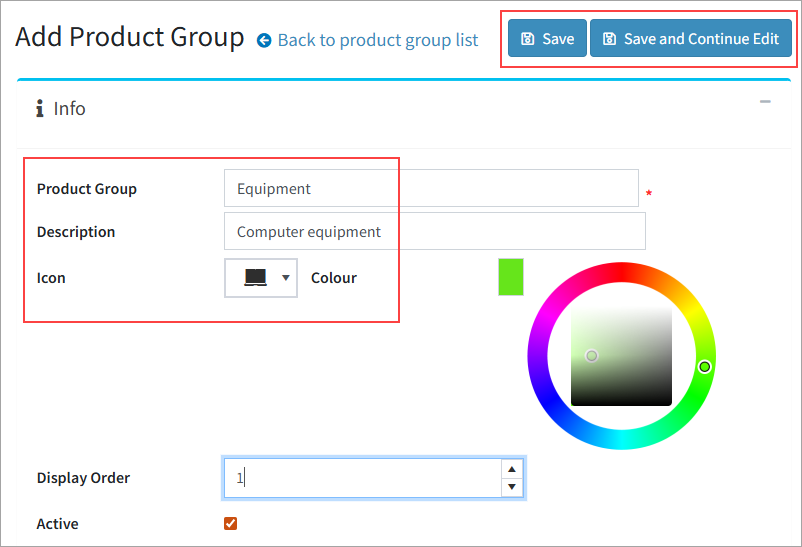 ▪Scroll down to Add a new product to add stock: ▪ –Search for products in the pop up window using the filters. –Tick which you would like to add. –Click Save at the bottom of the pop up window. |
This is where you will bring all the information together to create the Allowance, dictate which stock and quantities is set against it. Employees can be added individually to the allowance, but it's probably easier to add them via the import in the Employees section.
To Add an Allowance
▪In Companies, go to the Allowances tab. ▪Click Add Allowance. 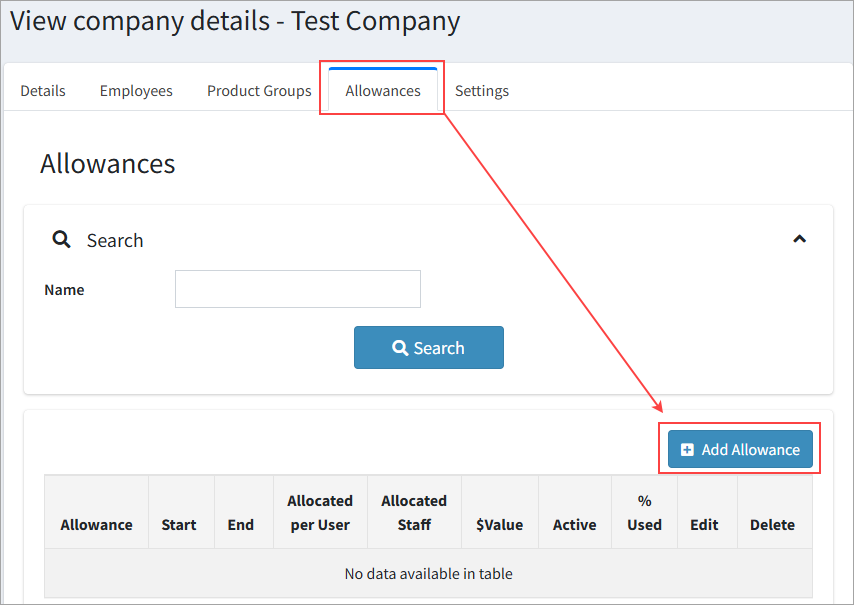 ▪Add a title in the Allowance field. ▪Add a description. ▪If the allowance is being set with a credit allocation (rather than a stock allocation) add it in the Allowance Credit Allocation field. ▪Add a duration start date. ▪Add a duration end date. ▪Choose if : –Annual Recurrence should be enabled. –Order Outside Period: Set if orders are able to be placed outside of the stated date range. –View Only Allocated Products: Set if the stock visibility should be restricted to this allowance (ie, employees will not be able to see any other stock except what is included in the allowance). 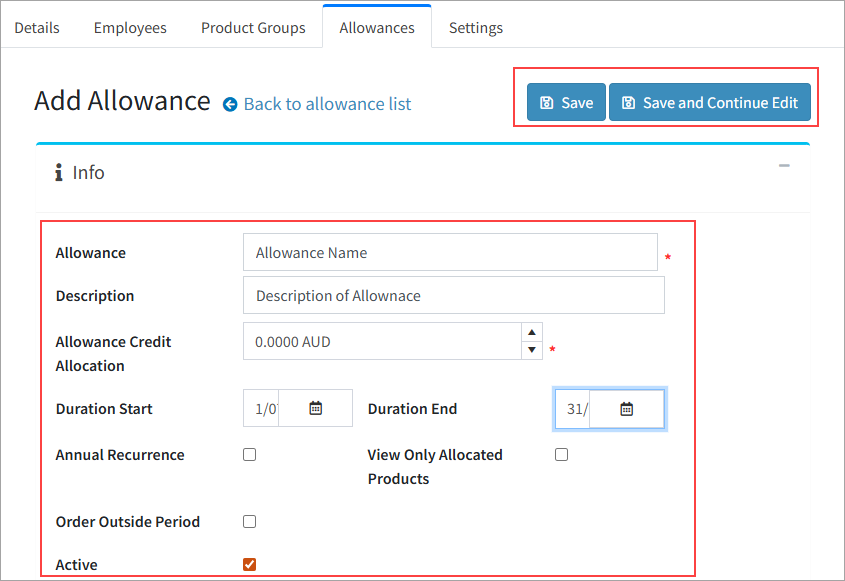
Edit Allowance ▪Scroll down to Employees: 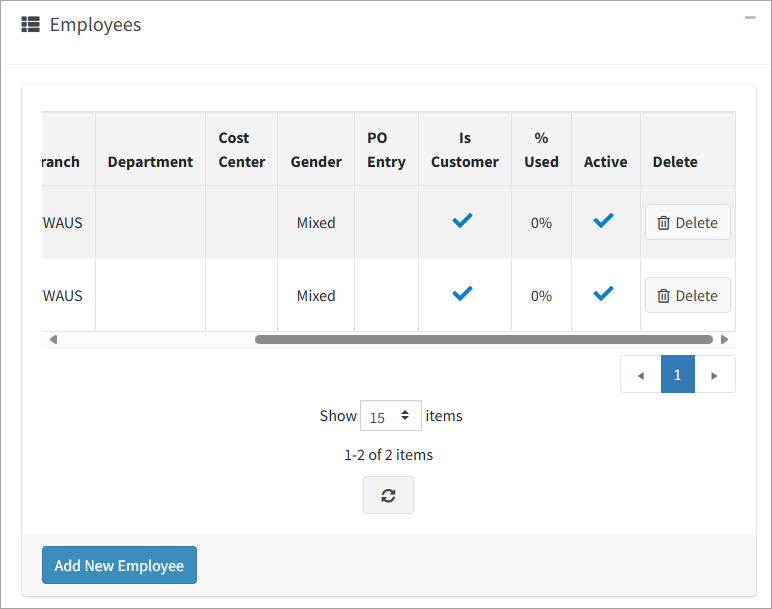 ▪Add New Employee –This can be assigned to allowances on import via the employee tab. –You can also add employees individually on this screen. –You can only add an employee that is already created against the company. This means you cannot create an employee here. ▪Scroll down to Product Groups 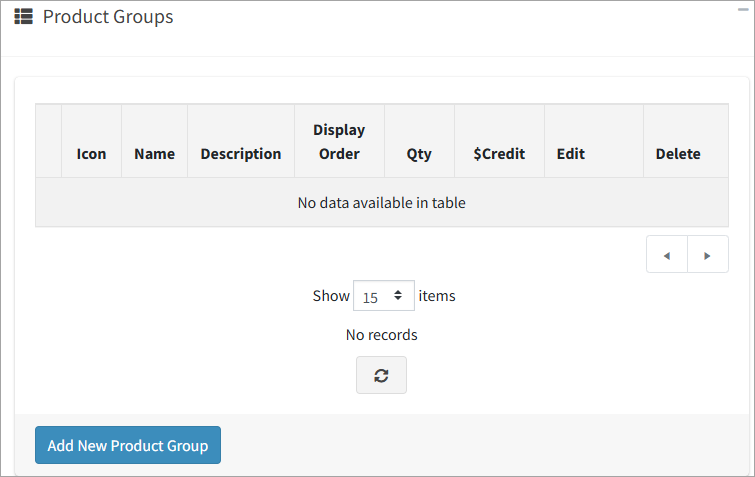 –Add New Product Group oSelect the product group as created in the Product Group tab above. oYou cannot create product groups here. –Edit product Group oChoose the following: –Display Order (can set negatives). –Quantity to be available in the allowance (can be 0). –Credit to be used in the allowance (can be 0). oClick Update to finalise edits or Cancel to remove edits. 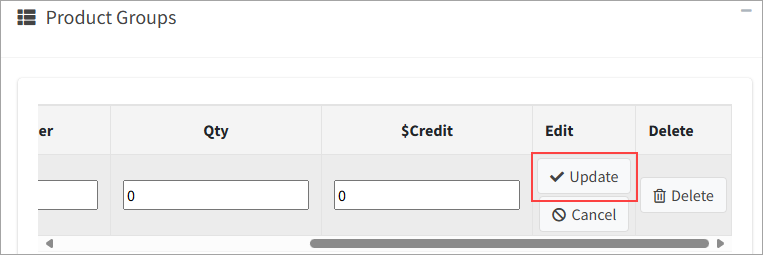 oIf you click to another screen the edits will be cancelled. |
In Companies, go to the Employees tab.
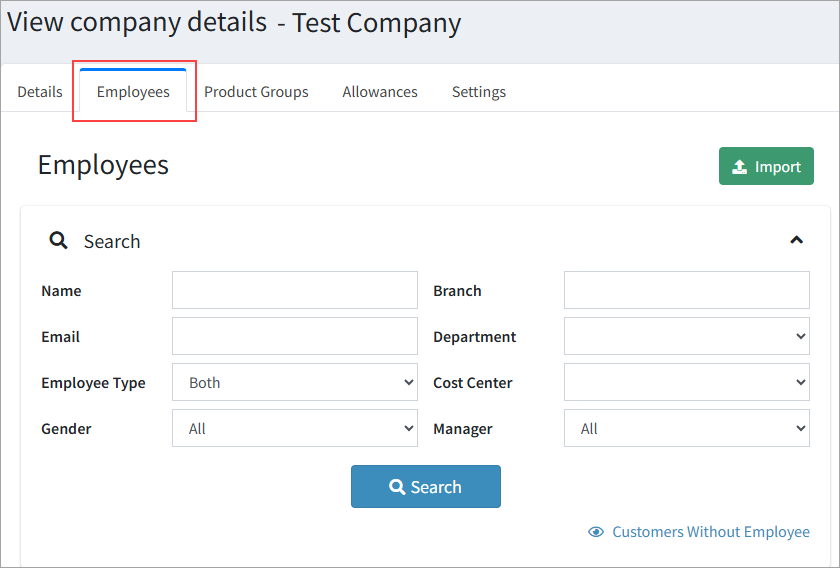
Branches will be added as default to this screen to allow you to import users per branch. Click a branch to see the following:
Employee List This will be automatically created via the card codes added in the Company's Details tab.
Add Employee List This is useful if you need to add a single employee, but it may be preferable to import bulk employees via the Import button.
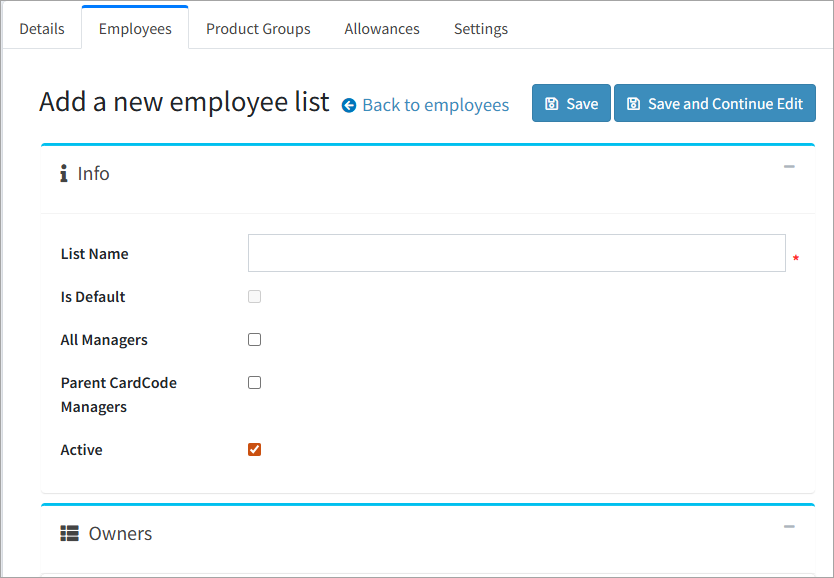 ▪Employee lists can be users that log in (associated with a customer), or do not log in (employee). ▪To add, click Add Employee List and give it a name. –All Managers – Allows all managers in the company to order on behalf of all staff in this employee list. –Parent CardCode Managers – Allows managers to set the parent card code to order for staff in this employee list. –Owners – You must save the employee list before assigning an owner. oOwners are managers that can order on behalf of other employees
Add a new Employee 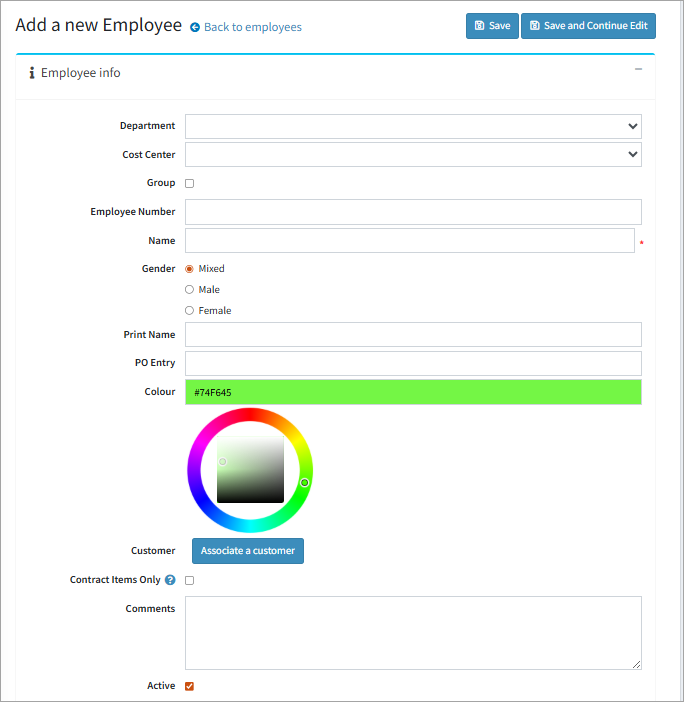 ▪Set Departments and Cost Centres if needed. –These will also draw from the Departments and Cost Centres set on the Details tab of the company. ▪Group – This is used to indicate that the entry is representing a group of employees. ▪Gender – Set the gender to be used as a default filter for gendered clothing. ▪Print Name – This is what will be used as the embroidery name for the employee. If left blank it will use the default as set in settings. ▪Colour – This will set the colour for the employee (hex code). ▪Customer – Associate a Customer – If the employee was not already associated with a customer, or needs to be changed, you can do this here. ▪Contract Items Only – This will set the employee to only have stock in the related promotional pricing visible.
Recommended as the final step, so all allowances, departments, settings, etc will be available in the template.
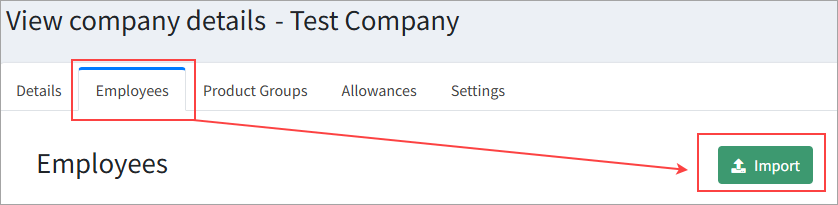
▪The import function will create users and associate them with the branch (card code), department, allowance, and/or cost centre. ▪You can download the template in the tool (click Import Users to access). 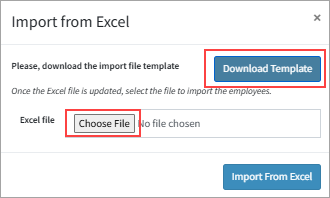 ▪The template will use defaults as set up in the Settings area. ▪Once the template has been downloaded and populated, you can select it with Choose File. ▪Once selected, click Import from Excel. ▪A notification will appear in the notification area (bell icon) to advise whether the import was successful or not. 
Important Fields in the Excel Template Branch – Dropdown to select from the active branches available in the company. Department – Dropdown to select from the active departments available in the company. Cost Centre – Dropdown to select from the active cost centres available in the company. Allowance – Dropdown to select from the available allowances. Group – Name – Full name of the employee. Gender – Dropdown to select from available genders. Print name – The name that will be used as the default print name. Colour – Associate a colour with the employee as a hex code. Manager – Yes or no dropdown to indicate whether this employee is a manager. Contract Items Only – Yes or no dropdown to indicate whether this employee should only see contract items. Comments – Yes or no to indicate whether comments should be enabled for this employee Add Customer – Yes or No to indicate whether this employee should be created as a Customer as well Email – The email of this employee (this is the primary identifier of the employees record) First Name Last Name (Address Information if the employee can have orders sent to their own address) Country Code State province Abbreviation City Address1 Zip Postal Code Phone Number |
Further information
Jim2Commerce Product Stock Group Management
Jim2Commerce Publish Products to Portal
Jim2Commerce Portal Image Naming
Jim2Commerce Image and Document Tags
Jim2Commerce Miscellaneous Product Tags
Jim2Commerce User Configurations