1.On the Toolbar, click the Pick icon. 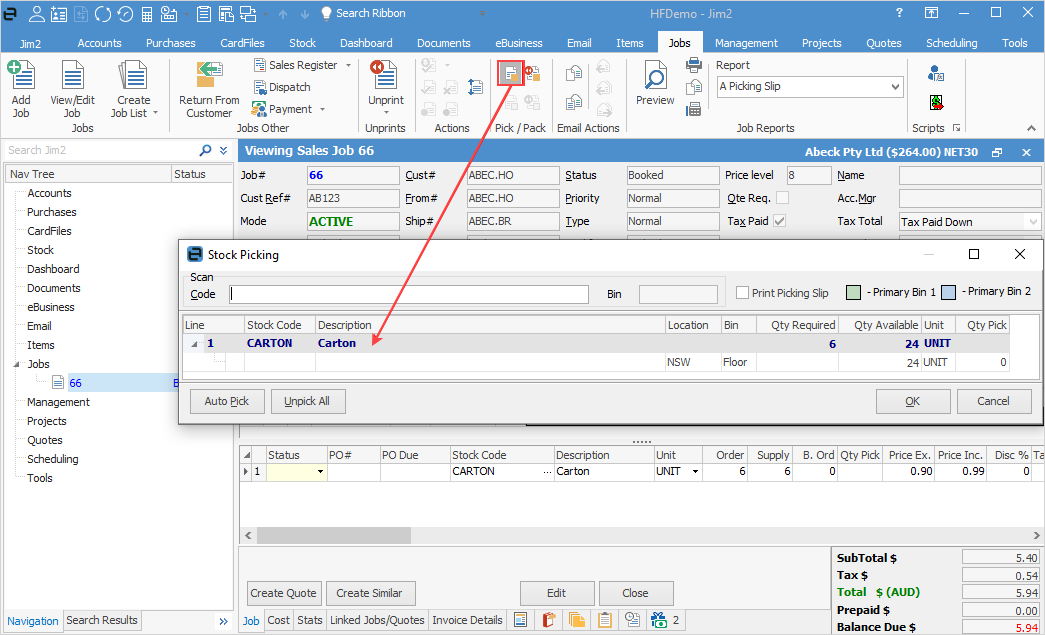 2.The stock picking form is displayed as above. 3.Note the stock is spread between a number of bins as per the original setup. 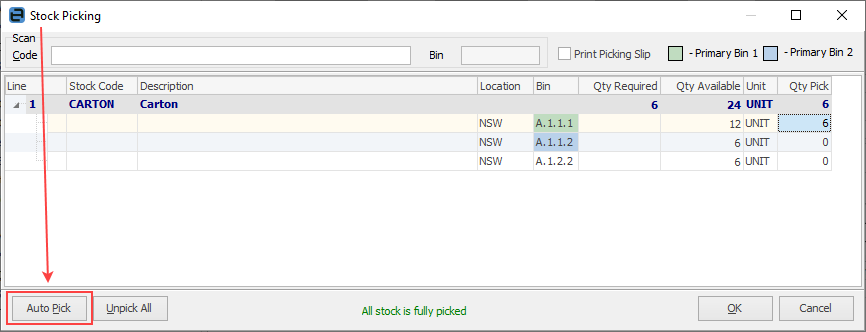 The quantity to pick can be entered manually, but it is best to click Auto Pick on the lower left of screen. Jim2 will then select the oldest stock on hand, taking into consideration any attributes.
Click OK. 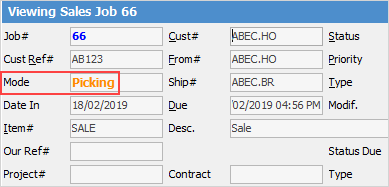 If a status has been selected in Options, the job status will be changed to what has been selected. A picking list can be produced that can follow the stock through the warehouse as it is picked, and the Mode changes to Picking. 
Complete the job in the normal way.
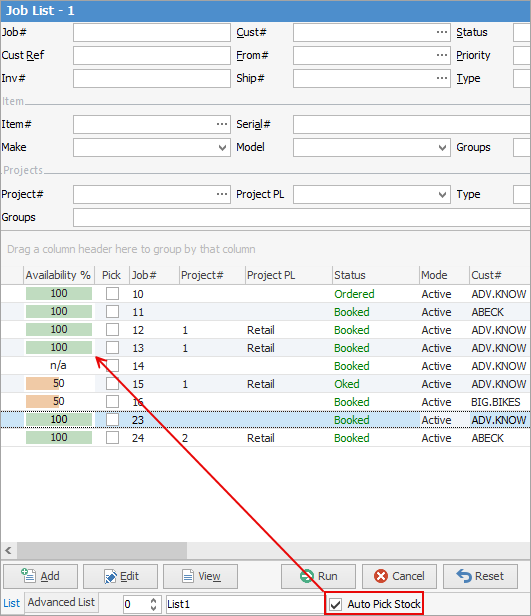
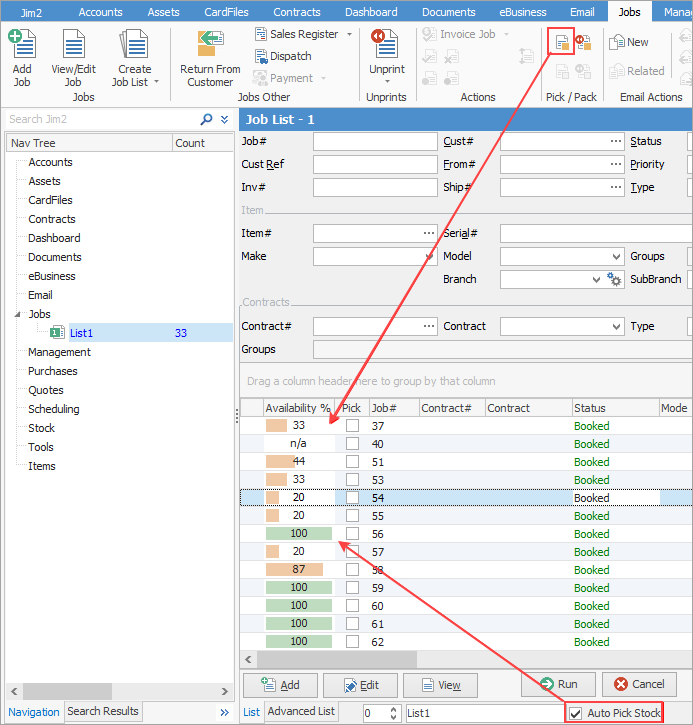
From a job list, you can Pick stock via the ribbon – this will pick stock for all jobs that have stock available for picking, including jobs that are locked by other users.
First, tick Auto Pick Stock and Run in the footer to bring up the Availability % column.
Then click the Pick icon in the ribbon:
Should there be a reason to, you can unpick the stock via the Unpick icon:
 |
