
|
All supplier feeds can be sent to the same email account (ie. stockfeeds@yourcompanyname.com.au). Within the Jim2 Configuration Manager under StockFeed module, you can set up the rules to determine which email belongs to which vendor by matching sender, subject and/or attached file name. |
Configuring the Jim2 eBusiness Connect (Vendor Stockfeeds)
1.Set up an email account.
A dedicated email address is required for receiving the stock feeds. This email account must suppobe accessible using) the POP3 protocol. The Stock Feed module will process all emails sent to this account. Emails that match the selection criteria for a vendor's feed will be processed, and all other emails will be forwarded to the configured email address.
2.Create a working directory.
Create a suitable working directory for Jes to use in processing the stock feed emails. Note that this directory must be accessible by the Jes service, ie. access must be granted to the user account under which the Jes service is running.
3.Configure Jes.
Use the Jim2 Configuration Manager (JesCM.exe) to configure Jes. If the Stock Feed module is not already included in the Jes configuration, add it.
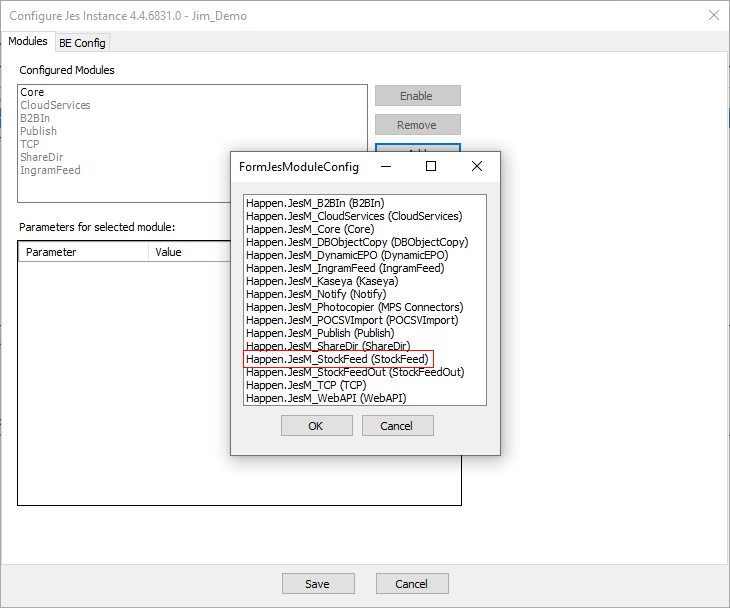
Select the Stock Feed module.
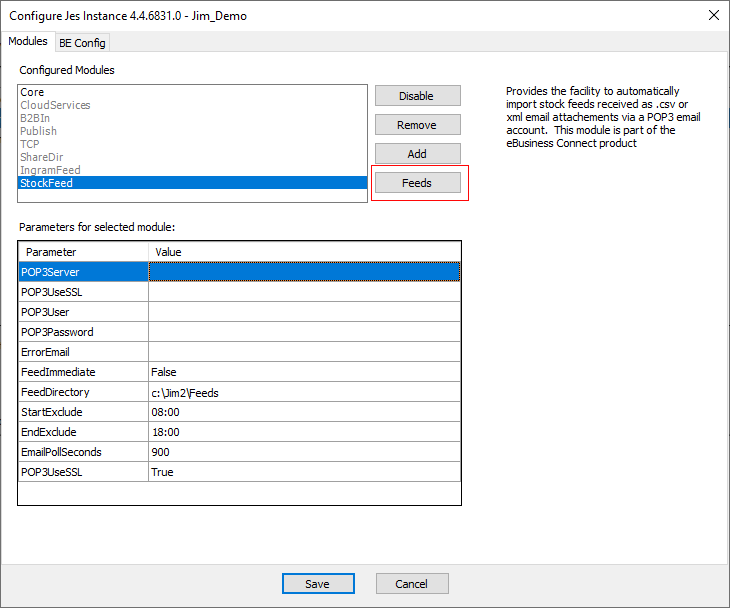
For details on the meaning of the parameters refer to the Stock Feed module. Enter the appropriate values for the stock feed parameters. Specify the directory created in step 2 above as the FeedDirectory.
Right click in the grid and select Add Param to add the POP3UseSSL parameter.
4.Configure the feed processing.
Select Feeds. For each vendor that is sending a feed to be processed by this module, select Add New. Enter a Stock Feed Name. This is required when setting up an email rule.
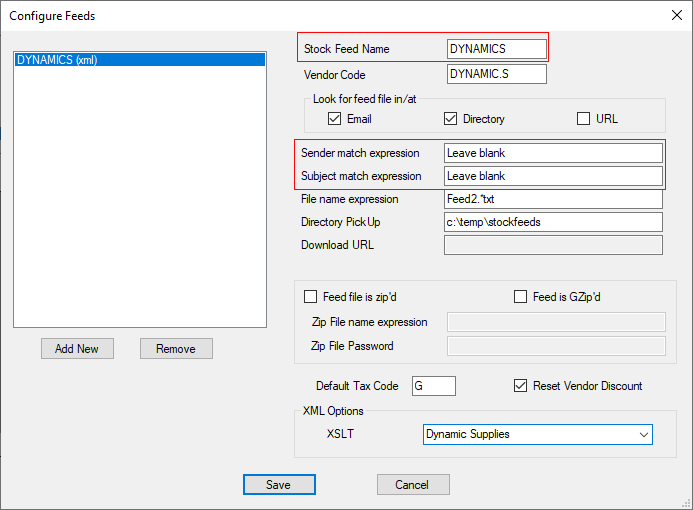
Enter the vendor code for the vendor. This is the card code for the vendor's cardfile in the Jim2 database.
Sender and subject match expression do not need to be entered.
Enter the file name expression. The Stock Feed module uses these expressions to determine if an email that has been received is a data feed from the vendor code just entered. Generally, put the exact text expected in this field. However, if a vendor's emails change each feed (for example, if the subject includes a date) a regular expression will need to be built to match the expected changes. Leaving any of the expressions blank means that check is not required.
|
There could be times where the file name may change. In this case, replace the File name expression with PRICEDLR.* The "." character in reg ex matches any character, and when it is followed by * this means 'repeated 0 or more times'. For more information on regular expression, google RegEx Cheat Sheets. |
The regular expressions are not case sensitive.
Enter the path to the directory (Directory PickUp) for picking up the stock feed, or enter the Download URL.
If the data feed is being sent in a .zip file, tick the Feed file sent in zip'd option. In this case the Zip file name expression must match the file name within the .zip file and the Zip file name expression must be entered to match the name of the .zip file that will be attached to the data feed email.
|
Feed is Gzip'd relates to a different file compression format, which is rarely used, particularly on Windows systems. |
5.Depending on the feed type (.xml for .CSV):
▪Configure the XML specific options.
For .xml type feeds, select XSLT. If the vendor is sending the stock feed in the Jim2 XML format, this should be left blank. If not, select the vendor's XSLT mapping file from the XSLT drop-down list.

▪Configure the CSV specific options.
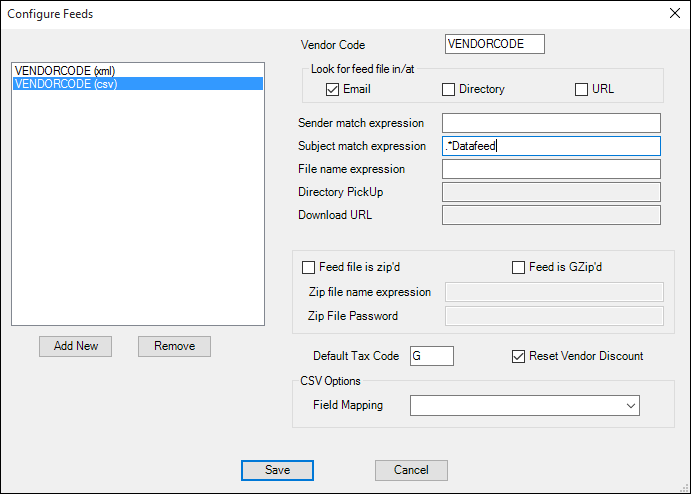
For CSV type feeds, select the Field Mapping appropriate to the vendor. Generally, this will be specific to the vendor, ie. the name of the mapping will match the vendor name.
6.Select Save.
Save the configuration and re-start Jes if necessary.
7.Arrange for the stock feed to be sent.
Contact the vendor to arrange for their stock feed to be emailed to the email account set up in Step 1 above.
create an email rule for the stock feed. On the ribbon, go to Email > Email Rules.
Set up Email Rules
Email rules need to be created for each vendor stock feed.

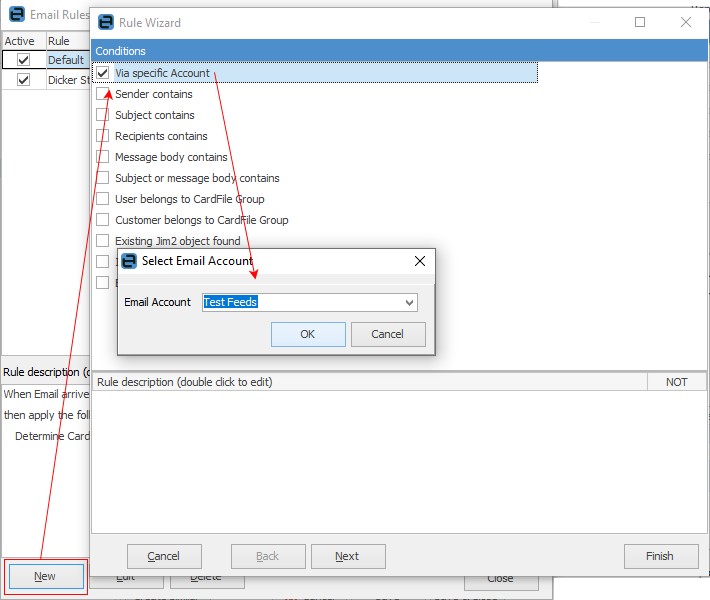
Select New, then Via Specific Account and enter the email account as set up via Jim2 Config Manager.
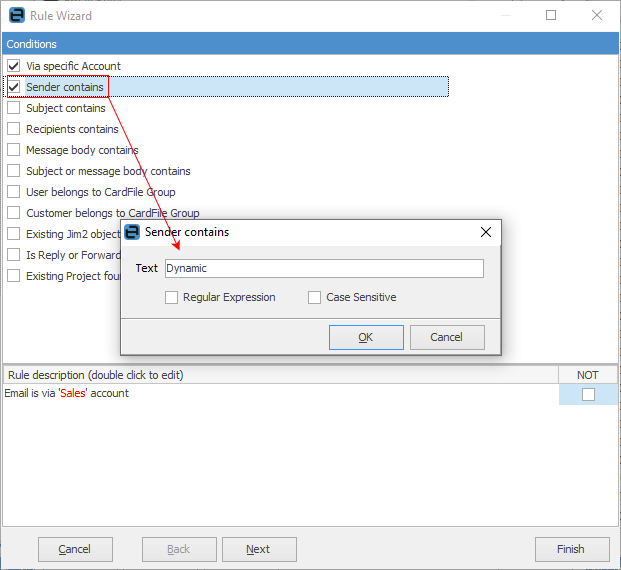
Then select Sender Contains, and enter the Text as set up via Config Manager.
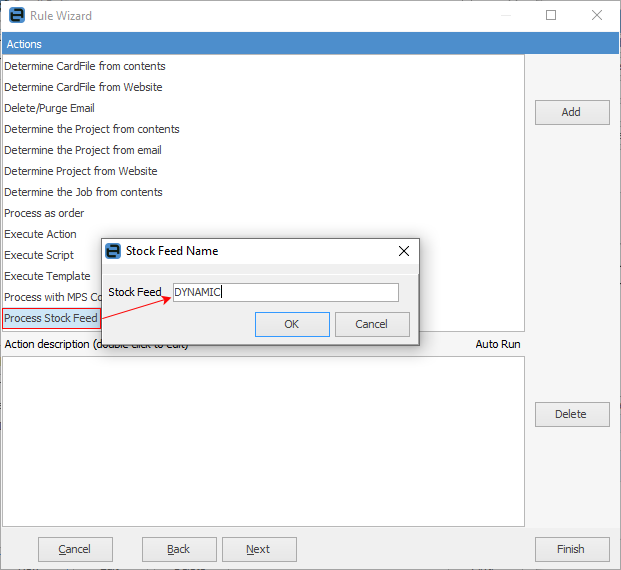
Select Next, then double click Process Stock Feed and enter the name as it appears in the StockFeed module in Jim2 Configuration manager.
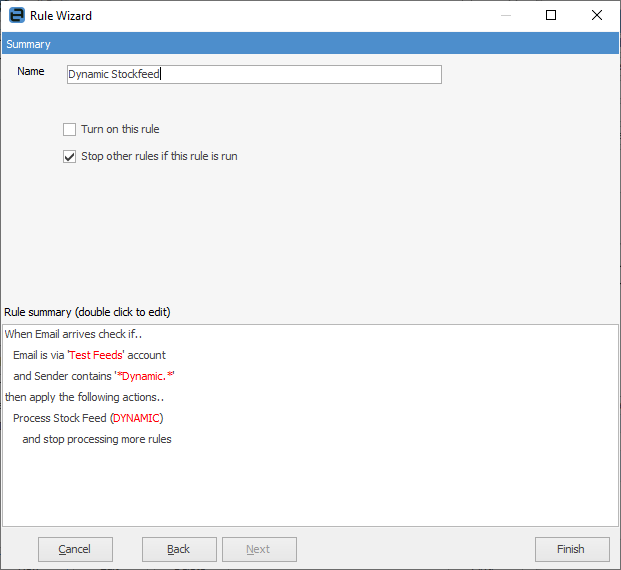
Select Next and name the email rule, tick Stop other rules if this rule is run, then select Finish.
Further information
The Stock Feed module.
