
Before actually importing Items into Jim2, the data must be prepared first. The following is a list of Jim2 Items fields.
Happen provides a spreadsheet template for use to import data into Jim2, so please contact support@happen.biz to obtain it.
|
It is very important to get the data right at this stage – the way to spell it, the way it should look, all the records verified. It is a lot easier and quicker to amend it now in a spreadsheet than later when it is in database form. |

Field |
Description/Use |
Data Type |
# of Chars |
Example |
|---|---|---|---|---|
ItemCode |
The Jim2 Item code |
String |
25 |
DC4C5575 |
Copier Make |
Item Make |
String |
15 |
Fuji Xerox |
Copier Model |
Item Model |
String |
15 |
DC4C5575 |
Copier Type |
Not used |
String |
N/A |
Leave blank |
Item Description |
Description of Item |
String |
25 |
Fuji Xerox DC4C5575 Copier |
Machine Type |
Mono or colour |
String |
10 |
Black, Colour |
Job Type |
Sale or Service job type |
String |
10 |
Service |
Show Serial |
Show/hide serial number |
Boolean |
T/F |
T |
Serial Required |
Serial number required |
Boolean |
T/F |
T |
Serial Type |
Leave blank or assign job number |
String |
25 |
Leave Blank |
Display Invoice Description |
Display/hide invoice description |
Boolean |
T/F |
T |
Invoice Description Required |
Invoice description is/not required |
Boolean |
T/F |
T |
Default Name |
Enter a default username |
String |
10 |
Enter user card code |
Default Name Only |
Only allow the default name user |
Boolean |
T/F |
T |
Report Levels 1 to 5 |
Enter Report Level |
String |
30 for each level |
Xerox |
 |
When entering numbers that have a leading zero into columns, to ensure Excel does not trim off the zeroes, set the column format to Text. |
Save the template as a spreadsheet and close it.
The import is now ready to be performed. It is best when doing the import (for speed and good database practice) to choose a reasonably quick machine/server and not have users actually logged on to the database.

On the ribbon, go to Tools > Import Data.

Select Item for the import destination, then click Next. Choose the spreadsheet file created earlier, then click Open source file. Click Next and the Map fields screen will display.
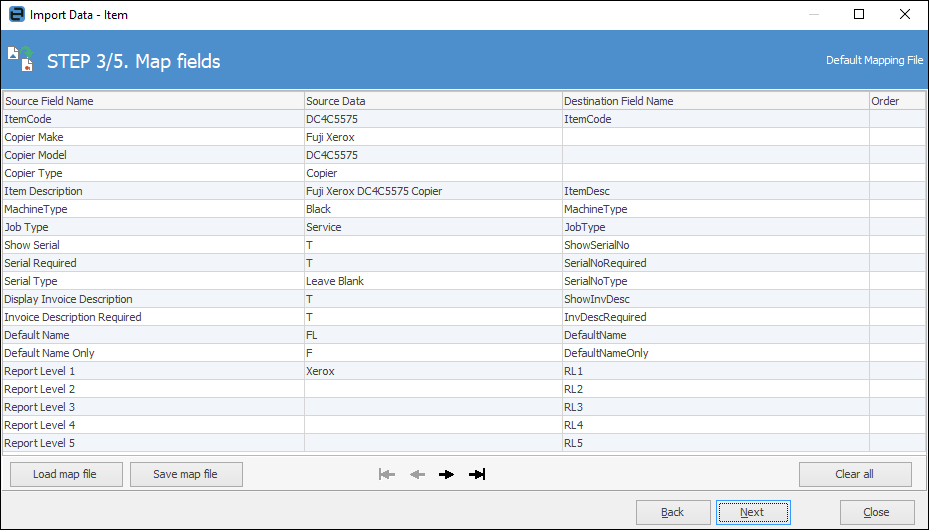
Map Source Field Name to Destination Field Name as above. Click Next, then Load data to grid from source.
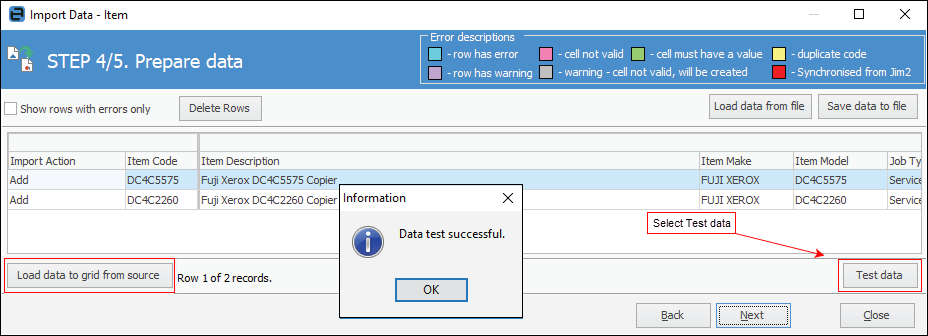
If data has been entered and mapped correctly, when clicking Test Data, a confirmation that the data test was successful will appear. If not, rows will display coloured as per the error descriptions in top right of the above image. These errors must be corrected before proceeding.
Click Next, then Import Data and Close.
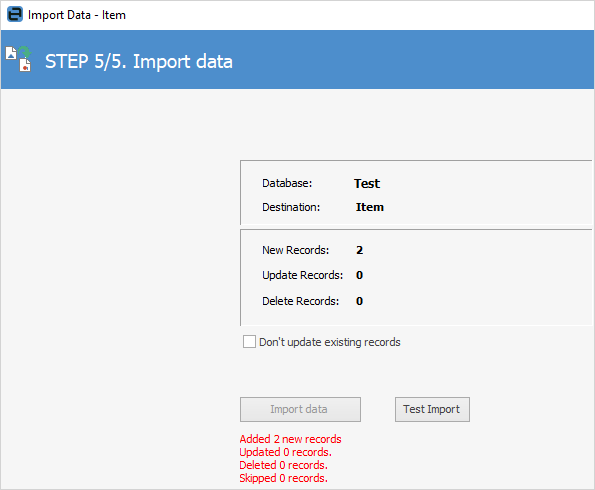
If Don't update existing records is ticked, any records found that match what is in the import will not be updated.
Further information