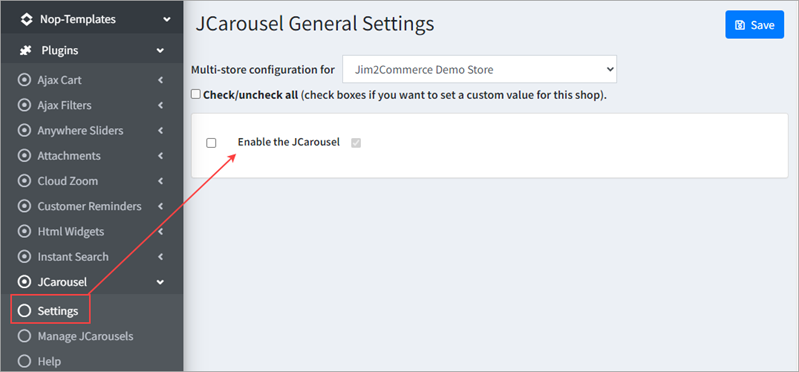
Enable JCarousel.
 |
You can create as many carousels as you wish, and add each to a place where appropriate. You can have more than one carousel on a page, and each one of them will work independent of the others.
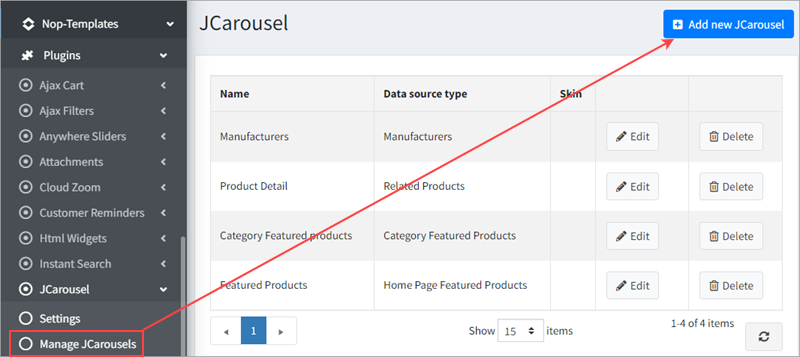
Go to Nop Templates > Plugins > JCarousel > Manage JCarousels. Click Add new JCarousel.
 ▪Name – Specifies the name of the JCarousel. ▪Title – Specifies a title that will display before the JCarousel on the public store. ▪Data source type – Specifies a predefined type of data that will populate the JCarousel plugin (eg. Featured Products, Related Products, etc.). ▪Maximum number of items – Specifies the maximum number of items that the JCarousel will contain. ▪Number of visible items in the JCarousel – Specify the number of visible items in the JCarousel. ▪Skin – Used for adding custom class to name for the current JCarousel ▪Item start index – The index of the item to start with. ▪Number of items to scroll by – The number of items to go through on a single scroll. ▪Autoscroll the content after (seconds) – Specifies after how many seconds to auto scroll the content. If set to 0 seconds the auto scroll will be turned off. ▪Autoscroll pause on hover – Pause autoscroll on mouse hover. ▪Loop items – Enable or disable infinite loop of items in the JCarousel. ▪The speed of the scroll animation – The speed of the scroll animation. If set to none, the scroll animation will be turned off. ▪Dot navigation – Enable or disable the dot navigation. ▪Arrows navigation – Enable or disable the arrows navigation. ▪Show title – If ticked, the title of the JCarousel will be shown. ▪Limited to stores – Option to limit the JCarousel to certain stores. If you do not need this option, leave it empty. |
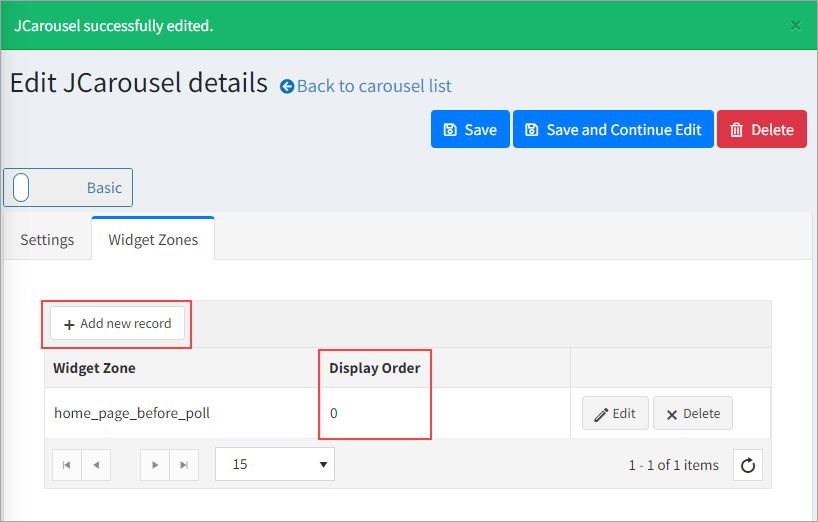
From the widget zones, you can choose the locations in which you want your carousel to appear in your public store.
If you want to add the carousel to widget zones, click Add New Record and select the desired widget zone from the drop-down.
You can also optionally specify a display order.
 |
To add additional products to be displayed in the JCarousel, select a Product Data Source Type or select None.
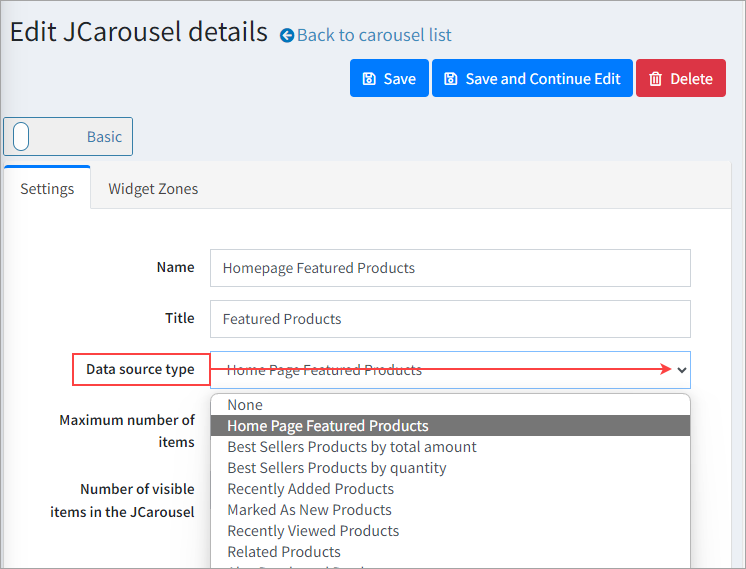
The Product Data Source Types are: ▪Home Page Featured Products – this data source is compiled from the home page featured products. Those are products that have Show on home page ticked. ▪Best Sellers Products – this data source is compiled from your store's most sold products. ▪Recently Added Products – this data source is compiled from the most recent products that have been added to the store. ▪Marked As New Products – this data source is compiled from the products that are marked as new. Those are the products that have Mark as new ticked. ▪Recently Viewed Products – this data source is compiled from the most recent products that the customer has seen. ▪Related Products – this data source is compiled from the products that are related to the product the customer is seeing. The data source will have products only on the product details pages. ▪Also Purchased Products – this data source is compiled from the products that have been purchased with the product the customer is seeing. The data source will have products only on the product details pages. ▪Products From The Same Category – this data source is compiled from the products that are mapped to the category of the product that the customer is seeing. The data source will have products only on the product details pages. ▪Category Featured Products – this data source includes the category's featured products. The data source will have products only on the category details pages. ▪Manufacturer Featured Products – this data source includes the manufacturer's featured products. The data source will have products only on the manufacturer details pages.
If you select a Product Data Source Type , then Add Additional Products, the product that you have selected will be added after the ones from the Data Source. If you select the None Data Source Type, only the products that you have selected will be shown in the JCarousel.
To add a new product click on Add a new product. |
In order to add additional categories to be displayed in the JCarousel, select a Category Data Source Type or None. The Category Data Source Types are: •Home Page Categories •Sub Categories •Sibling Categories
If you select a Category Data Source Type, then click Advanced to be able to Add Additional Categories, the category that you have selected will be added after the ones from the Data Source. If you select the None Data Source Type, only the categories that you have selected will be shown in the JCarousel.
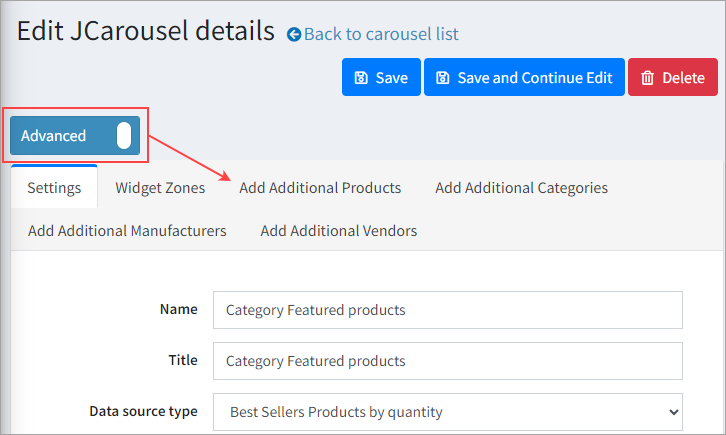
To add a new category click Add a new record. |
In order to add additional manufacturers to be displayed in the JCarousel, select a Manufacturer Data Source Type or select None.
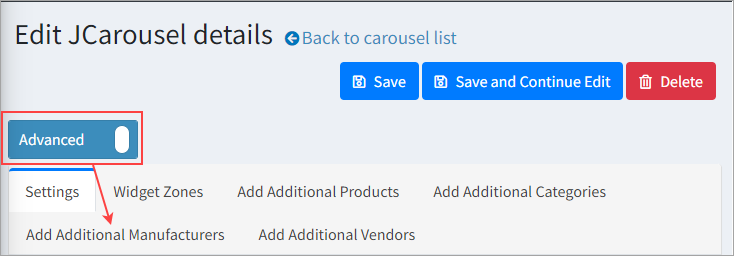
The Manufacturer Data Source Type is: ▪Manufacturers
If you select a Manufacturer Data Source Type, then Add Additional Manufacturers, the manufacturers that you have selected will be added after the ones from the Data Source. If you select the None data source, only the manufacturer that you have selected will be shown in the JCarousel.
To add a new manufacturer click Add a new record. |
In order to add additional vendors to be displayed in the JCarousel, select a Vendor Data Source Type or select None.

The Vendor Data Source Type is: ▪Vendors
If you select a Vendor Data Source Type, then Add Additional Vendors, the vendors that you have selected will be added after the ones from the Data Source. If you select the None Data Source Type, only the vendors that you have selected will be shown in the JCarousel.
To add a new vendor click Add a new record. |
Further information
