
This type of transfer is used to move stock between major locations, eg. from the Sydney warehouse to the Brisbane warehouse, from Melbourne store to the Glen Waverley store, etc.
1.Process initiated at the requesting location (To Location).
On the ribbon go to Stock > Transfer Stock > Add > Location Transfer.

|
Some letters in the field names within the header are underlined, eg. Status. Using Alt+ the underlined letter will jump to the field beside that heading. |

▪Select From Location and To Location of the initiating location.
▪Add any appropriate Notes.
▪Select stock to be transferred
▪Save.
|
If using Branches, the Branch is always the one that initiates the transfer, eg. the VIC branch could initiate a transfer from the NSW location to the QLD location.
A multi-branch organisation should always have established written procedures to ensure efficient workflow, for example: •a nominated person at each branch maintains a list to ensure requests from other branches are actioned •urgent requests are confirmed by email/phone. |

The transfer is now on a status of Booked.
2.The sending location (From Location) checks the transfer list.
On the ribbon go to Stock > Transfer Stock – enter selection criteria, then click Run.
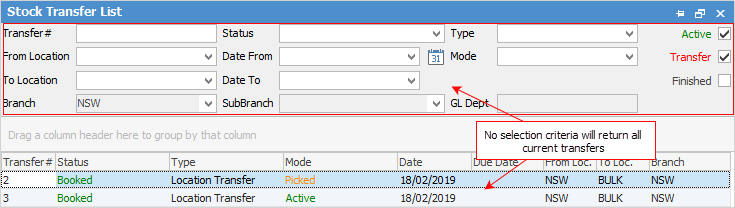
As with all lists throughout Jim2, clicking Run without any selection criteria will produce a list of all current transfers, regardless of location.
This list is useful to obtain an overview of what is happening throughout the company, and it reveals that there are a variety of different Status/Mode combinations choose from:
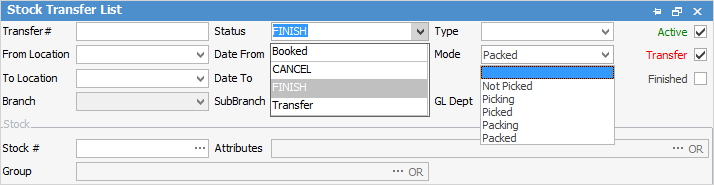
Whilst this list is adequate for an organisation with a small number of internal transfers, the ideal situation would be to enter selection criteria (using the Advanced List tab on the bottom left of the stock transfer list screen) to return specific information relative to the user.
Such a list should be pinned. Open each transfer and confirm by changing the status to Pick.
|
If the sending location does not intend to process the request, they should notify the requesting location. Again, this depends on company procedures. |
▪Raise transfer – set status to Booked, and Mode to Pick.
▪Sending location picks stock – set status to Transfer.
▪Physically move the stock.
▪Receiving location receives the stock.
▪The sending location Picks the stock.
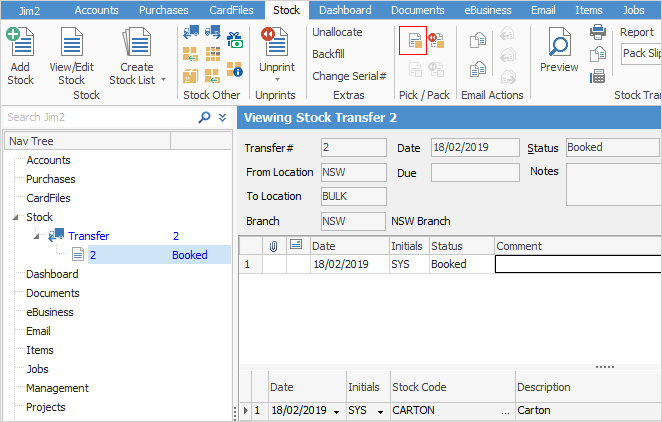
Click the Pick icon on the ribbon to bring up the Stock Picking screen. Each stock code is shown with a grey background as the header that displays the quantity required for this transfer, and the total quantity available at this location. Beneath this is displayed each bin that contains this stock, starting with the primary bin, and listing the quantity in that bin.
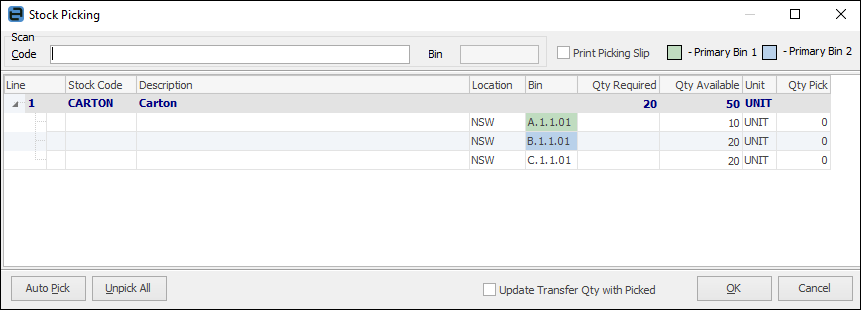
The picking is now completed by either:
▪Clicking Auto Pick and the required quantity will be picked from the primary bin. If insufficient in that bin, it will continue to work down the list until everything is picked.
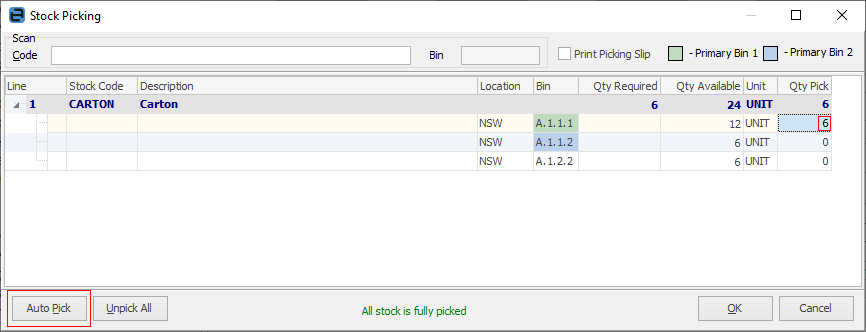
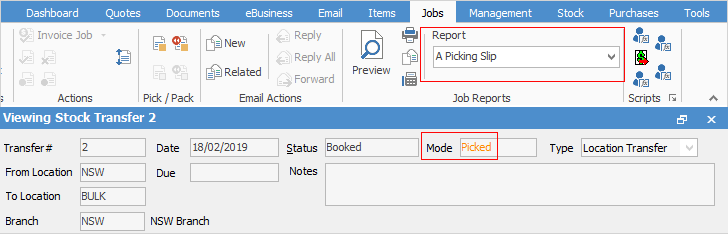
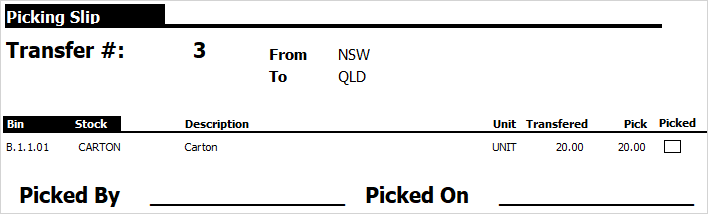
▪Manually keying in the pick quantity against the respective bins. Manual selection would typically be used to force the bin. For example, if a large quantity is to be picked, it may be better to take it straight from the bulk bin. Another example might be where it is easier to pick everything from one bin. The determining factor will be the experience of the operator and their knowledge of the warehouse layout. Click OK to commit the Pick, and print the picking slip. The Mode changes to Picked.
|
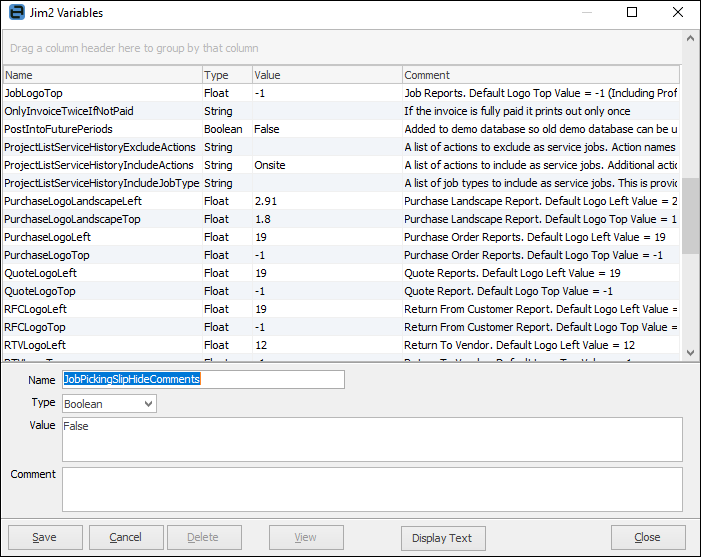
Comments can be hidden on the Job – Picking Slip Report by entering the following Global Variable:
 |
3.The sending location physically sends the stock.
▪Change the status to Transfer and process as per internal procedures.
▪The receiving location receives the stock.
▪Change status to Finish and Save.
▪Click the Pack icon on the ribbon. The Stock Packing screen is displayed:

In this example, the inbound stock is being packed in all three bins by entering the quantity into the Qty Packed field.
|
The Add Bin button enables another bin to be allocated to this stock. This could be particularly useful if a temporary holding area has been designated during a busy period. Add Bin will bring up a dialog box where to select which bin.
 |
Click OK. A packing slip can now be printed from the dropdown report list.

Further information