
1.From the Quotes tab, select the Add Quote icon. The Adding Quote form is displayed showing the quote header.
|
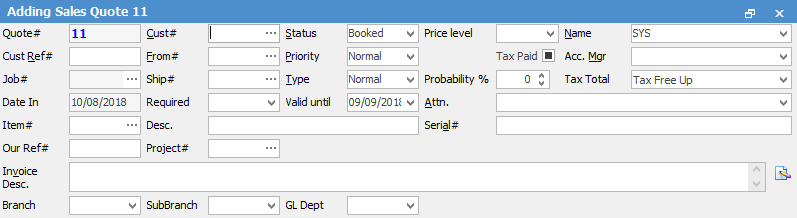
Some fields will have information defaulted into them automatically by Jim2, including Quote#, Status, Name, Priority and the Date In. |

 |
You will see some letters underlined in the field names within the header, eg. Cust#. Using Alt+ the underlined letter will jump you to the field beside that heading. |
|
Jim2 is designed to prompt user input by placing the cursor at the appropriate fields that the user is required to complete. The Enter key will move the text cursor to the next user input field in the job entry pattern. The pattern follows Customer Card Code#, Customer Ref# and Item fields. |
2.Select a customer in one of the following ways:
▪Start to type the customer name in the Cust# field (see ). Jim2 intuitive type will begin to (numerically/alphabetically) pre-empt your choice of names from the Card Code list as you type
▪Click the ellipsis [...] beside the Cust# field to display the full list of customers and then click to choose from the list
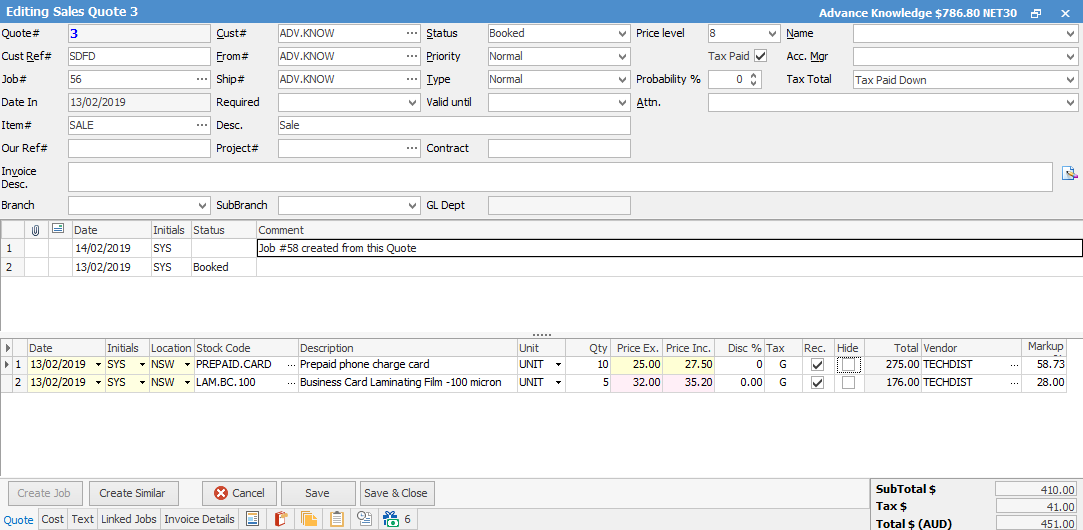
The Quote header will now be updated with Price Level, Ship # and the Tax Paid information from that specific customer's Card File. However, you may override this default information (if required) simply by using the TAB key or mouse to move the cursor to that field, highlight and re-select. The exception is that Quote # and Date In are not able to be edited as they form part of the secure Quality record for that Quote.
3.Type a customer reference (for example: the name of the person who requested the quote) in the Customer Ref# field.
|
This alpha/numeric reference should be supplied by the customer so that they can match this quote with their own internal procedures, personnel or work orders. |
4.Enter the date the quote is requested in the Date Req field, by either typing the date or selecting the drop-down  to select a date.
|
When users handle many quotes at once, this Date Req field should be closely monitored to ensure effective customer service. |
5.The date the quote is valid till will auto fill in the Valid Until field based on the default set in Tools > Options > Quotes. You can override this.
|
This is very useful for goods that have on special until (variable) pricing depending on date of order, etc. |
6.Select the Item that is attached to this quote (remember Item is the prime objective of a Job) and the Desc. field will default to the text description as setup in that Item record.
7.Enter a numeric value for the Probability of this Quote being successful. This field will round the entered value up to the nearest five percent.
8.You can now add comments or stock to this quote. The F3 function key will take you to the Comment grid of the Quote.
Your F4 function key will take you to the stock grid.
You can add documents to a quote (such as adding an acceptance to a quote in writing) via the Documents tab at the footer.
Further information: