
Lists within Jim2 run live in the Nav Tree. This means that the list will be refreshed at regular intervals specified by the user.
Users can include/exclude search criteria to narrow down their search. For instance, if you double click on Cust# in a job list, the background of the field will become green. This means that whatever is selected in this field will be excluded when you run the list.

A useful feature of live lists is the counter to the right of each item. For example, making a live job list gives your staff the advantage of knowing when new jobs have been assigned to them in the job queue, as the job counter to the right of the list increases with each new job assigned to them.
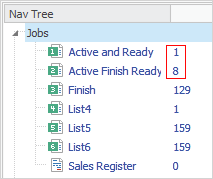
The list shown below is a running active job list. This will show any jobs on the status of Active to signal to the purchasing officer that an action is required. For instance, once they have ordered the parts, they will change the status of the job to Ordered. The next time the Active list updates, that job will not be shown.
The way to set a list as live is to either type a number or use the up and down arrows to enter a number of minutes into the minute counter on the bottom of the list. You can also name the list in the field beside this.
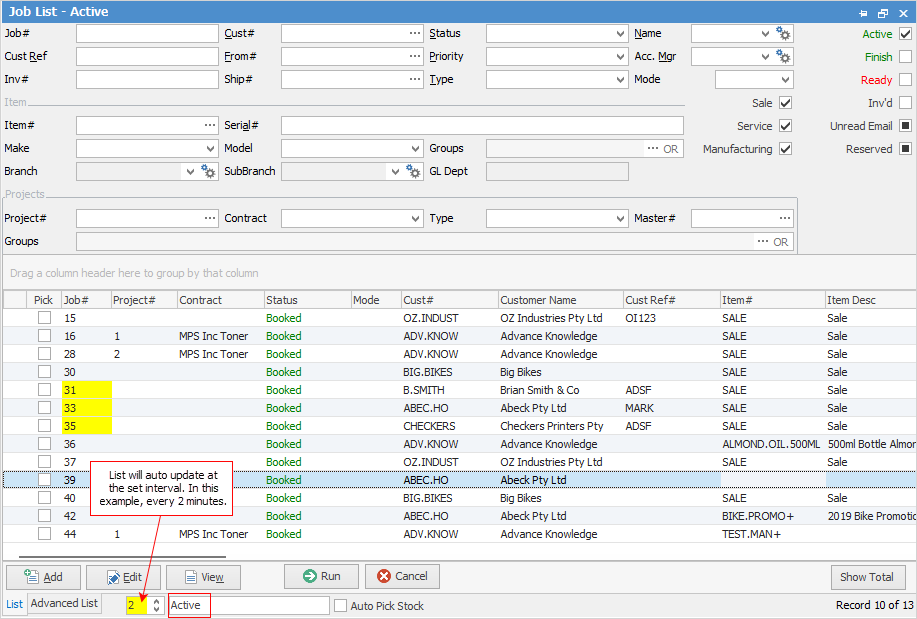
Once you have run the list and pinned it, the background of the minute counter will show in yellow, and the list will be updated at the nominated interval. The active record in the list (ie. the last thing you looked at if it's still in the list) will display with a blue background.
 |
Jim2 supports multi-select in lists, ie. hold down the Ctrl or Shift key to select multiple lines in a list. |
|
Often, not all columns/rows can be seen within the screen. They can be shown using the slide bar to move left to right and top to bottom (scroll bars pop up to the bottom and right of the viewing screen).
 |
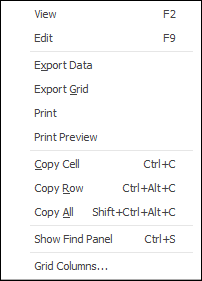
If your security allows it, you can right click within the grid, select Export Data and save the list information as an XLSX file.
Right Click Option |
Function |
||
|---|---|---|---|
View |
View the highlighted card file. |
||
Edit |
Edit the highlighted card file. |
||
Export Data |
Exports the grid to a spreadsheet, showing only one header row. |
||
Export Grid |
Exports the grid to a spreadsheet. This is particularly useful if your grid has more than one header row, as it will export all header rows. |
||
Export CardFile Non Report Groups |
Exports card code, name and non report group information to a spreadsheet. |
||
Print the list. |
|||
Print Preview |
Preview the list to be printed. |
||
Copy Cell |
Copy the cell you have clicked on. |
||
Copy Row |
Copy the entire row you have clicked on. |
||
Copy All |
Copy all, which can then be pasted into a spreadsheet (only one header row in this case). |
||
Show Find panel |
Opens the Find panel (right click and click again to remove):

|
||
Grid Columns... |
Allows you to select more columns to add to the grid: •CardNo is the numerical number Jim2 has given this card file. •CustActive shows T or F (true or false) •PerActive shows T or F •ShipAddrActive shows T or F •UserActive shows T or F •VendActive shows T or F |
There are additional right-click options for each object. These extra options will be explained in the relevant object list, ie. CardFile List, etc.
 |
Objects in lists that have related unread emails will appear in bold type. |
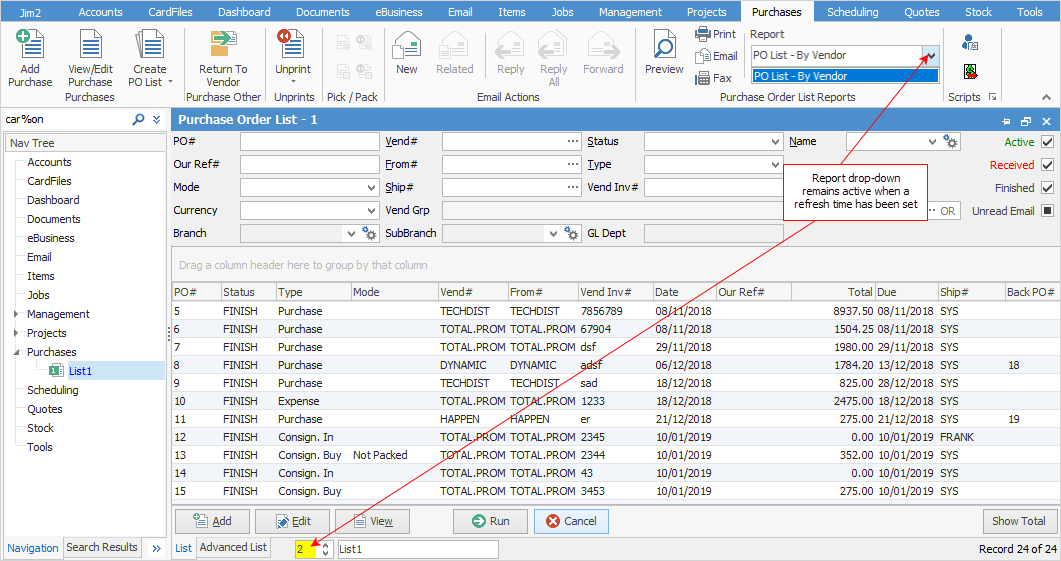
You can run reports from lists when you set a refresh time, although you can run reports without setting a refresh time.
Further information: