
Jobs are raised in the normal way under Warehousing, until the point of stock being picked.
On the ribbon, go to Jobs > Add Job.

Select a customer in one of the following ways:
▪Start to enter the customer name, Jim2's intuitive type will begin to pre-empt the choice of names from the card code list information is entered.
▪Click the ellipsis [...] beside the Cust# field to display the full list of customers, then choose from the list.
▪Enter a customer reference (for example, name of the person who requested the job) in the Customer Ref# field.
|
This alpha/numeric reference should be supplied by the customer so that they can match this job with their own internal procedures, personnel, purchase orders or work orders. If multiple jobs are required for the same reference number (work order), run a Job List using this reference number to monitor the progress of the work order. |
|
Some letters in the field names within the header are underlined, eg. Cust#. Using Alt+ the underlined letter will jump to the field beside that heading. |

Within the Item# field, enter the Item code.
Move to the stock grid and, using the ellipsis [...], select the stock for the job, along with the quantities required.
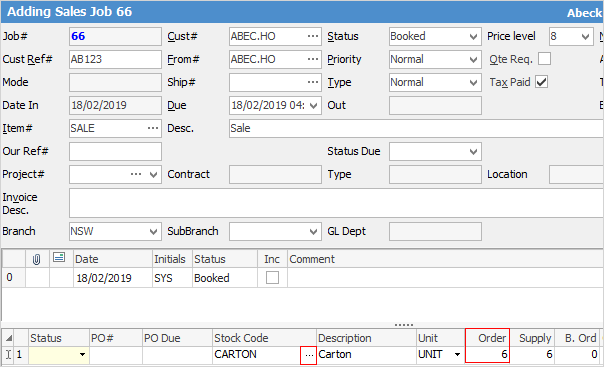
The far left column in the stock grid background colour will change if you select Stock availability by right clicking in the field.
Green = stock is available
Red = there is no stock available
Orange = some stock is available, but not all
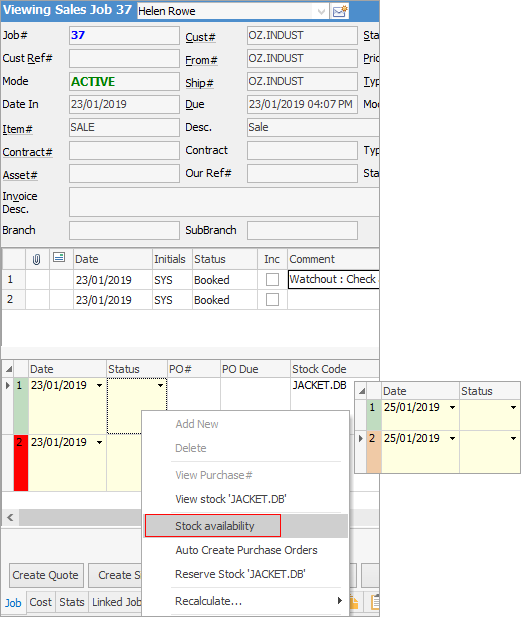
Sorting, searching and grouping are available as per other lists in Jim2. Select the column header in the grid, then drag it to the Group By area to group.

Pick the Stock
1.On the Toolbar, click the Pick icon.

2.The Stock Picking form is displayed as above.
3.Note the stock is spread between a number of bins as per the original setup.
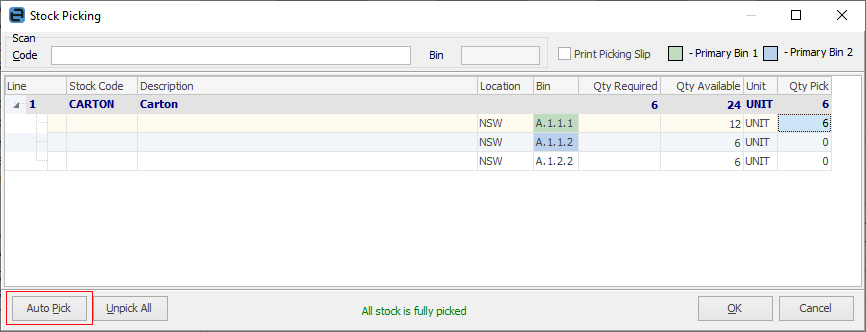
The quantity to pick can be entered manually, but it is best to click Auto Pick on the lower left of screen.
 |
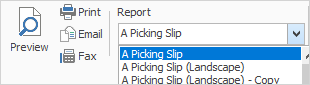
Note: You can also print a picking slip from within this screen. |
Click OK.
If a status has been selected in Options, the job status will be changed to what has been selected.
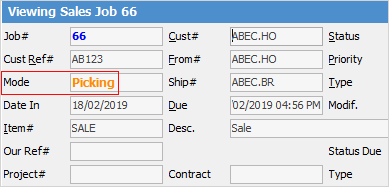
A picking list can be produced that can follow the stock through the warehouse as it is picked, and the Mode changes to Picking.
Complete the job in the normal way.
|
If attempting to print a picking slip report without picking the stock, the bins will not appear on the report. |
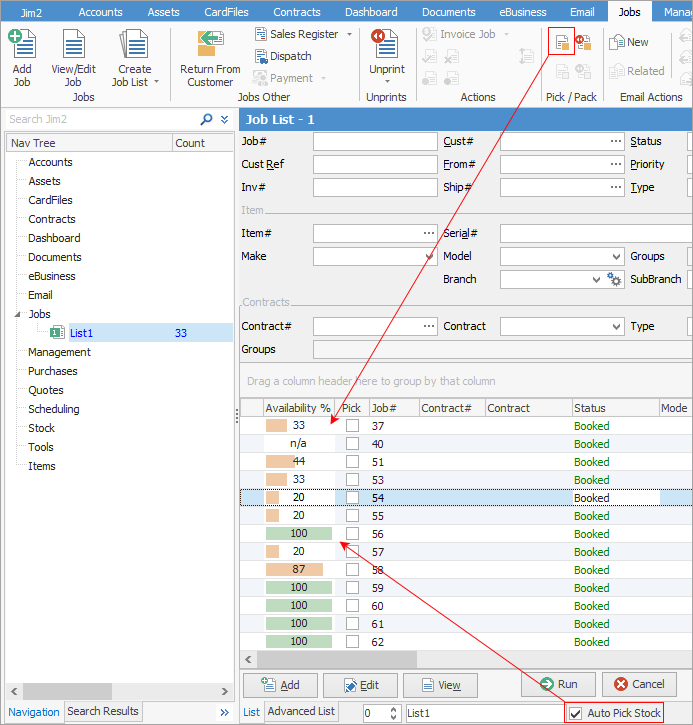
From a job list, you can Pick stock via the ribbon – this will pick stock for all jobs that have stock available for picking, including jobs that are locked by other users.
First, tick Auto Pick Stock in the footer to bring up the Availability % column, then click the Pick Stock icon.
|
You can also right click on a line within the stock grid to unpick that line, if required. If the job is fully picked, this will change the job from Picked to Picking mode. You can also add new/delete stock lines whilst the job is in Picking mode. |
Further information