
The core component of warehousing is the synergy of the physical warehouse and Jim2. This happens as a two-fold process:
▪identifying the layout of the storage area in Jim2 through stock bins and
▪setting up workflow processes as in Warehouse Management and business procedures.
Bins can be added in one of two ways:
1.Manually – typically used for making minor changes/additions to the warehouse.
2.Using the Stock Bin Wizard – typically for the initial setup of the warehouse, or for large additions.
On the ribbon, go to Tools > Setups > Stock > Stock Bins.
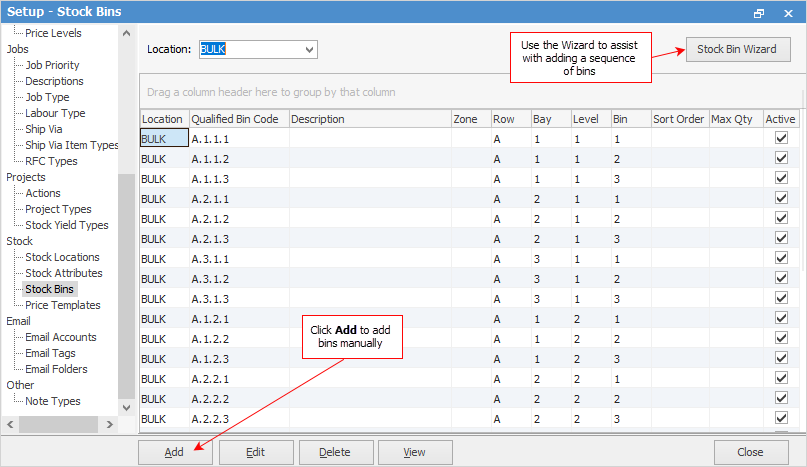
1.Add Bins Manually
▪Active: ticked means this bin is being used. Unticked means this bin is not being used.
▪Enter the zone, if used.
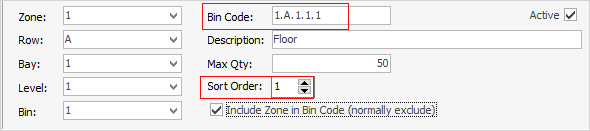
▪Enter the appropriate row, bay, level and bin numbers (mandatory fields) – a qualified bin code will appear in the Bin Code field. An optional bin description can be included.
▪Max Qty allows entering the maximum quantity that will fit in the bin.
▪Select the Sort Order.
▪If using zones, the zone can be optionally included in the Bin Code.

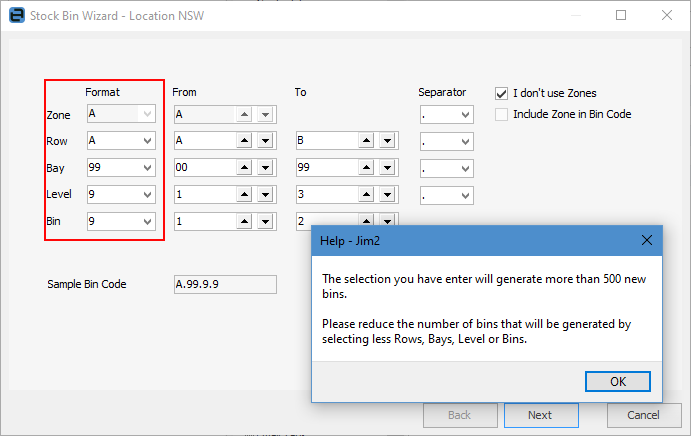
▪This virtually follows the same process as in 1 above, except that there is a choice of format and separator style.
▪Enter the starting and ending number for each row, bay, level and bin.
▪Use the two checkbox options as appropriate.
Jim2 will create all bins based on what is entered here (see image above).
 |
Note: There is no way to remove locations in bulk, so there is a cap of 500 on how many bins can be added at once.
You will receive a warning if you try to add to many bins at once. In this case, limit the numbers being added by running the Wizard multiple times, for instance, once for each level.
 |
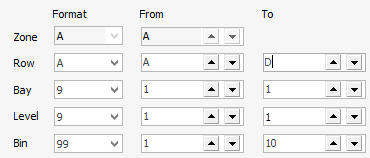
Warehouse Layout – A Practical Example
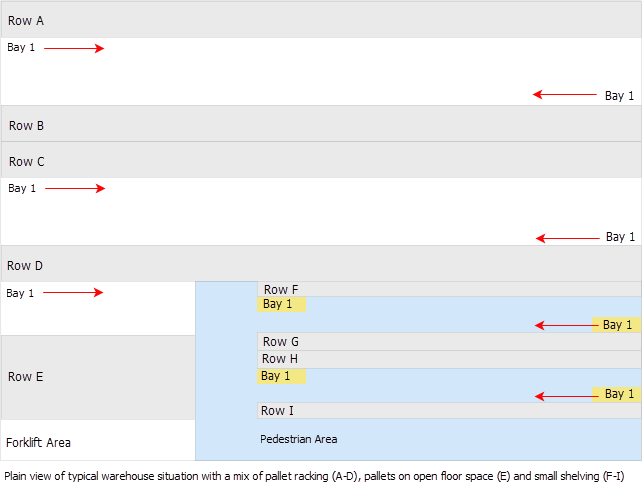
As shown in the example above, the Stock Wizard was used to create Rows A to D,
then
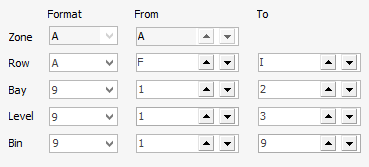
1.Rows F to I (the shelving) were created, again using the wizard, with these settings below:
and finally:
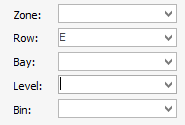
3.Row E (the floor space) was created by clicking Add to open the Add Bin screen and entering E into the Row field.
 |
Note: You can also delete bin locations here, however these need to be done one by one. |
Further information