1.To assign Groups to a particular Item, start by selecting the ellipsis [...] at the right-hand edge of the Group field.

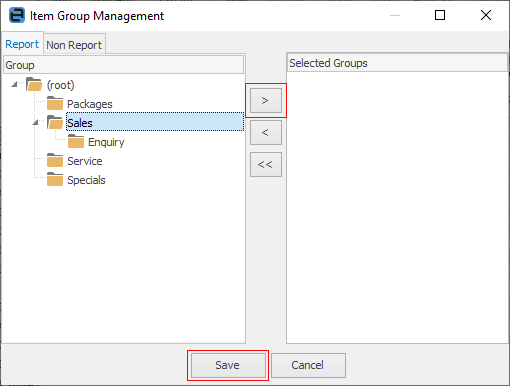
1.The Item Group Management screen will appear, showing a list of all Item groups that are currently available. Use the scroll bar and arrows to select the desired group/sub-group. When finished, click Select.
2.If a suitable group is not available, add a group while still in this screen. To do so, right click and select Add Group or Add Child Group from the drop down options.
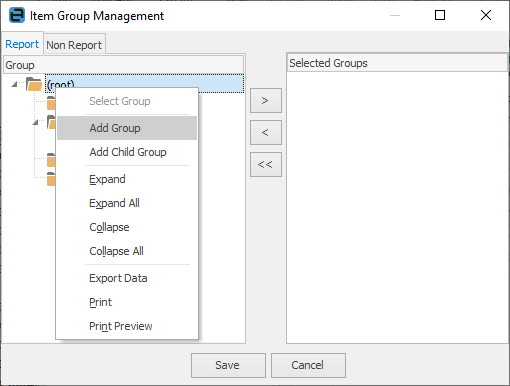
3.A new, empty text line will appear.
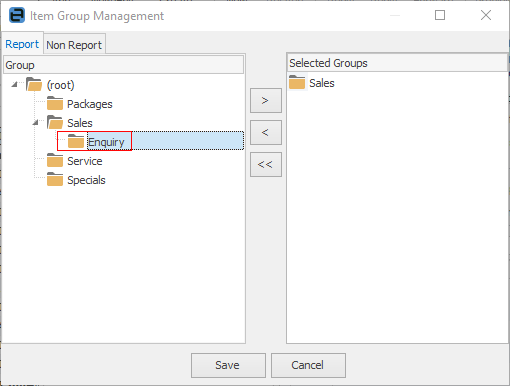
Enter the new group or child group name and press Enter. The new group will now be available and can be applied immediately by using the arrows in the centre to move the new group to the Selected Groups side of the screen.
![]()
5.When all the appropriate groups have been applied to the Item, click Select.
 |
When adding report level groups to Items, only one group can be assigned for each level. They must be consecutively ascending, ie. to assign a level 2 group, a level 1 group must be assigned first.
To add the group, select the last child group – this will add all groups above as well. A parent group, then the child group cannot be chosen.
 |
Further information