
An Item, which is used only in jobs, quotes and contracts, is used for three purposes:
1.To display the actual stock object information, along with make and model that is being sold, serviced or repaired (eg. specific type/brand, make and model of a pump).
2.To display the category of work being carried out (eg. onsite, rework).
3.To store a bill of materials for products that are manufactured.
This section explains the function of Items within the work process, and the interaction of other Jim2 objects in managing the information maintained within an Item. The Item in a job interacts with the stock and can be assigned as the responsibility of single or multiple user(s). See below for an example.
An Item is used as a means of automating various functions within the system, including tracking and reporting. An Item can be set up with related stock, so the user is prompted to add the related stock to a job.
The Item describes what is to be serviced in a service job, what is to be manufactured in a manufacturing job, and what sort of sales job is to be executed.
One job is added for each Item entering the workflow. A list of Items the company uses will show areas of competence – selling, servicing or manufacturing each Item.
 |
Be careful not to confuse stock with Items. An Item represents the prime objective of a job, ie. the method of sale, service, etc.
If an Item can be identified as applicable to both sales and service jobs, add that Item as a Sales Item as well as a Service Item, ie. add two Items (with different names) using each type. |
Whilst an Item may not necessarily be required, the following explains how to add one.

1.On the ribbon, go to Items > Add Item. The Adding new Item form is displayed.
 |
Some fields will have information defaulted into them automatically by Jim2. This default information can be overridden by entering text in the field. |
2.Enter a code that will easily identify this Item.
At this stage the Item can be saved, although Jim2 will warn that the the Description, Make and Model fields should be completed. These can be added later, if required.
3.Enter the description of this Item in the Description field.
4.If required, either enter or choose from the dropdown options, to enter the make and model of the Item in the Make and Model fields.
|
Make and Model fields are free type fields. The dropdown options for both build up over time when new makes and models are added. |
5.Enter the name of the user (optional) who is primarily responsible for selling or servicing this Item in the Default Name field, depending on the job type. If there is only one person capable of this function, tick Default Name Only as well.
6.In the Job Type of the Item header, choose whether this Item relates to a sales or service job from the dropdown options.
|
If the Item relates to a sales job, an additional checkbox (Update Job Name on Invoicing) is available. This will update the Name on the job to the person invoicing the job. This would be used in a sales environment where commission is paid and the person who added the job is not necessarily the person who should be credited with the sale. Enable Invoice Authentication Required in Retail Options for this to work correctly. |
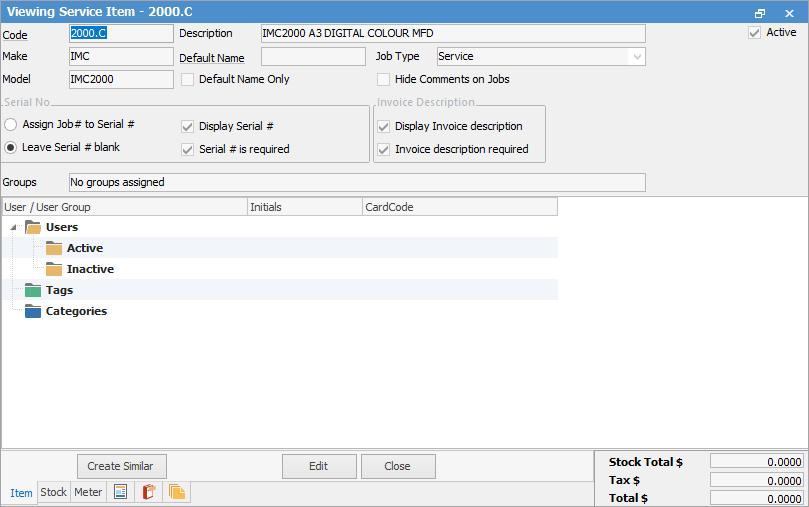
7.In the Serial Number section of the Item header, make selections that apply to this Item.
8.In the Invoice Description section of the Item header, tick the boxes to have an invoice description for this Item, and whether to display that description.
9.Go to the Stock tab at the bottom and add any stock related to this Item.

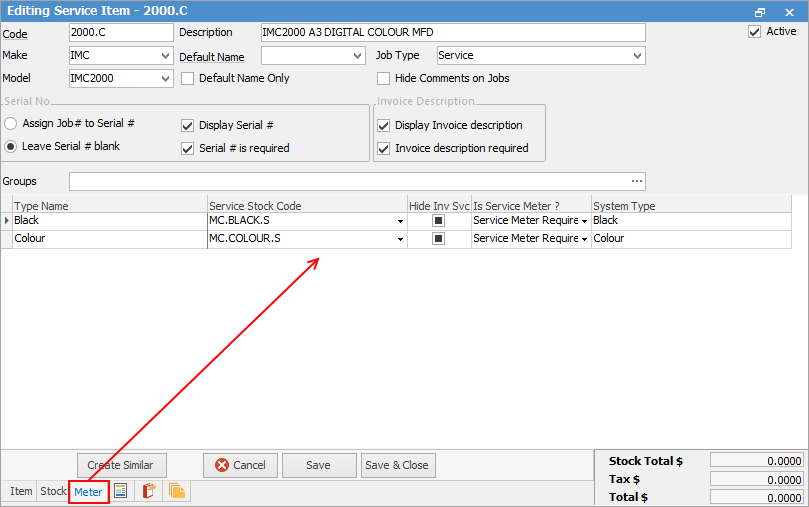
10.Go to the Meter tab at the bottom, and add the meters required for this Item.
Hyperlinked fields
The following Items fields provide hyperlink access to view associated information. Hovering the cursor over the wording to the left of the field will display the label name in blue if it is hyperlinked. Click on the label and choose the option to view. Code – will open the cardfile of the code entered here.
Further information