
Actual labour, or user's time, can be added to any Jim2 object displaying the Labour tab in the footer at any time. In this instance, how to add actual labour to a job will be shown. The amount of time added to the job labour grid does not necessarily on-charge to the customer, however it can be used to track processes.
For example, a new service is introduced by the company. All users who make any contribution to that service should log their actual time needed to complete each process, along with any stock being used. This allows to better cost out the new service and devise a realistic billable charge to the customer.
|
Actual labour can be used to produce accurate productivity figures, showing individual improvement or overall process improvement. If productivity is a key business indicator for the company, users should be encouraged to use the Actual Labour grid within the job. |

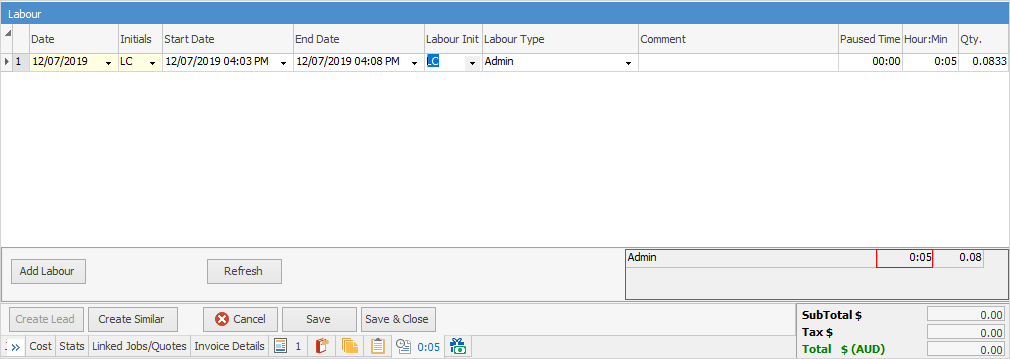
Only add appropriate actual labour to the Labour grid of the job, and this will keep a running tally on all inputs (shown in the footer of the Labour tab). That total will guide in how much billable labour (stock) should be added to the stock grid of the job, as this will be invoiced to the customer at their price level.
|
It is important to realise the difference between actual and billable labour on any job. Billable labour is actually a type of stock that can be added (in defined measures) to the stock grid of the job, and be invoiced to the customer at their price level.
Measures of actual labour (time) spent on a job by users is recorded and can be accessed via the Labour tab on the job form. A running tally of all labour added in the Labour tab is kept in the Labour Total field shown in the footer of the Labour tab. |

1.With the Job in edit mode, select the Labour grid by either:
▪Pressing the F7 function key, or
▪Going to the Labour tab at the bottom of the job form.
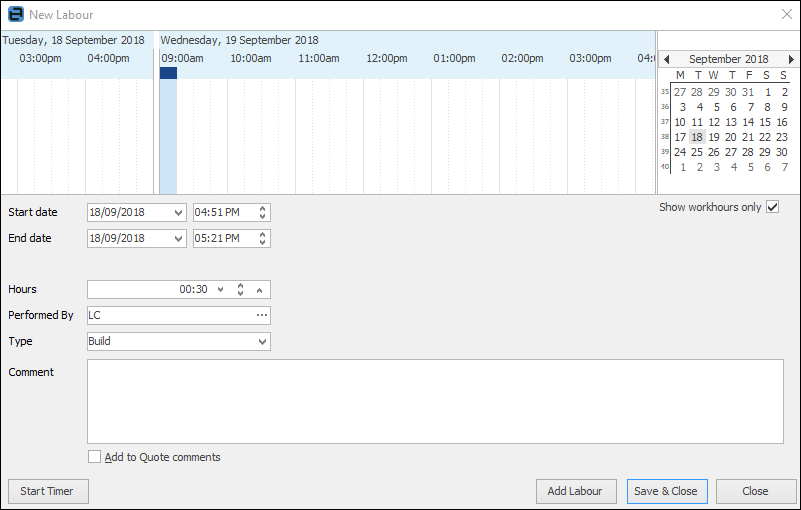
The screen will appear with the following fields already updated:
Start Date |
Which is the system date and time. |
End Date |
Which is the system date and time. |
Performed By |
The user's initials from their cardfile. |
Type |
The user's default Job Type from their cardfile. |
You can override this default information by using the Tab key or mouse to move to that field, highlight and re-select.
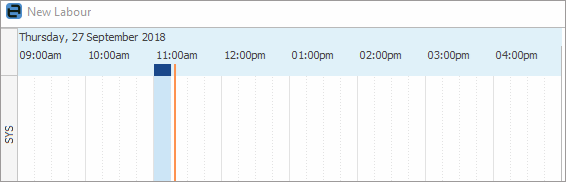
Alternatively, click and drag the blue area in the grid to add time:
2.Enter the actual labour hours and minutes in the Hours field. Enter a colon (:) or use the space bar to enter minutes as well, then click OK. Alternatively, specify a start and end date/time, then add a comment related to the time spent.
|
The following features appear when right clicking in some of the fields in the Labour grid while in edit mode.
|
Further information
Export Labour Hours from a Job