
|
The drag and drop feature does not work within Jim2.Cloud. |

The following explains how to add a local document, as well as how to add a document from an email attachment.
Add a Local Document
1.Right click on the local file, and select Copy.
2.With the object screen open (job, etc.), you now have two ways of adding the document to Jim2.
▪On the Quick Access toolbar, click on the Add Document from Clipboard icon (this is the quickest way to add a document).
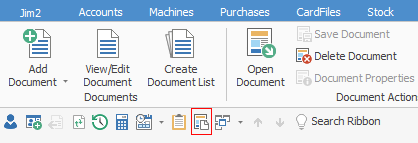
▪Select the Documents tab from the ribbon:
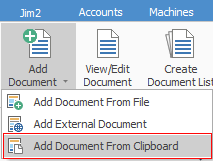
3.Select Add Document from Clipboard option. The document will be copied up, and may take a moment or two, depending on the size of the document. Jim2 may appear unresponsive while this is happening.
4.When the file has been copied to the cloud, you will receive the following prompt with an additional ticked box: Link to Job #xxx (or whatever the object is that you have open at this time).
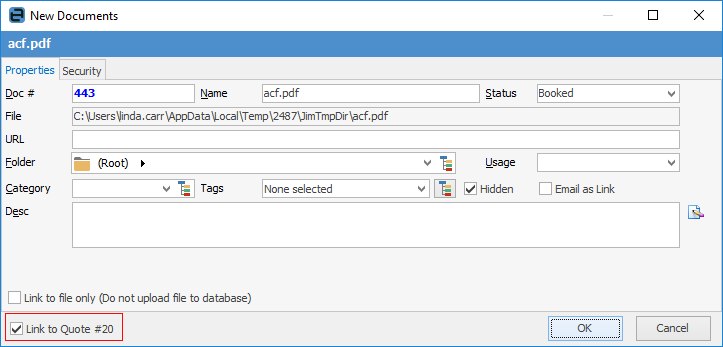
5.Tick Link to Job#, then click OK.
Update the folder, category and tags, if applicable.
Add a Document from an Email Attachment
1.Right click on the attachment in your email program, and select Copy.
2.From within Jim2.Cloud, go to the Documents tab of the object (job, etc.) you wish to attach the document to.
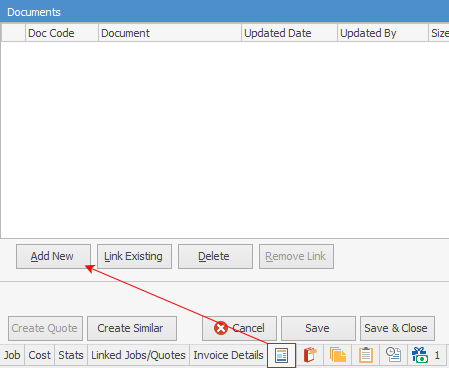
3.From the Documents tab click Edit, then Add New.
4.The screen that appears is your My Documents directory in the Cloud. Right click in a blank area and Paste the attachment. Depending on the size of the attachment, it may take a few moments to upload.
5.When you see the attachment appear, select it and then click Open.
You will now be presented with the same Jim2 Document screen as per the above image in point 4 above.
Further information: