
The core component of Warehousing is the synergy of your physical warehouse and Jim2. This happens as a two-fold process:
▪identifying the layout of your storage area in Jim2 through stock bins; and
▪setting up workflow processes as in Warehouse Management and your business procedures.
Bins can be added in two ways:
1.Manually – typically used for making minor changes/additions to your warehouse.
2.Using the Stock Bin Wizard – typically for the initial setup of your warehouse, or for large additions.
On the ribbon, go to Tools > Setups > Stock > Stock Bins.
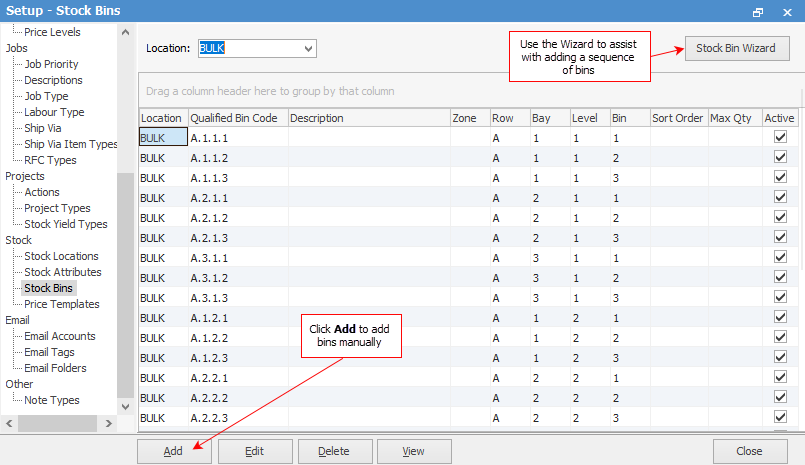
1.Add Bins Manually
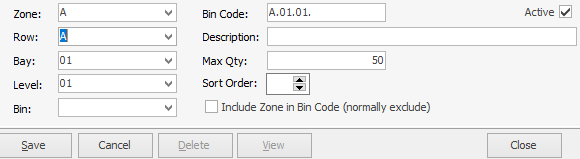
▪Enter the zone, if used.
▪Enter the appropriate row, bay, level and bin numbers (mandatory fields) – a qualified bin code will appear in the Bin Code field. An optional bin description can be included.
▪Select the Sort Order if required.
▪If using Zones, the zone can be optionally included in the Bin Code.
▪Max Qty allows you to enter the maximum quantity that will fit in the bin.
▪Active: ticked means this bin is being used. Unticked means this bin is not being used.
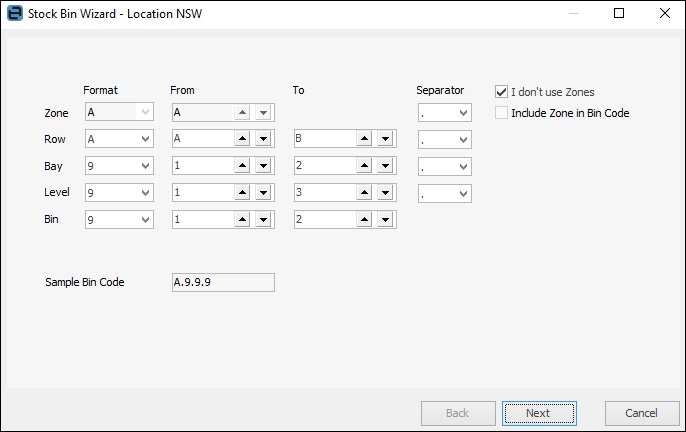
▪This virtually follows the same process as in 1 above, except that you have a choice of format and separator style.
▪Enter the starting and ending number for each row, bay, level and bin.
▪Use the two tick box options as appropriate.
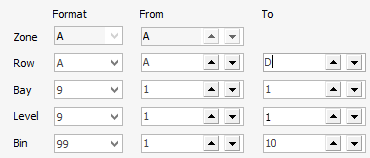
Warehouse Layout – A Practical Example
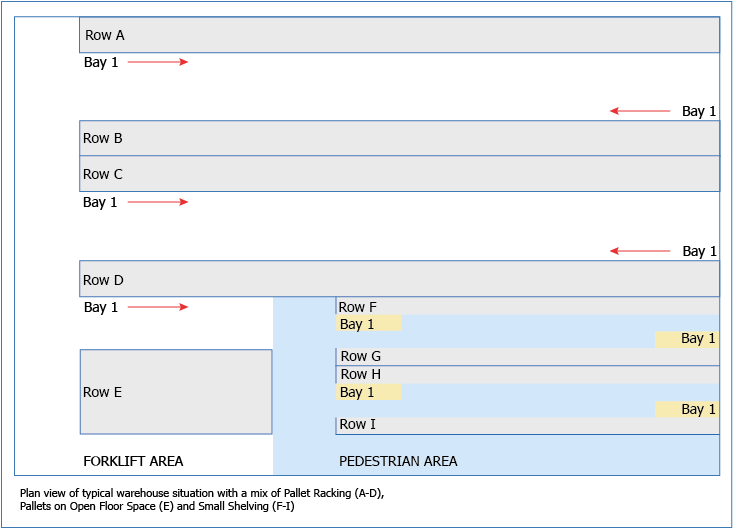
1.As shown in the example above, the Stock Wizard was used to create Rows A to D,
then
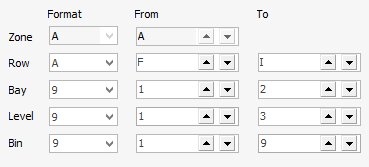
2.Rows F to I (the shelving) were created, again using the wizard, with these settings below:
and finally:
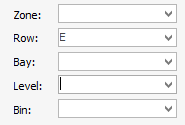
3.Row E (the floor space) was created by clicking Add to open the Add Bin screen and typing E into the Row field.
See Also: