
Invoicing follows the normal Jim2 procedure once the job is completed. Several invoicing options are available to suit each particular business application.
Identify the Billing Jobs to be Invoiced
Run a list of jobs by type Billing Meter and Finish.
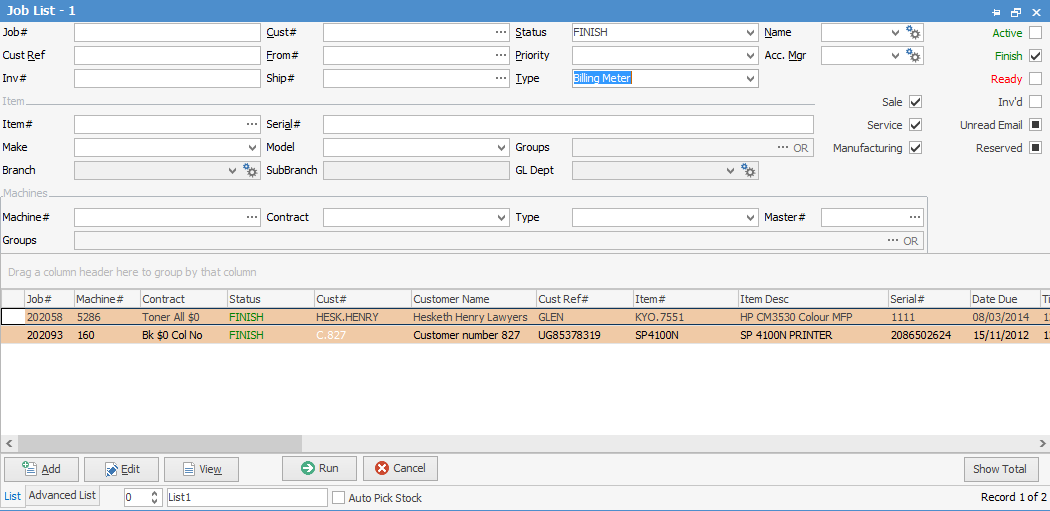
As with all Jim2 lists, additional filtering can be applied to display a smaller, more specific list.
|
You will see some letters underlined in the field names within the header, eg. Cust#. Using Alt+ the underlined letter will jump you to the field beside that heading. |
Invoice Jobs Individually
In the above example, the jobs are on green Finish, meaning they are still Active. Each job will have to be edited individually and invoiced by pressing F6 or the Invoice Job icon.
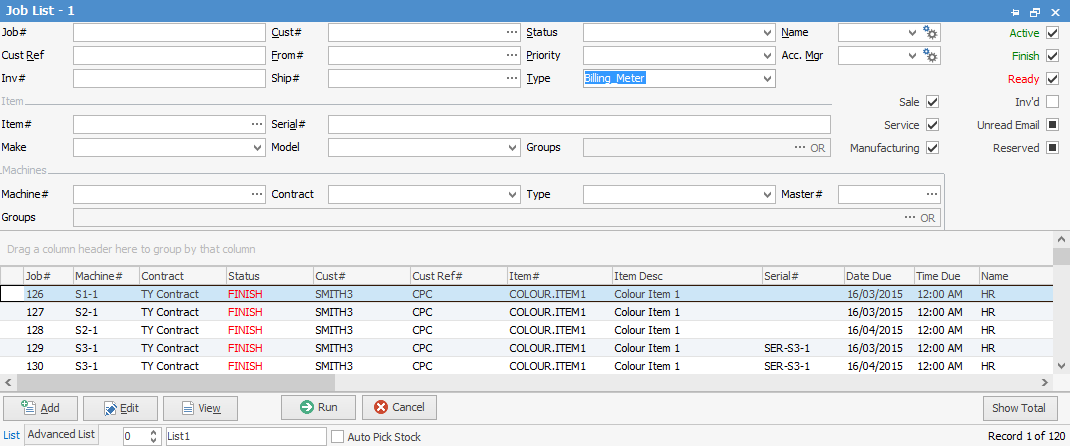
Jobs that have a red Finish, are ready and can be invoiced by opening without going to Edit.
Invoice Jobs in a Batch
Only jobs that have been set to Ready can be invoiced in a batch.
Run a list of jobs by type Copier Billing and Finish as previously but also untick Active and Finish in the top right of the list.
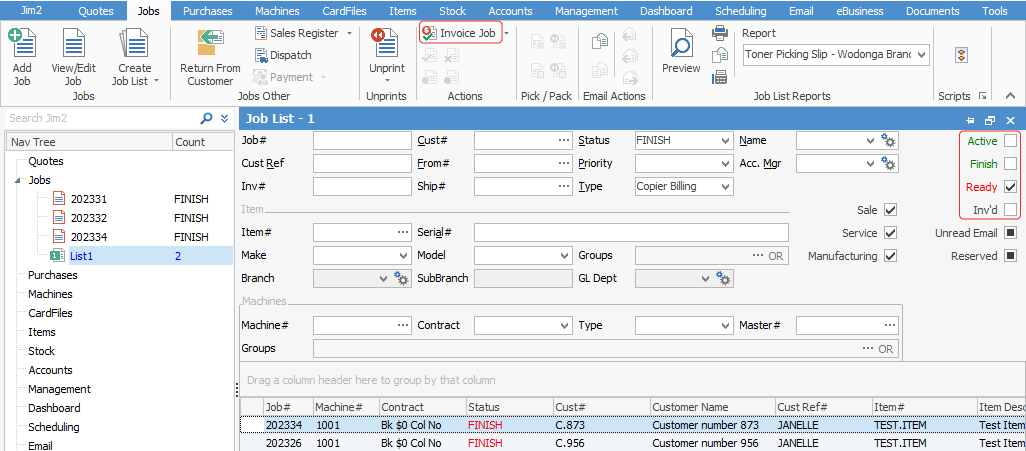
This list only displays jobs that are ready (red Finish), and notice that the Invoice Job icon is active, meaning these jobs can now be invoiced directly from this list.
This whole list can now be invoiced by pressing F6 or the Invoice Job icon, and Jim2 will produce as many invoices as there are billing customers.
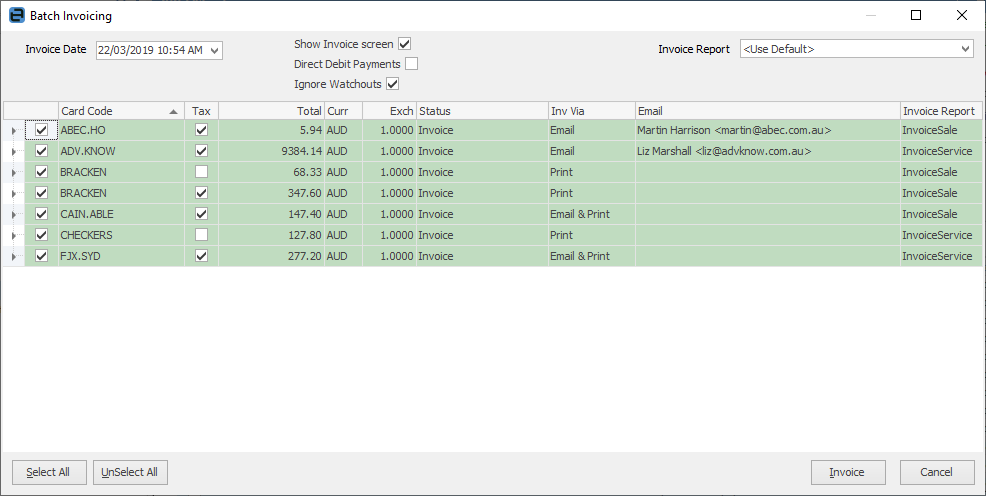
Where there are multiple machines for the one billing customer, Jim2 will consolidate those details on the one invoice.
Invoiced jobs are ordered by the following:
•Job's Ship No
•Job Status
•Machine Type (Master Machines are ordered first)
•Project Code
•Job No
Again, this list can be further filtered to specific customers, invoicing types, or any other criteria required by following the normal Jim2 List process.
|
You can tell Jim2 to use the same invoice layout for consumable jobs that you use for meter billing jobs.
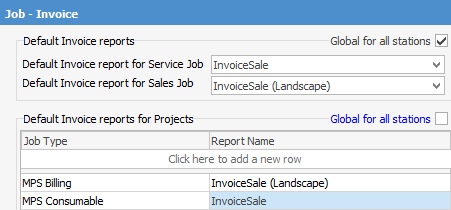
When you batch invoice they will all be on the one invoice. |
Invoice Customer for Multiple Jobs
If a master contract is used, then we have available several other invoice layouts.
This invoice layout shows only the summary of the contract, showing the minimum and billed volumes and any unders or overs (if there are any).
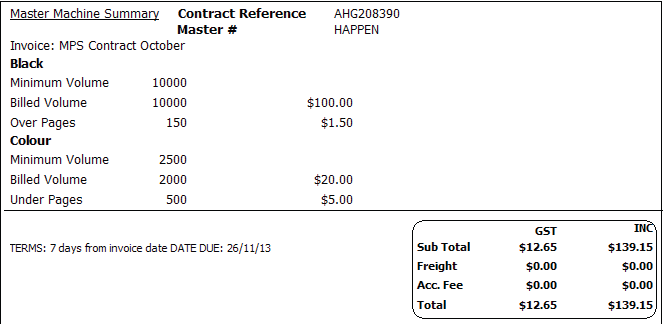
For a lot of customers, this will be sufficient, and they may only require more if they feel there has been an error.
InvoiceMeters Master Detailed
Run a job list and tick the Ready box, then select Type Billing (or whatever you have named it), then choose your customer.
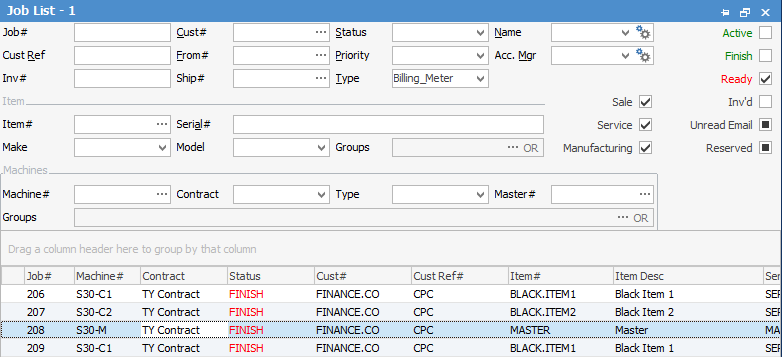
If we select the Invoice Job icon from the ribbon, and select the Invoice Meters report, we should get something similar to the following:
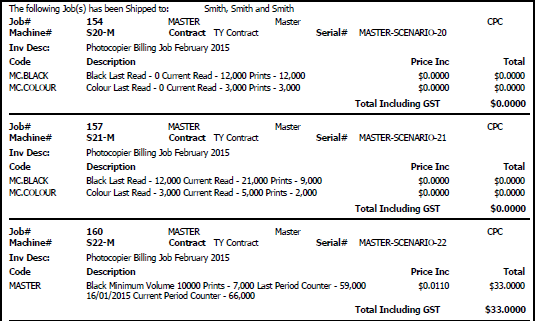
Invoice Meters Master
When dealing with master-child contracts, the invoice may have more specific requirements.
For those customers who wish to see how this total is calculated, you may need to provide a copy of the InvoiceMeters – Master Detailed report.
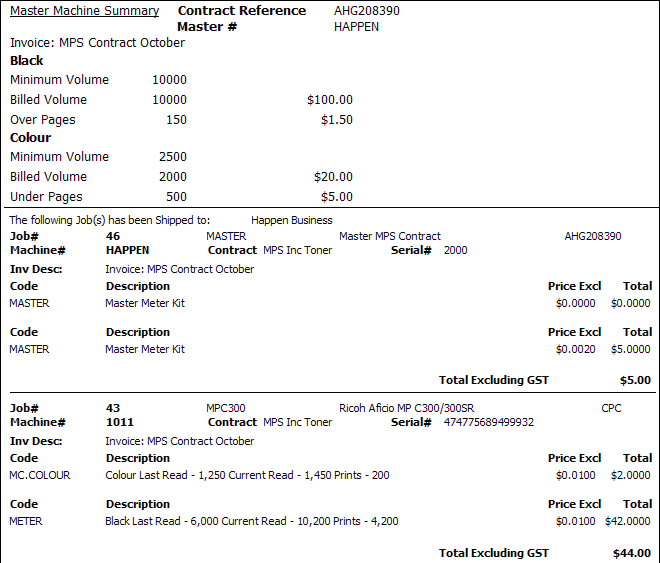
In all cases, the preferred layout can be set on the card file of the customer, if it differs from the default. Each machine can have a different invoice description to the default via Tools > Options > Machines > Machine.
Net Overs and Net Clawback fields on invoice
The master invoice summary may calculate that there were 2,000 over pages, and 750 of these were clawed back. This would display two lines on the invoice summary.
If the rates for standard and overs pages are the same, then this has exactly the effect as just having only 1,250 over pages, which simplifies the invoice appearance.
It is even more important when they cancel each other out. If you have 600 overs and 600 pages clawed back this can be unnecessarily confusing on an invoice. In this case the NetOvers and NetClawback fields would both be empty, requiring no other line than the Min Volume line.
|
If you have invoiced a service meter, and discovered you have entered the wrong reading, go to the Invoiced Job tab on the bottom of the machine and view the service meter jobs. Unprint the invoice in question. Fix the read, then re-invoice. |
Further information:

