
Project templates can be created during the Action Wizard process, or via the Template List within Jim2 Projects.
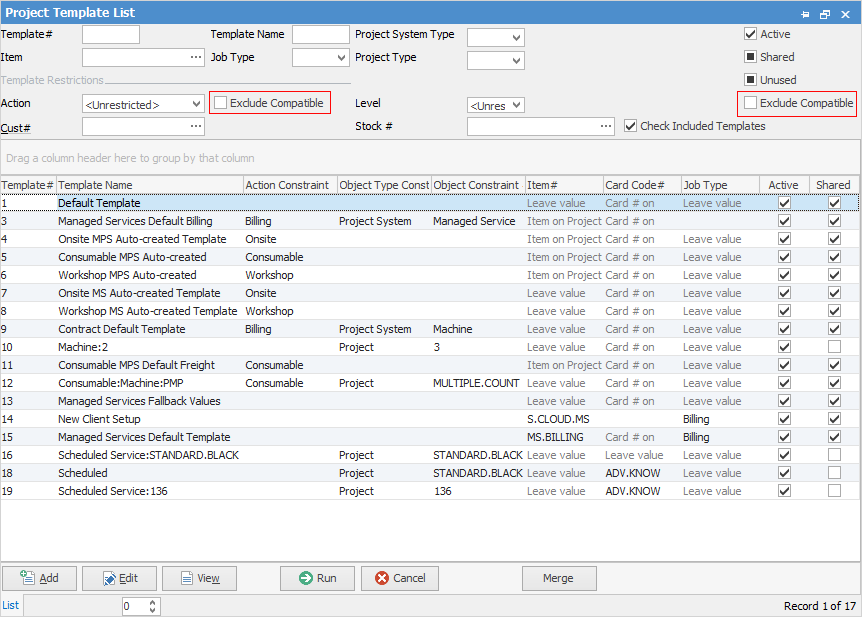
The Template List is where see all the project templates within Jim2. Billing templates are used when generating billing jobs from projects. In addition, there are some default non-billing templates.
|
Exclude Compatible checkbox: Most templates use inherited templates – for instance, the Default Template (or whatever it has been renamed).
Ticking Exclude Compatible for Action, when run, the list will show only specific templates with no Action constraints.
Ticking Exclude Compatible on the far right side, and selecting Project System Type Managed Service will show the specific templates with no constraints for that Project System type. |
Creating a New Template
Click Add from the bottom of the Template List. Click Change Template to edit the Template.
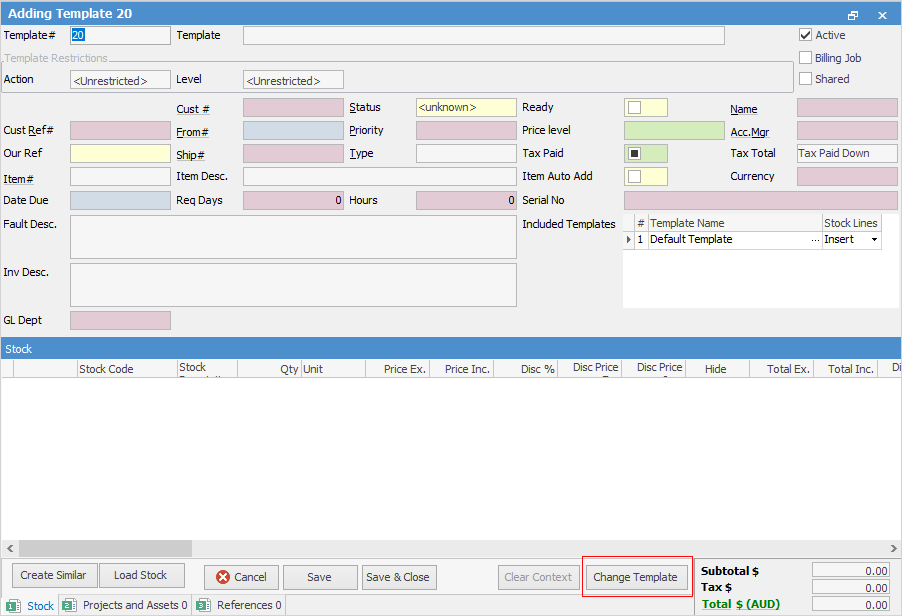
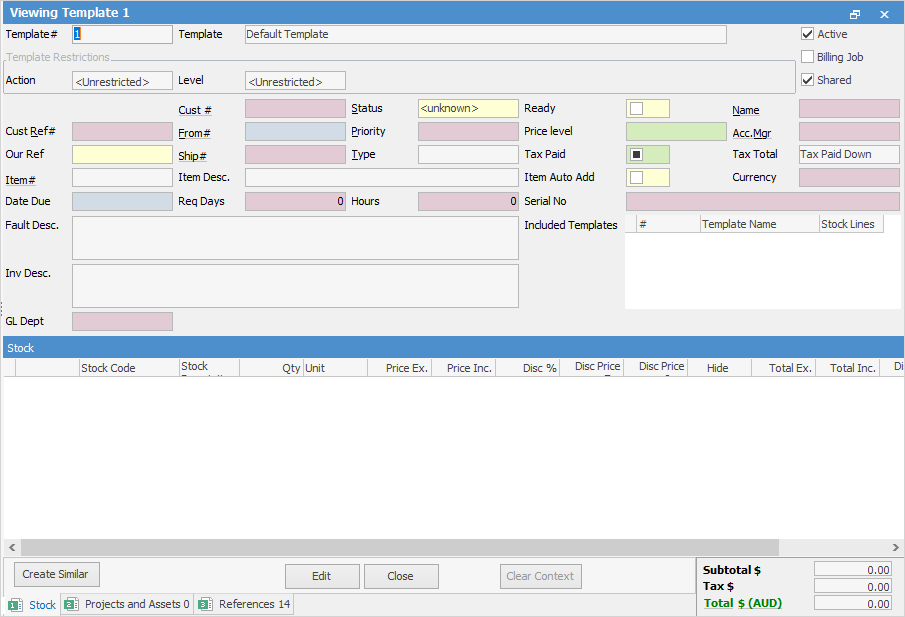
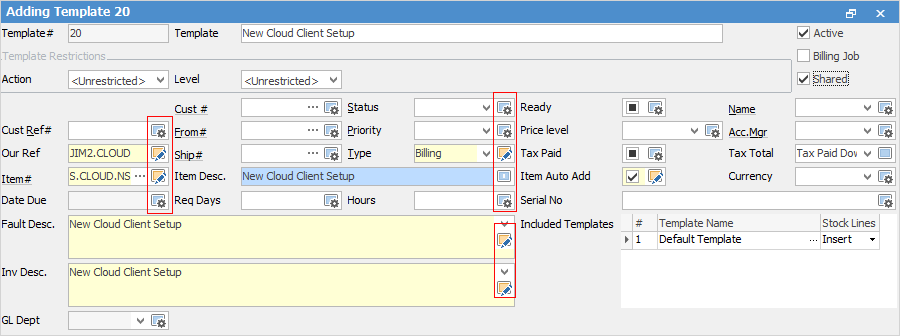
The fields have different colour shading, which is designed to help understand where the values in a template are being derived from. See below for an explanation of the colours. There is an included template.
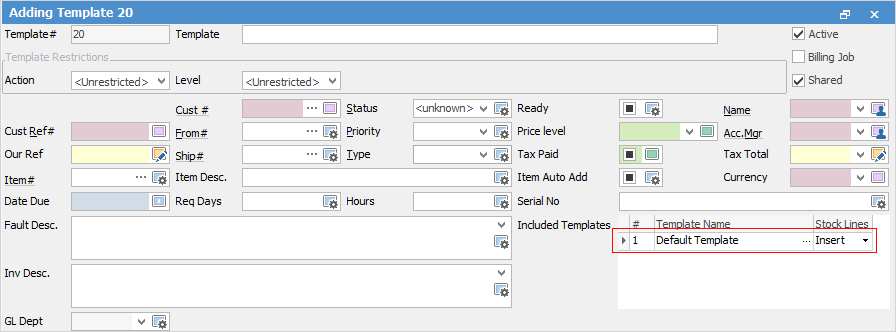
All new templates will inherit values from the Default Template (included template), which see in the list of project templates. This can be removed from included templates, or changed to another template at any time by clicking the ellipsis [...] in the Template Name field.
 |
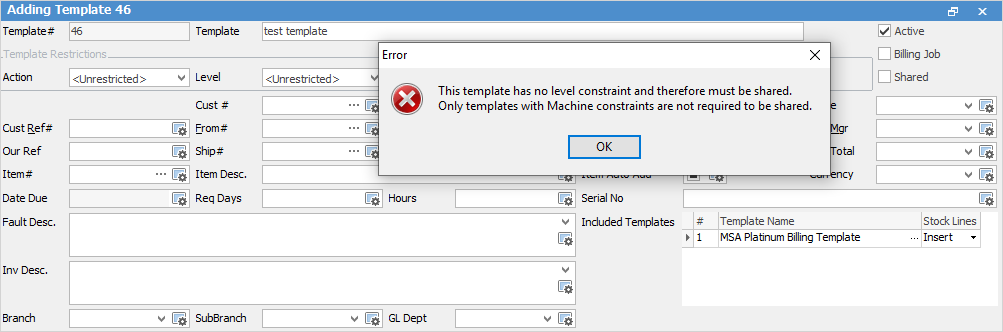
Note: As there are no Level restrictions on this the template, it must be shared. |
The Default Template already has some key values configured, which saves having to configure them for every template created.
This is a sample template:
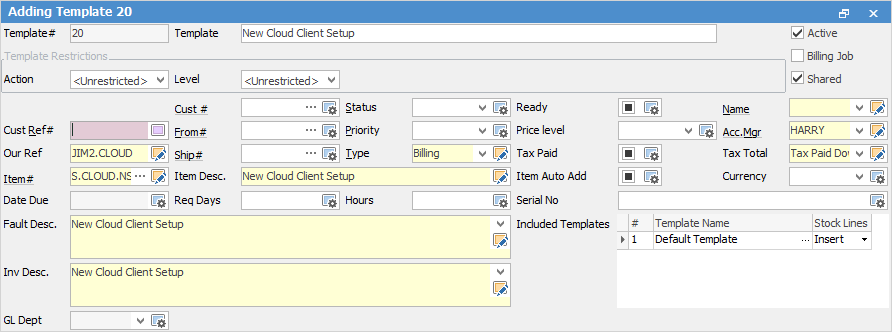
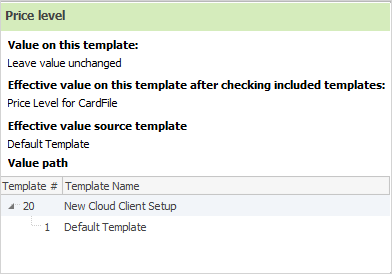
Effective value source template – New Cloud Client Setup
Value Path – Template Name New Client Setup
Add Stock
Add stock to the template, which will drop that stock into the projects. The order of the stock lines can be changed within the stock grid via drag and drop. Click and hold the mouse in the area left of the stock line number, then drag to where the line is required to sit.
Select more than one row at a time using the Shift key.
To add more stock, click Change Template, go to the stock code field and click the ellipsis [...] to add a new stock line.
To copy from another template, in Edit mode, click the Load Stock button.
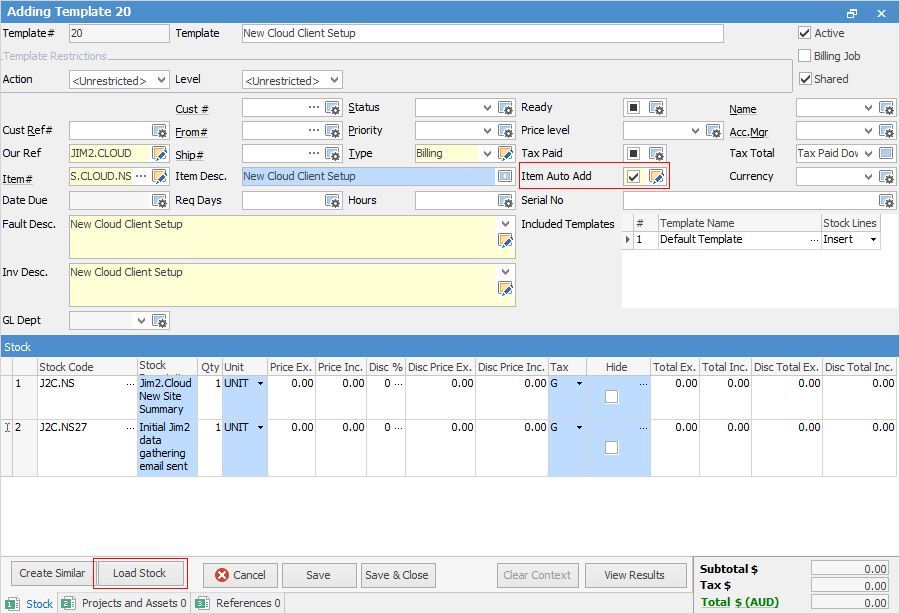
The template lookup screen will be presented, where a user can select the template to copy stock from.
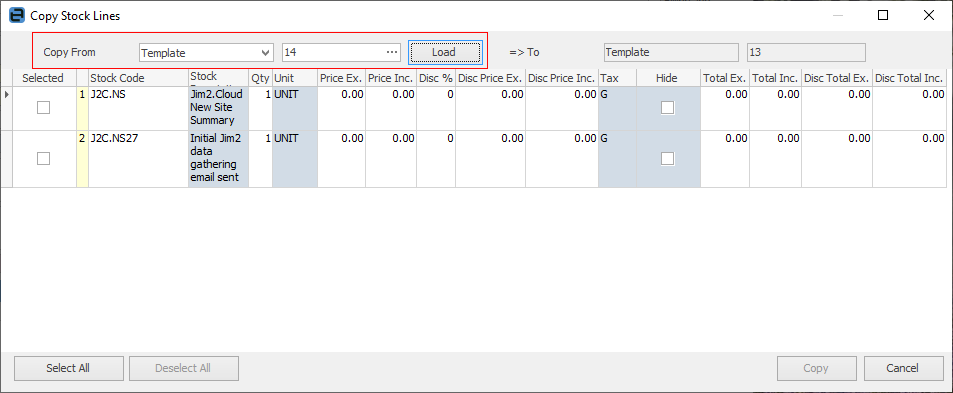
Select all stock or individual stock lines to copy to the other template.
|
It is also possible to copy/move/merge stock from other jobs, quotes or project templates, and kits can also be added in templates to allow for applying stock checklists. |
Updating a Template
First, decide to add to this template specifically and what can be left alone to use inherited values.
Click Edit to move from View to Edit mode to make the changes.
The following image shows the template in Edit mode (after clicking Edit, click Change Template):
|
When an Item is added to jobs using project templates, auto-add stock is only triggered if configured in the template to do so. |
When hovering over the fields in the header, an explanation of where the value is coming from will appear. For example, highlighted Cust Ref# pop-up explains it is coming from the customer card code on the project.
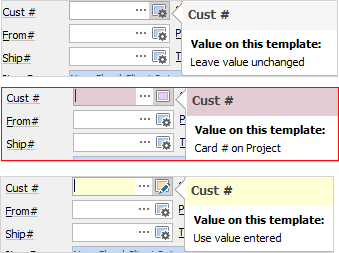
Yellow – The value here is set at the template level.
Red – The value is being inherited from either the project, or a higher-level template association.
Green – The value is coming from the default on the cardfile.
Blue – The value is coming from a default source such as stock code, Item code or logged on user.
White – There is no value, and the value on the job will have no value when created.
There are some other important settings:
Active – Whether the template is active, and can be used.
Billing Job – Ticked only when the template is being used for billing job creation.
Shared – Whether this template can be shared, and potentially used by many projects. If there are no Level restrictions, this must be ticked.
Not Shared – Generally used by billing jobs with project specific settings and stock.
Action and Level Restrictions:
Action – This template can only be associated to the action specified here.
Level – Further restriction of where the template can be used.
▪Asset – can only be used on a specific asset.
▪Action – can only be used with the action specified.
▪Project – can only be used on a specified project.
▪Project Type – can only be used on a specified project type.
▪Project System Type – very high level, ie. can only be used for Managed Service types.
|
Note: If Level is left at Unrestricted, the template must be shared.
 |
How to
Project Job Implementation Templates Example
Project Template Creation Example 1