
Areas within the database may actually relate to different areas of the company, and there may be times when reports are needed on the profit/loss situations for different areas. Branches, sub-branches and GL departments are all used for this purpose. Using all, none or some of these functions, and whether they are optional or required fields, can be decided here.
Within Tools > Options > Branches, select which company logo report to be printed on specific documents: sales, purchases and debtors statements. Any or all can be used for: Default, Branch, or Sub-Branch.
If branches are being used, on the ribbon, go to Tools > Setups > Accounting and select Branches.

 |
The Branch setup screen shown below will only be visible if these have first been enabled in Options > General > Branches (log off and back on for this to take effect). |

The example here shows the Branches section with the Brisbane store information that has been set up.
There are three fields and one checkbox available when adding or editing a branch location.
Entry Option |
Purpose |
|---|---|
Code |
Enter up to ten alphanumeric characters for the branch code. |
Name |
A name/description of the branch. This can be up to 25 alphanumeric characters in length. |
Card Code |
If a cardfile for this branch has been set up, it can be added here. This is optional, however see Branch address below for more information. |
Active box |
Tick this box to make the branch active. If subsequently disabled, a warning will appear when entering transactions that the branch is not currently in use. That branch can still be used if required. |
|
A branch that is currently in use in the Jim2 database cannot be deleted, however it can be deactivated. If Branches are enabled at a later time, it will not be retrospective, ie. it will not affect any transactions prior to the date Branches was enabled. |

The following steps must be taken to apply a different address and logo.
Branch address
Create a new cardfile which will be used for the address information, and link to the branch in settings as per above. This will ensure that the address used in the new cardfile is used for the branch created.
▪On the ribbon go to Tools > Report Designer.
▪Open the Logo folder.
▪Highlight Company Logo.
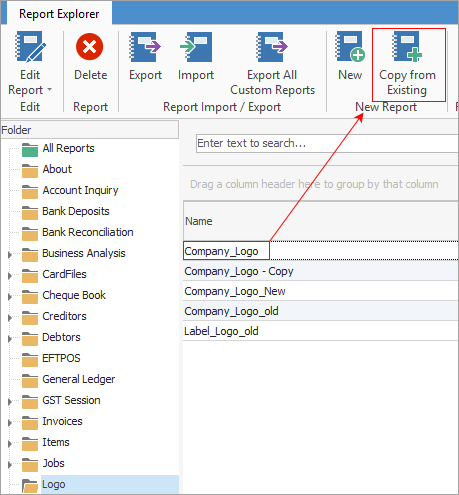
▪From the ribbon select Copy from Existing.
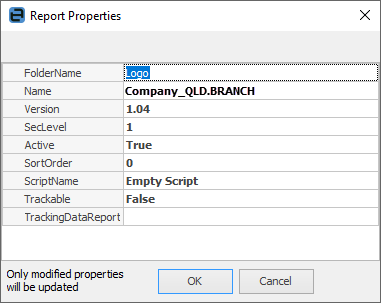
▪In Name, update to Company_branch (where branch is the branch card code).
▪Click OK.
Edit the new logo report and update it with the new branch logo.
Further information