
This will explain how to add branches to the Jim2 database, and how to add logos to differentiate branches on invoices, quotes and purchase orders.
Add cardfiles
Add a cardfile for each branch. Tick both Customer and Vendor. At this point a default branch is not selected, as the default branch has not yet been set up (see below). Save the cardfile.
|
The delivery address on the cardfile is important. Address can be a post office address, whereas Delivery Address is the physical address used for delivery of goods. |
Enable branches
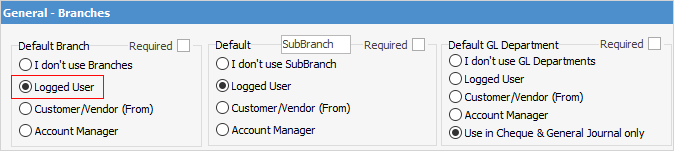
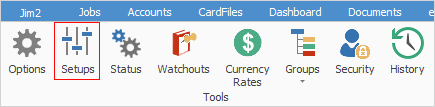
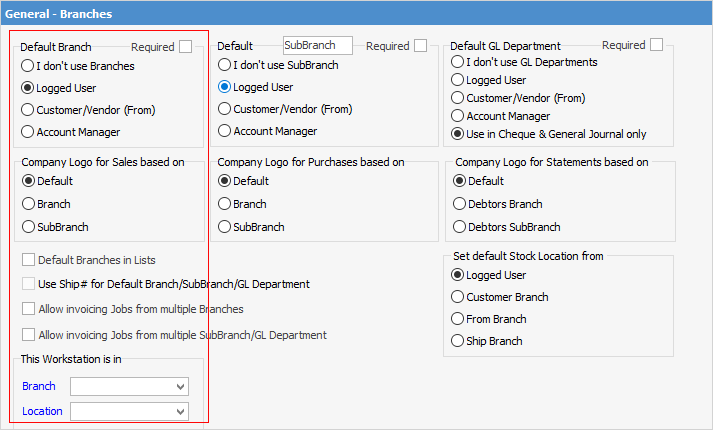
On the ribbon, go to Tools > Options > General > Branches.
Make a choice in the Default Branch option (defaults can be manually changed in objects). For example, in this image the logged user's default branch will automatically populate relevant transactions. Click OK.
 |
Enabling the use of Branches at a later time may result in warning messages requiring selection of a branch in some objects where it wasn't required before. To overcome this, go to Tools > Options > Branches and untick Required, click Refresh and try the transaction again.
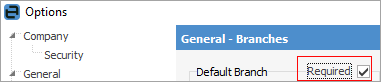
Once finished, re-enable Branches in Options.
 Refresh icon (above the ribbon)
Once the transaction is completed, return to this option and tick Required. |
Set up branches
On the ribbon, go to Tools > Setups > Accounting > Branches.
Click Add. Enter a unique code (up to 10 characters) to identify the branch. Enter the name of the branch. Select the card code set up earlier. Tick Active, then click Save.

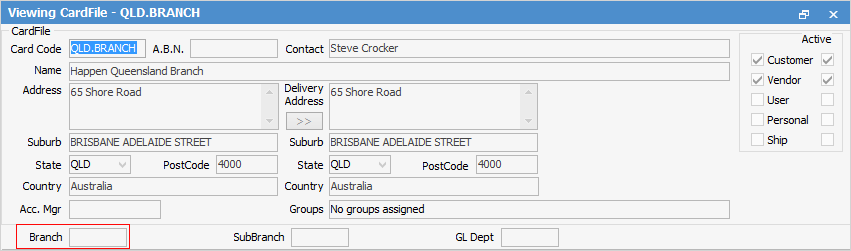
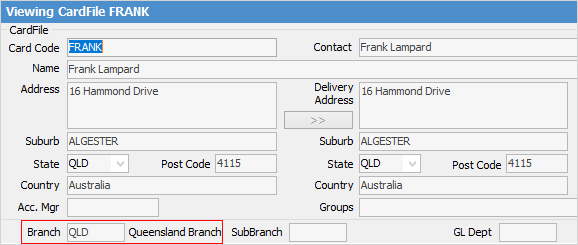
Once the default branch setup has been completed, enter the default branch in the cardfile.
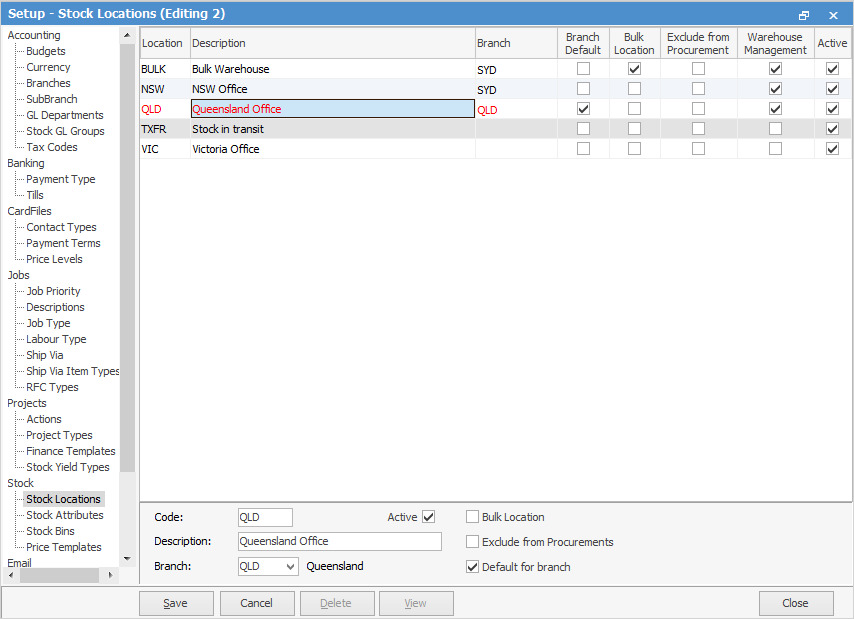
Add stock locations
This step will set up stock locations, and link to the branch. On the ribbon, go to Tools > Setups > Stock > Stock Locations.
Click Add. Enter a unique stock location code and description, then select the default branch. Tick Active and Default for branch.
If separate logos are to be used for the various branches, these will need to be set up in Report Designer. On the ribbon, go to Tools > Report Designer.

Navigate to the Logo folder in the Nav Tree and select Company_Logo, then click Copy From Existing on the ribbon. Copy the report and add an extension as per the card code (ie. card code is QLD.BRANCH, so Company_Logo QLD.BRANCH), then add the new logo.
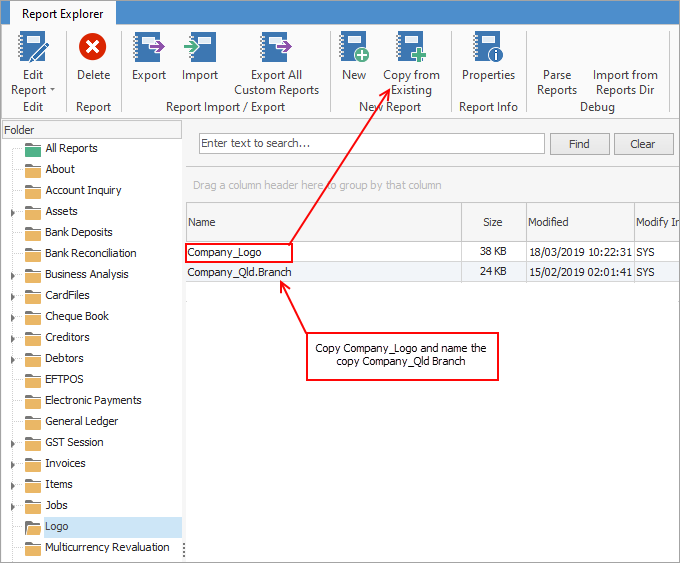
See Display Company Logo in Reports for more information on preparing the logo.
Finalise the settings for branches as required in Tools > Options > General > Branches.
Default Branch Field |
Description |
|---|---|
Required |
Choose this option if all transactions will require selection of a branch. Jim2 will not let users save the transaction without entering the branch. |
Logged User |
Jim2 will select the default branch from the logged user's cardfile. |
Customer/Vendor (From) |
Jim2 will select the default branch from the customer/vendor (from) cardfile in the transaction. |
Account Manager |
Jim2 will select the default branch from the account manager's cardfile (account manager selected against the customer/vendor cardfile. |
Open the user cardfiles and select the default branch for each user.
Throughout Jim2, if branches, sub-branches and/or GL departments are in use, these fields will appear in the headers of all objects and lists.
|
If a branch is no longer required, it should remain active so any historical reporting is still correct, however Required can be unticked. |
Further information