
This section of the job form contains a grid that is used to record and automatically price any stock (parts, tests or labour) used in a job that will be invoiced to a customer. Price calculations are in direct relation to the price levels and price breaks (and tax requirements) as set in the customer's card file, and the stock pricing calculation as set in each stock record. The stock grid calculates the sub-total selling price, tax amount and total to be invoiced as stock is added to the grid.
If pre-configured in the stock tab of the Item, stock will be added automatically when an Item is selected in the Job header.
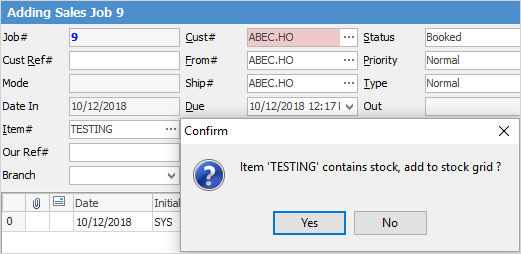
This is commonly used when adding stock where certain conditions are imposed on the job, such as running product tests prior to selling. You can also add additional lines of stock after the Item has populated the stock grid.

The fields within the stock grid are described below:
Field |
Explanation/Usage |
||
|---|---|---|---|
Date |
The date the stock line was added to the job. |
||
Initials |
Initials of the user that added the stock to the job. |
||
Status |
Status allows you to record a unique status for each stock line. The type of status available will change depending on the type of stock, and uses statuses already set up in Jim2. In this example labour stock has different statuses to depleting stock.

Note: You will be asked if you wish to update the status of the job itself – you can update, or leave it as is. |
||
PO# |
The purchase order number related to this line of stock. This will show when you have auto-created a PO from the job.
Note: You cannot add a purchase order number to a job – it will automatically populate on auto create.
|
||
PO Due |
This displays the due date of the linked purchase order at line level or purchase order header due date, if not set at line level.
 |
||
Location |
The location of the stock you are selling – this will default to the location set in the user card file. You can change the location using the drop-down list. |
||
Stock Code |
The user adding stock must select a stock code to identify the product or service being tracked by this job. Selections can be made from the stock records via the ellipsis [...] at the end of this field, which will bring up the Stock Select screen. If the stock code is coloured red, this means that the stock is either special stock or a customer-specific order. |
||
Description |
The description of the stock code from the stock records is automatically placed in this field. You can add or change information in this field. If you have set up multiple measures for this stock, it will use the description appropriate for that measure.
|
||
Unit |
The unit measure for that stock code is entered here. You are able to change the unit measure type by selecting the down arrow beside the Unit field. |
||
Order |
Number of units ordered by the customer. |
||
Supply |
Number of units actually supplied to the customer.
|
||
B. Ord |
Displays the quantity on back order. |
||
Qty Pick |
Displays quantity picked – only with Advanced Warehouse Management. |
||
Price Ex. |
Actual selling price excluding tax. |
||
Price Inc. |
Actual selling price including tax. |
||
Disc % |
Allows you to enter a discount percentage. |
||
Tax |
Tax code applicable to that stock. |
||
Hide |
Ticking this box will hide that particular stock code information. |
||
Total |
Line total (Supply Qty x price including GST). |
You can change the order of the stock lines within the stock grid via drag and drop. Click and hold the mouse in the area left of the stock line number, then drag to where you require the line to sit.

Sell Details

Sell details are automatically added or updated when adding stock to a job, or when recalculating the selling price. The sell details show the source of the selling price (Price Level, Promotion, etc.) and the source reference. The selling price is colour coded to indicate the source, and hovering your cursor over a sell price cell will display the details.
Sell Source |
Colour |
Description |
Price Level |
White |
Sell price is as per price level set on the Job header. |
Different Price Level |
Pink |
Sell price is based on a price level different to the price level set on Job header. |
Customer Specific |
Green |
Sell price is as per the customer-specific price on the related stock. |
Manually Entered |
Yellow |
Sell price has been manually entered. |
Promotion |
Orange |
Sell price based on a promotion. |
Project |
Purple |
Sell price is based on the price level of the related project (only if you are licensed for Managed Services or Managed Print Services editions. |
Min Sale |
Red |
Sell price is set to the stock’s min sell price level. |
Other Price Background Colours
Blue |
This is a kit. |
Pale Blue |
Linked to a PO. |
Red |
The background colour of the B.Ord column will be coloured red if any stock is back ordered. If the Supply plus B.Ord figures do not equal the ordered quantity, both the Supply and B.Ord figures will be displayed in red. |
 |
If the stock you are selling has been purchased specifically for the job (the purchase order stock line has a job number link), the line will show in a light blue colour in the PO and the job. If the stock you are selling is special stock, it will show with the stock code in red and also the line in light blue. |
Right clicking in the stock grid enables several additional features, including:
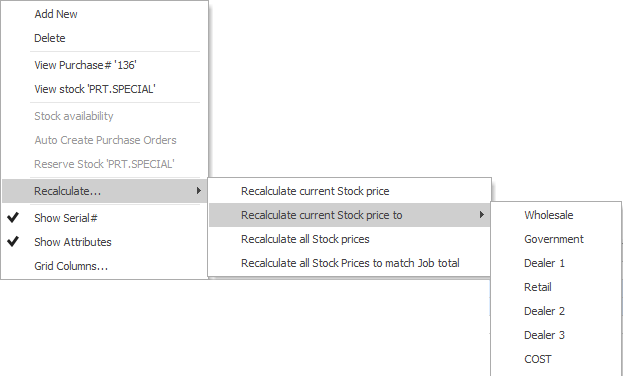
Drop-down Selection |
Explanation/Purpose |
|---|---|
Add New |
Adds a new stock line. |
Delete |
Deletes the line including the stock that has been added to the job. |
View Purchase# |
Is a hyperlink and will take you to the purchase order that was used to order the specific stock for this job. |
View Stock |
Is a hyperlink and will take you to that stock form. Available in Edit and View mode. |
Stock Availability |
This setting gives you the ability to override committed stock (ie. stock allocated to other jobs). |
Auto Create Purchase Orders |
This setting allows you to automatically create a purchase order. Note that linked stock is excluded from this list. |
Reserve Stock |
Reserving stock means that stock is exclusively held for that job and can't be sold, picked or reserved on other jobs. |
Recalculate: |
|
Recalculate current Stock price |
Recalculate the line of stock. For instance, you have changed the original amount, or expenses may have been applied.
Note: If you have manually entered a price, select Recalculate and it will be replaced by the original price from the stock record. We recommend that you change the quantity first, then enter prices. |
Recalculate current Stock price to |
This will recalculate the pricing for the stock line you have selected to another price level you have set up. |
Recalculate all Stock prices |
Allows you to automatically recalculate stock prices to match a certain figure. For example, you have several lines of stock on a job with the total price being $2019.25. Recalculating all stock prices to match job total allows you to enter a price of, say, $1999. Jim2 will automatically adjust all prices based on their selling price so that the job total equals $1999. |
Recalculate all Stock Prices to match Job total |
This will recalculate all stock prices in the grid – useful if you have applied an expense to a line of stock on a particular job. |
Show Serial# |
In the Description field you can choose to show the serial number of the stock item. |
Show Attributes |
Displays stock attributes within the stock line, if applicable. |
Grid Columns...
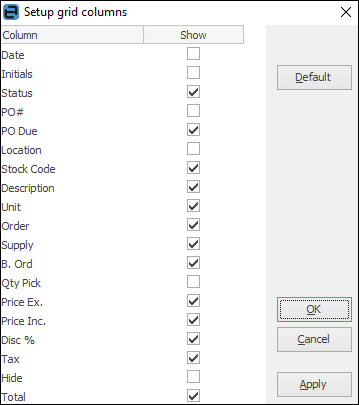 |
This sets up the grid columns that will be displayed in the stock grid. In expanded view, all grid columns are displayed by default.

In collapsed view, the following columns are not shown: ▪Date ▪Initials ▪PO# ▪Location ▪Qty Pick ▪Disc %.
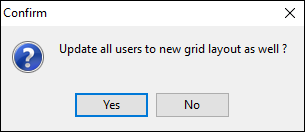
You can add or remove grid columns by ticking the box, then clicking Apply. Once you click OK you will be asked if you wish to update all users to the new layout as well.
|
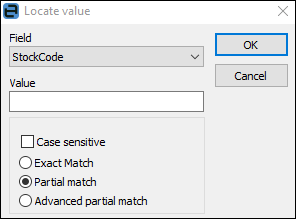
Within the stock grid, you can search all columns and rows by selecting Ctrl+S. This will bring up the Locate value screen, where you can select which field to search and enter the text to search for in the Value field:
Stock search facility is available from within the stock grid by selecting the ellipsis [...] in the Stock Code field (or by using the F5 function key on your keyboard). This will assist you in refining what stock will be included in the stock grid. It will show the available quantity of stock at each stock location – this may affect which stock you choose to supply. In this screen you are also able to select multiple lines of stock by specifying the quantity required of each stock record in the Select Qty column.
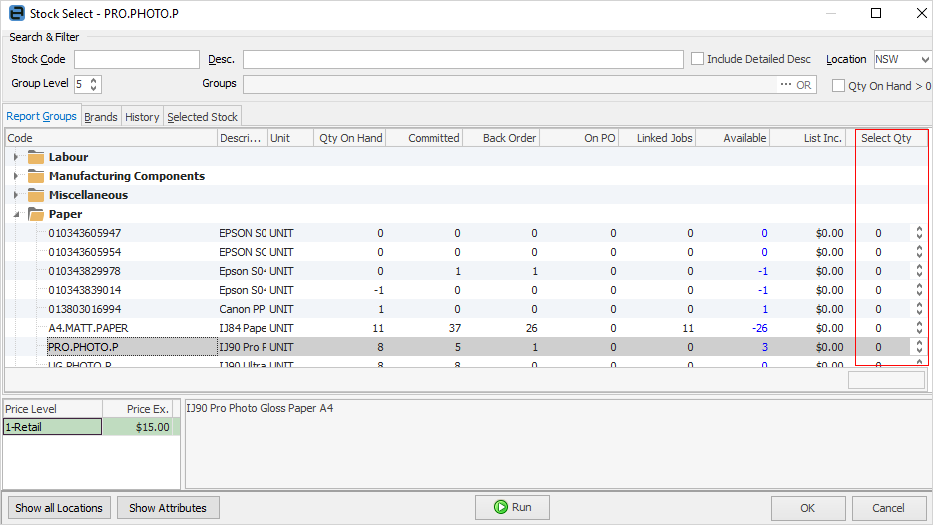
You can review your selection in the Selected Stock tab.

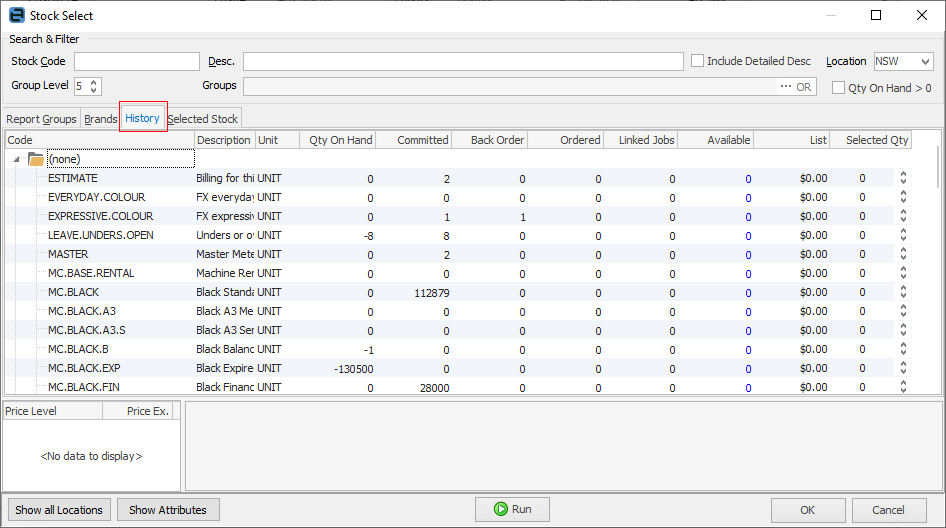
You can also see the history relating to stock, showing what stock has been sold in the last 365 days.
Further information:


