
To add a new user (employee):
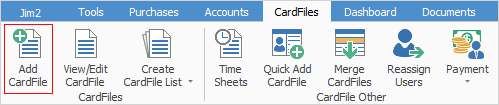
1.On the ribbon, go to CardFile > Add CardFile.
Enter the user's card code, as well as their name and address details.
The Card Code is a unique identifier for each card, and must be entered before the card can be saved. The card code format that the business will use should be established with the intention of maintaining consistency, eg. alphanumeric codes or surname.initial, etc. The card code format can be changed at any time. To maintain consistency, it may be advisable to edit old cardfiles to match the new card code format.
2.Untick Customer (if required) and tick User from the selection in the top right-hand corner of the screen.

 |
Customer can only be unticked when adding a user. If it is already ticked when editing a user, it cannot be unticked. This is not a problem, as users can also be customers, ie. they may buy stock from the company. |
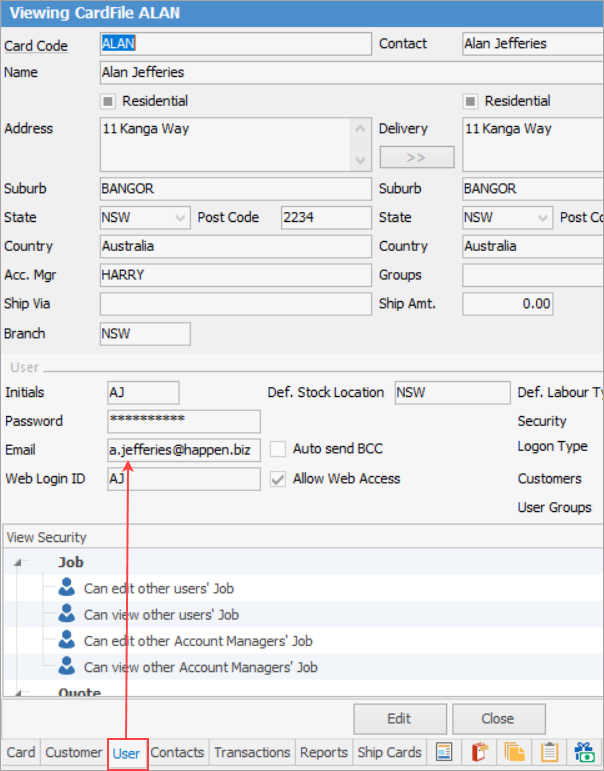
4.In the footer, go to the User tab.
|
Unless User is ticked in the CardFile header, the User tab will not be shown, nor can user details be added. |

5.Enter the following:
▪the user's initials (two or three characters, including full stop (.)
|
Note: The user initials cannot be changed once transactions have been made against the cardfile. |
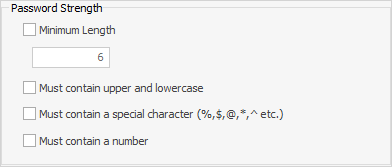
▪a password (as per the strength requirements set in Tools > Options > Security)
|
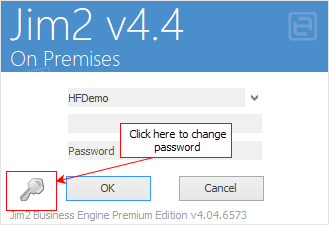
This is also where an administrator can change/reset a forgotten user password at any time. This can only be done if Security allows it. |
▪the default stock location (which is used to set the user's location – choose from the dropdown list). This will be the default shown when Stock Select is used.
|
Note: For multicompany setup, please see here. |
▪the user's security level(s) (choose from the dropdown list)
▪enter the user's email address (if applicable)
|
Note: This is the email address used by Jim2 when sending/replying to emails.
 |
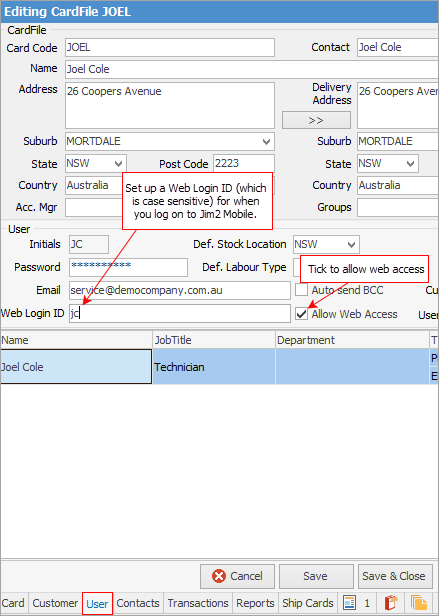
▪enter a Web Login ID and tick Allow Web Access to ensure users can log on to Jim2 Mobile
–Web/Mobile, which means the user can only log on via this method
–API, also meaning the user can only log on via this method
–Accountant, allows an external accountant to log on with a subset of security rights. Accountants can log on to Jim2 on premises without a licence (Jim2.Cloud clients do require a licence, however). Security for the logon can be restricted as per normal Jim2 Security, however, licensing prevents access to anything except viewing debtors, creditors, GL, Account enquiry, transaction journal, cheques, banking, bank rec, till rec., management reports and business analysis, adding/editing (and finishing) general journals and GST sessions. If a user attempts to log on using the standard Jim2 client, it will fail.
| An accountant logon is limited to the following security (ie these security accesses can be controlled by Jim2 Security – all other security accesses would be denied irrespective of what was allowed in Jim2 security). |
| View Debtors and Creditors. |
| View GL Accounts, Transaction Journal, and Account Inquiry. |
| View Transaction Journal. |
| Add, Edit, View, Delete/Reverse, FINISH general journal. |
| View, Edit. Delete GST Session. |
| View Multi-Currency Revaluations. |
| View Cheques. |
| View banking sessions and bank recs. |
| View till recs. |
| See management reports and business analysis (the reports they can run is subject to their report level access as per standard Jim2 report security). |
▪if Auto send BCC is ticked, a copy of all emails sent from Jim2 by this user will be sent to the email address entered in the Email field. However, it is not necessary to send a copy to personal email accounts because all the emails and sent information are stored in Jim2.
|
Note: This applies only to new and related emails. Reply and Forward emails will not get BCC. |
Security should be set so that only authorised people can see the User tab of cardfiles.
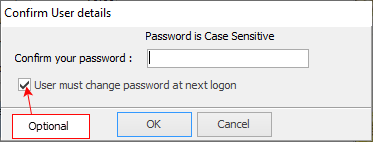
6.Click Save or Save & Close. Confirm User details will pop to screen asking to confirm the password that has been set. This must be entered before the user can be created. The user must change password at next logon box will already be ticked. This can be unticked if desired.
Explanation of fields in the User tab:
Field |
Purpose/Usage |
||
|---|---|---|---|
Initials |
Enter the user's initials in this field. This can be up to three characters (including full stop), and will be used every time the user logs in to Jim2.
|
||
Password |
Enter the user's password in this field. It can be up to 10 characters, and is the password that the user must enter when they first log on to Jim2. The user has the option to change the password when logging on.
Note: An Administrator with appropriate security level can change this password at any time, ie. if the user has forgotten the password. |
||
Enter the user's email address. This is used when emailing reports from Jim2. |
|||
Web Logon ID |
Defaults to the email address when Allow Web Access is ticked. This can be changed at any time. |
||
Def. Stock Location |
Enter the user's stock location into this field. This is the default stock location for that user, when selling or purchasing stock. The stock locations to choose from can be set up in Tools > Setups > Stock > Stock Locations. |
||
Def. Labour Type |
Enter the user's labour type in this field. This is the default labour type for that user when applying their labour to a job. The labour types to choose from can be set up in Tools > Setups > Jobs > Labour Type. |
||
Note: When a user is editing an individual purchase order or job record, they can change their location/default labour type, but this will not affect or change the default location/labour type as set on the cardfile for that user. |
|||
Auto send BCC |
This will automatically BCC anything emailed from Jim2 directly to the nominated email address. To activate the BCC option, tick this box. However, it may not be necessary to have a copy sent to personal email accounts as all emails and sent information are stored in Jim2.
|
||
Web Login ID |
This will default to the user's email address, however enter whatever is preferred here as an ID. |
||
Allow Web Access |
Tick this box to access Jim2 remotely. This is required for use with Jim2 Mobile.
If Allow Web Access is ticked, the Web Logon ID will be automatically copied from the Email field, if already populated. The Web Logon ID can be changed to something else, eg. first name or a nickname, etc.
If Allow Web Access is unticked, the user will not be able to log on to Jim2 using Jim2 Mobile. It also won't allow the user to log on to the eBusiness server (if appropriate) |
||
Rate $ |
Enter a labour rate for this user, which will be used when producing certain profit reports.
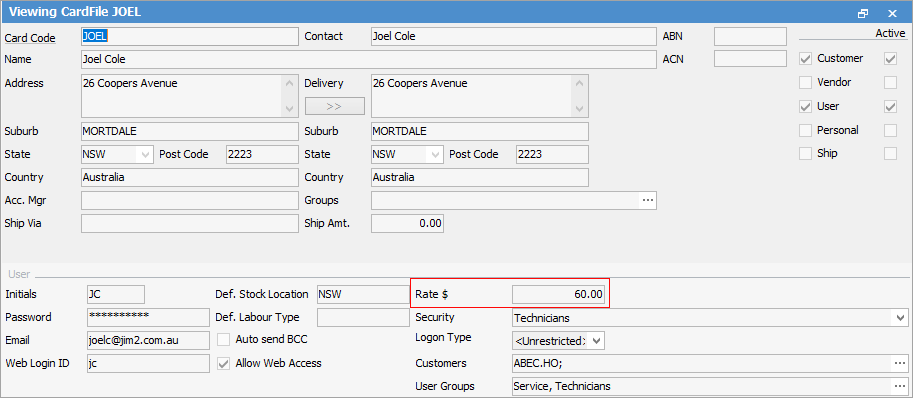
The Rate $ field should be populated with the hourly rate it costs to employ the person (not just their hourly pay rate but also included overheads), so there is a cost associated with their actual time logged against jobs. The cost will then appear in the job profit reports.

The cost should include at least: wages (hourly rate), superannuation, workers compensation insurance. and perhaps a share of overheads, eg. training, uniforms, vehicle running costs, etc. If unsure how to calculate this rate, seek advice from the company's accountant. |
||
Security |
Choose the appropriate user security group(s) for this user from the dropdown options in the Security Group field. Security allows one or more security groups to be selected. |
||
Customers |
Restrict the customers that a user is allowed to deal with by choosing specific customers from the dropdown options. User Groups also allow using Tags and Categories.

Set security to prevent user groups entering transactions for all customers. This option would only be used in a tightly controlled sales team environment. |
||
User Groups |
Select the user group(s) this user is to be added to. |
||

Further information