
The Project List is a very powerful search function within Jim2. Users can define their own project responsibilities by creating lists that apply to their specific function. For example, you can generate a list of all active projects using your user name, or using a status to see where the project is up to.
Project lists run live in the Nav Tree, and will be refreshed at regular intervals (depending on how many minutes you stipulate) as projects are updated across the network. You can even name and pin your lists so that they represent what you are searching for. This helps the user if they have multiple lists running at the same time.
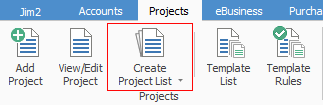
Configuring a project list can be done from either a standard list or using the Advanced List option. List or Advanced List can be selected at the bottom of the Project List screen.

Standard Project List Header
|
You will see some letters underlined in the field names within the header, eg. Cust#. Using Alt+ the underlined letter will jump you to the field beside that heading. |

The Project List tab is the default. In this screen you can select the following fields, and combinations of fields, to generate a Job List.
Field |
Explanation/Usage |
|---|---|
Project# |
Enter a specific Project number if desired. |
Cust# |
Enter a specific customer card code if desired. |
Status# |
Filter the list via Status to only include relevant Status type. |
Type# |
Filter to include the type of Project (as set up in Tools > Setups > Project Types). |
Serial# |
Enter a specific serial number to refine your search. |
Ship# |
Enter ship card code if different to customer card code. |
Master# |
Enter Master Project number. |
Request By |
Enter how requests for information are sent to customers, ie. email, etc. |
Cust Ref |
Enter a customer reference to search for within the list. |
Contract |
Enter the contract type (price level). |
Last Billed < |
Narrow down your search by looking for last billed before this date. |
Name |
Enter the name of the user, if desired. |
Billed |
Enter the frequency of billing, ie. quarterly, monthly, etc. |
Next Billed < |
Enter a date for the next billing before this date. |
Request Sent < |
Enter a date for when the last request was sent before this date. |
Item# |
Enter an Item type. |
Make |
Enter a Make type if required. |
Model |
Enter a Model type if required. |
Avg Bills |
Enter the average billing dollar amount. |
Active |
Selects all active Projects. |
Request Sent |
Selects all Projects in the state of Request Sent. |
Billing Due |
Selects all Projects in the state of Billing Due. |
Finish |
Selects all Projects in the state of Finish. |
Consolidated |
If Consolidated is selected on the Vendor tab of a card file (Group PO By Project Method), ticking this box will show all projects with Consolidated POs. |
Branch, SubBranch and GL Dept fields |
These will show if you are using Branches. Select what is relevant to your search. |
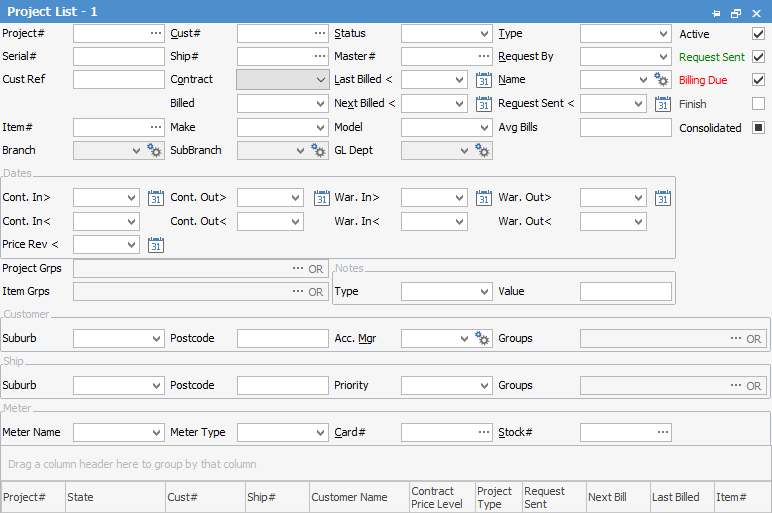
Advanced Project List Header
The Advanced List will allow you to search by the following criteria, in combination with any of the fields above:
Item |
Explanation/Usage |
|---|---|
Cont.In > |
Enter a contract start date after a specific date. |
Cont. Out > |
Enter a contract finish date after a specific date. |
War. In > |
Enter a warranty start date after a specific date. |
War. Out > |
Enter a warranty finish date after a specific date. |
Cont. In < |
Enter a contract start date prior to a specific date. |
Cont. Out < |
Enter a contract finish date prior to a specific date. |
War. In < |
Enter a warranty start date prior to a specific date. |
War. Out < |
Enter a warranty finish date prior to a specific date. |
Price Rev < |
This can be used to set when pricing was reviewed, or when pricing is to be reviewed. |
Project Grps |
Select Project group to search within. |
Item Grps |
Select Item group to search within. |
Type |
Select a Note type. |
Value |
Enter further Note criteria to narrow down your search. |
Customer Suburb |
Enter the Customer suburb. |
Customer Postcode |
Enter the Customer postcode. |
Customer Acc. Mgr |
Select the Customer Account Manager. |
Groups |
Select card file report/non report groups as desired. |
Ship Suburb |
Enter the Ship suburb. |
Ship Postcode |
Enter the Ship postcode. |
Priority |
Enter the job priority. |
Groups |
Select card file report/non report groups as desired. |
Meter Name |
Enter meter name if applicable (Managed Print Services only). |
Meter Type |
Enter meter type if applicable. |
Card# |
Enter card code related to meter if required. |
Stock# |
Enter stock code related to meter if required. |
|
On the right-hand side of the Groups selection within the list you will notice ... OR. If you click this, it will change to &. This relates to how you want to use groups within your search. If you want to select two groups and find things that are in both groups, use the & option. If you want to search two groups and find anything that is in either one of those groups use the OR option. Double clicking on the word Groups at the beginning of the Groups field will turn the field green to indicate that group selection is inverted. For example, select projects/jobs that are not in these groups. |

Project List Grid
Within the grid your search results produce a list in a format that can be grouped even further. Dragging a given column header to the grey area at the top of the list results table will allow you to sort your results by that column header. This is normally known as grouping. The grouping area is clearly identified as shown below.
To view or edit any of the projects within the list, simply double click or use your F2 function key on any of the fields relating to the project you want to display.
|
When viewing a project from a list select the arrow in the quick access toolbar for the next/previous job, etc. in that list:
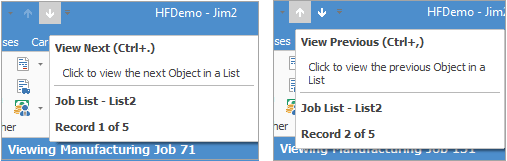
Shortcut Keys:
Ctrl+. moves to the next object in the list Ctrl+, moves to the previous object in the list |
Further information: