
The Project list is a very powerful search function within Jim2. Users can define their own project responsibilities by creating lists that apply to their specific function. For example, generate a list of all active projects in your name, or using a status to see where the project is up to.
Project lists run live in the Nav Tree, and will be refreshed at regular intervals (depending on how many minutes are stipulated) as projects are updated across the network. Name and pin the lists so that they represent what is being searched for. This helps if there are multiple lists running at the same time.
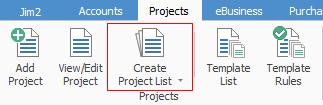
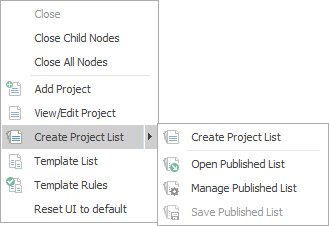
Configuring a Project list can be performed from either a standard List or using the Advanced List option. List or Advanced List can be selected at the bottom of the Project List screen.
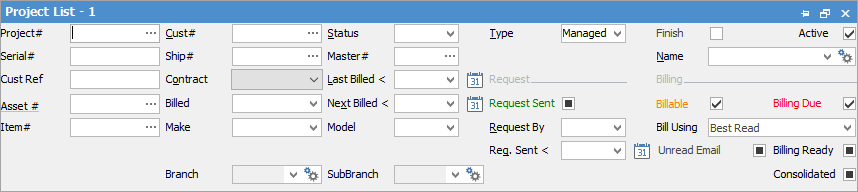
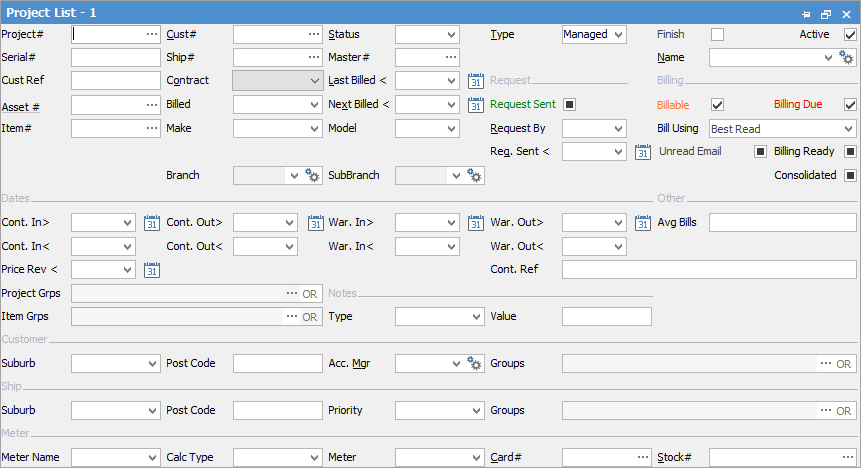
Standard Project List Header
Sorting, searching and grouping are available as per other lists in Jim2. Select the column header in the grid to sort, then drag it to the Group By area to group.
To view or edit any of the projects within the list, double click or use the F2 function key on any of the fields relating to the project to be displayed.
Field |
Explanation/Usage |
|---|---|
Project# |
Enter a specific Project number. |
Cust# |
Enter a specific customer card code. |
Status# |
Filter the list via status to only include relevant status type. |
Type# |
Filter to include the type of Project (as set up in Tools > Setups > Project Types). |
Serial# |
Enter a specific serial number to refine the search. |
Ship# |
Enter ship card code if different to customer card code. |
Master# |
Enter Master Project number. |
Request By |
Enter how requests for information are sent to customers, ie. email, etc. |
Cust Ref |
Enter a customer reference to search for within the list. |
Project |
Select the contract type (price level).
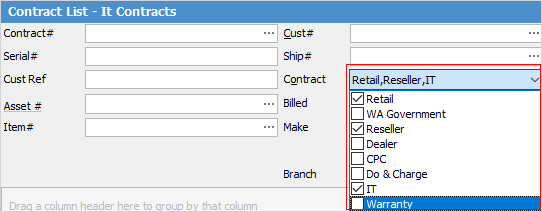
Note: More than one can be selected, or leave blank to run a list of all contracts. |
Last Billed < |
Narrow down the search by looking for last billed before this date. |
Name |
Enter the name of the user,. |
Billed |
Enter the frequency of billing, ie. quarterly, monthly, etc. |
Next Billed < |
Enter a date for the next billing before this date. |
Request Sent < |
Enter a date for when the last request was sent before this date. |
Asset# |
The asset number. |
Item# |
Enter an Item type. |
Make |
Enter a Make type. |
Model |
Enter a Model type. |
Active |
This means the contract has been billed for the last period and a new bill is not yet due. |
Request Sent |
Selects all Projects in the state of Request Sent. |
Billable |
Selects all projects that are billable. |
Billing Due |
Selects all Projects in the state of Billing Due. |
Unread Email |
Tick to show only projects with unread emails. |
Bill Using |
Default Read – This is the default as set up on an asset in the Request By field. Default Read (including Manual) – This allows for using the default as set up on an asset, but also includes any manual reads entered. Best Read – This will take the best read based on settings in Tools > Options > Contracts > Machines. The default choice can be set up in Tools > Options > Contract > Machines, but can be changed at object level. |
Billing Ready |
Selects all Projects in the state of Finish. |
Consolidated |
If Consolidated is selected on the Vendor tab of a cardfile (Group PO By Project Method), ticking this box will show all projects with Consolidated purchase orders. |
Branch, Sub-Branch |
These will show if using Branches. Select what is relevant to the search. |
|
Some letters in the field names within the header are underlined, eg. Cust#. Using Alt+ the underlined letter will jump to the field beside that heading. |

Advanced Project List Header
The Advanced List will allow searching by the following criteria, in combination with any of the fields above:
Item |
Explanation/Usage |
|---|---|
Cont.In > |
Enter a contract start date after a specific date. |
Cont. Out > |
Enter a contract finish date after a specific date. |
War. In > |
Enter a warranty start date after a specific date. |
War. Out > |
Enter a warranty finish date after a specific date. |
Cont. In < |
Enter a contract start date prior to a specific date. |
Cont. Out < |
Enter a contract finish date prior to a specific date. |
War. In < |
Enter a warranty start date prior to a specific date. |
War. Out < |
Enter a warranty finish date prior to a specific date. |
Price Rev < |
This can be used to set when pricing was reviewed, or when pricing is to be reviewed. |
Project Grps |
Select Project group to search within. |
Item Grps |
Select Item group to search within. |
Type |
Select a Note type. |
Value |
Enter further Note criteria to narrow down the search. |
Customer Suburb |
Enter the Customer suburb. |
Customer Postcode |
Enter the Customer postcode. |
Customer Acc. Mgr |
Select the Customer Account Manager. |
Groups |
Select cardfile report/non report groups as desired. |
Ship Suburb |
Enter the Ship suburb. |
Ship Postcode |
Enter the Ship postcode. |
Priority |
Enter the job priority. |
Groups |
Select cardfile report/non report groups as desired. |
Meter Name |
Enter meter name (Managed Print Services only). |
Meter Type |
Enter meter type (if applicable). |
Card# |
Enter card code related to meter. |
Stock# |
Enter stock code related to meter. |
|
On the right-hand side of the Groups selection within the list is the word OR. Clicking this wording will change it to &. This relates to how to use groups within the search. To be able to select two groups and find things that are in both groups, use the & option. To search two groups and find anything that is in either one of those groups, use the OR option. Double clicking on the words Card Grp at the beginning of the Card Grp field will turn the field green to indicate that group selection is inverted. For example, select cards that are not in these groups. |

This section explains the field headings in the Project list. Refer to Lists for details on sorting, naming, grouping, etc. The headings may not be strictly in this order, and there are a number of headings that relate to Managed Print Services only.
Field |
Explanation |
|---|---|
Project |
Machine number. |
State |
Displays where the project is up to, ie. Active, Billing Due, etc. Any text coloured red means that an action is required. |
Cust# |
Customer card code. |
Ship# |
Ship card code. |
Customer Name |
Customer name. |
Project Price Level |
Displays the price level for the machine, as set up in Price Levels. |
Project Type |
Displays the type of machine, as set up in Project Types. |
Request Sent |
This field is updated when a meter read request is sent. |
Next Bill |
Displays the next bill due date. Any text coloured red means that an action is required. |
Last Billed |
Displays the last billed date. |
Item# |
Item number. |
Item Desc |
Item description as shown in the Item. |
Item Model |
Model. |
Item Make |
Make. |
Name |
Choose a name, or use logged user. |
Cust Ref |
Customer reference. |
Serial # |
Serial number (if applicable). |
Asset# |
The asset number. |
Asset Ship# |
The ship address of the asset. |
Asset Item Desc |
The description of the Item on the asset. |
Asset Model |
The model of the asset. |
Asset Make |
The make of the asset. |
Asset Owner# |
The customer who is the owner of the asset. |
Warranty In |
Date warranty commenced. |
Warranty Out |
Date warranty expires. |
Status |
The status of the machine, ie. Booked, etc. |
Request By |
Request By method, ie. email. |
Branch/Sub-Branch/GL Dept |
Lists branch, sub-branch and GL Department if branches are being used. |
Location |
Primarily used to describe the location of, for instance, a photocopier in a customer's building, ie. Reception, 1st floor, etc. |
Customer Region |
Customer region group. |
Ship Region |
Ship region group. |
Ex Mach# |
If a machine was at a previous customer, returned and went to a new customer, this number relates to the machine contract from the original customer – allowing tracking the entire life of the machine. |
Billed |
Billing frequency, ie. monthly. |
Master# |
Master machine number. |
Price Rev |
Date price last reviewed. |
Acc. Mgr |
Customer account manager. |
Billing Ready Source |
Show the source, ie. Best Read, etc. |
Default Read Age |
Shows the read age, ie. -10 means 10 days prior. |
Default Read Age (Inc. Manual) |
Shows the read age including any manually entered ages, ie. -10 means 10 days prior. |
Best Read Age |
Shows the best read age, ie. -10 means 10 days prior. |
Children Missing Default Read |
Shows the number of children missing default reads. |
Children Missing Default Read (Inc. Manual) |
Shows the number of children missing default reads, including those manually entered. |
Child Count |
Lists the number of children linked to the master contract. |
Children Missing Best Read |
Lists any children missing a best read. |
Missing Children % |
Lists the percentage of missing children reads. |
Master Meter |
Yes or no. |
Billing Total Ex. |
The figure shown here is the amount of the next billing action due.
Note: if there is more than one billing action, the amount shown here will be for the next billing due, and will not show the total of all billing due. |
Company |
Lists the company, if licensed for multi-company. |
Billable |
Will show the billable date. |
|
Will only return results for what is ticked. |
|
Will not return results for any unticked boxes. |
|
Will return results for all of the above. |


|
When viewing a project from a list, click the arrow in the quick access toolbar for the next/previous project in that list:
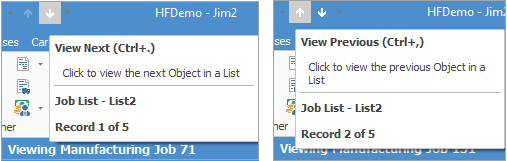
Shortcut keys: Ctrl+. moves to the next object in the list Ctrl+, Moves to the previous object in the list |
If user security allows it, right click within the grid, select Export Data and save the list information as an XLSX file.
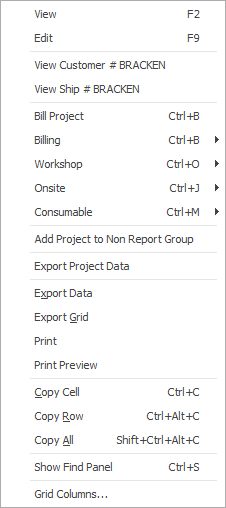
Right click options in list grid
Right Click Option |
Function |
||
|---|---|---|---|
View |
View the highlighted Project. |
||
Edit |
Edit the highlighted Project. |
||
View Customer # |
View the highlighted customer's cardfile |
||
View Ship # |
View the highlighted customer's Ship cardfile |
||
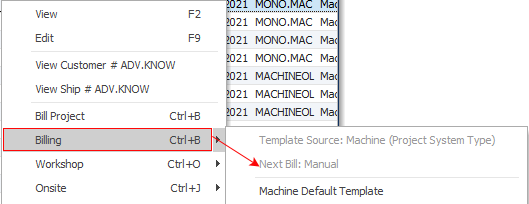
Bill Project Billing Workshop Onsite Consumable |
Will allow billing the highlighted Project. What appears below Bill Project is based on the actions you have set up:
 |
||
Add Proect to Non Report Group |
Allows adding the highlighted Project. |
||
Export Data |
Exports the list to a spreadsheet. |
||
Export Grid |
Exports the grid to a spreadsheet. This is particularly useful if the grid has more than one header row, as it will export all header rows. |
||
Print the list. |
|||
Print Preview |
Preview the list to be printed. |
||
Copy Cell |
Copy the highlighted cell. |
||
Copy Row |
Copy the highlighted row. |
||
Copy All |
Copy all, which can then be pasted into a spreadsheet |
||
Show Find panel |
Opens the Find panel: 
|
||
Grid Columns... |
Allows adding more columns. Also allows removal of columns. Select the column to add, then drag it to the position required in the columns within the grid. To remove, click and drag to the Grid Columns... window, or drag down away from the header area. |
Right click options in the Nav Tree
After the top 3 (which are self explanatory), these options mirror what is on the ribbon in the Projects tab, except for the last tab, which will Reset to Default all tabs.
Further information
How to
Add Recurring Managed Service Jobs