All purchasing functions remain the same under Advanced Warehouse Management until the point of receiving stock.
1.On the ribbon, go to Purchases > Add Purchase.
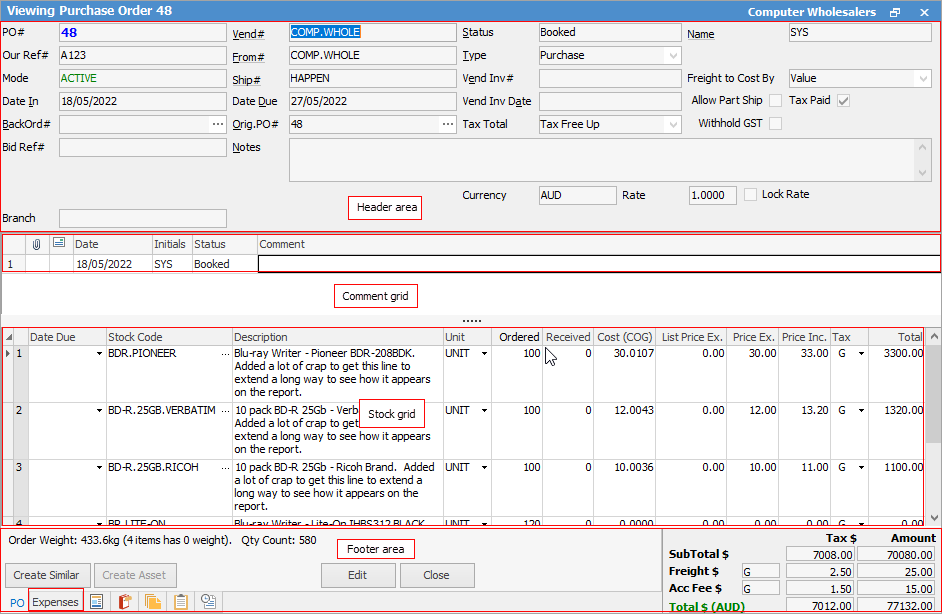
2.The Adding Purchase Order form is displayed. Jim2 automatically populates some fields in the purchase header, including the PO#, Status, default Ship# (if set in Tools > Options > Purchase), Type, Date In, Orig. PO#, Tax Total, Freight to Cost and Account Fee Tax Codes.
|
Some letters in the field names within the header are underlined, eg. Vend#. Using Alt+ the underlined letter will jump to the field beside that heading. |

Jim2 is designed to prompt user input by placing the cursor at the appropriate fields that the user is required to complete. The Enter key will move the text cursor to the next user input field in the purchase order entry pattern.
The pattern follows:
▪Vend#
▪Vendor Inv Date
▪Vendor Inv#
▪Notes – shipping or payment notes
|
Some of this default information can be overridden by using the Tab key or mouse to move to that field, highlight and re-edit. The exception is that the PO# and Date In cannot be edited as they form part of the secure quality record for each purchase. |

2.Select a vendor in one of the following ways:
▪Start to enter the vendor code. Jim2 intuitive type will begin to (numerically/alphabetically) pre-empt the choice of names from the CardFile List as information is entered.
▪Click the ellipsis [...] beside the Vend# field to display the search screen.
▪The CardFile List tab provides access to a full list of vendors, then choose from the list.
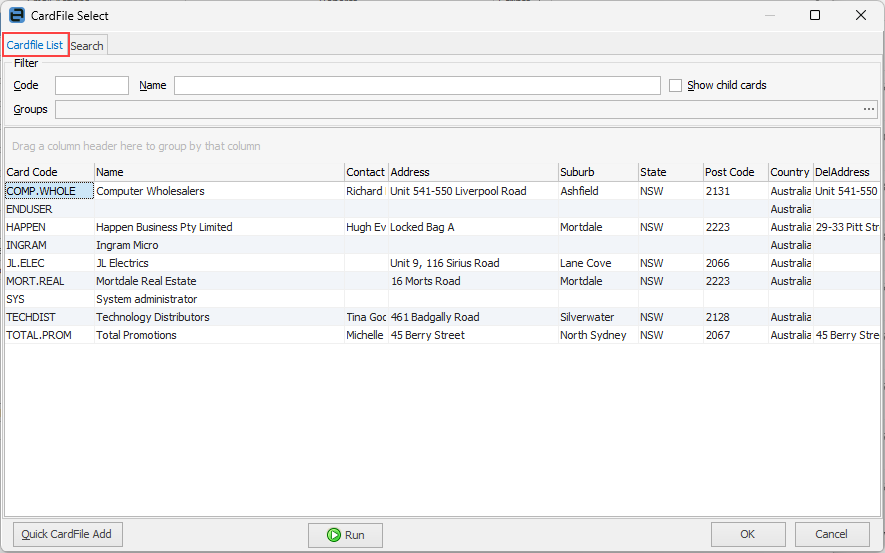
Sorting, searching and grouping are available as per other lists in Jim2. Select the column header in the grid to sort, then drag it to the Group By area to group.

|
Jim2 uses information and calculations from the vendor cardfile records to automatically add default information into certain fields of the purchase order. To change any of these default values, move to the field required and use the drop down list active within that field, or highlight and change the entries. |
3.Select a date due based on when the vendor has promised the goods will be delivered, or use the required days information calculated using information from the vendor's cardfile.
4.If required, enter a specific message in the Notes field in the Purchase header – any special delivery or payment messages (this message will appear only on this purchase order).

5.Add comments and stock to this purchase. The F3 function key will move to the Comment grid and the F4 function key will move to the stock grid.
6.Once the stock has been received and ticked it off against the purchase order, update any prices, and change the status of the purchase order to Received.

After changing the status to Received (or Finish, if appropriate), the stock now needs to be packed to bins. |
1.On the ribbon, click the Pack icon.  2.The Stock Packing form will be displayed. 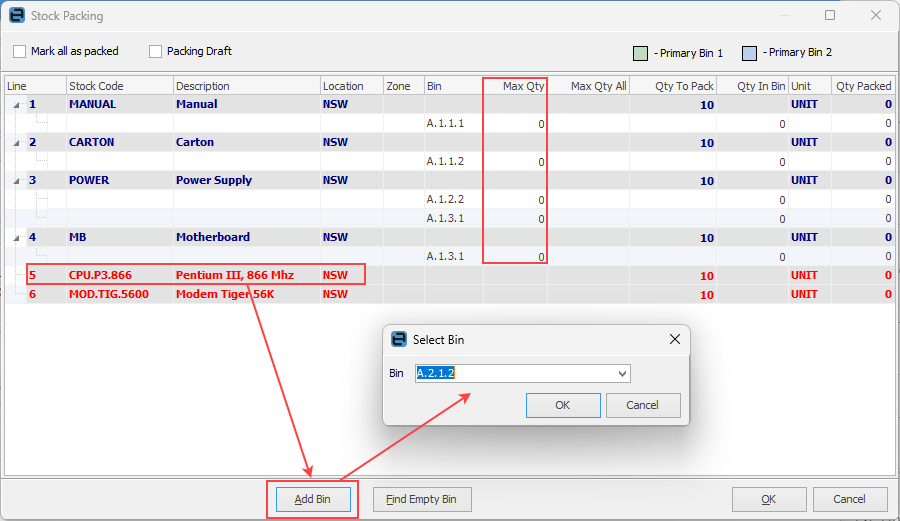 Note that the bin Max Qty is a guideline only and can be overridden when manually packing stock. This could be performed in advance of a large order being packed, or an anticipated event that would temporarily halt bin replenishment. The Add Bin button enables selection of other bins not already displayed. Use this function to pack stock to a different bin. 3.Pack stock – enter the quantity to be packed against each bin in the Qty Packed column, or click Find Empty Bin to locate empty bins to pack the stock into. 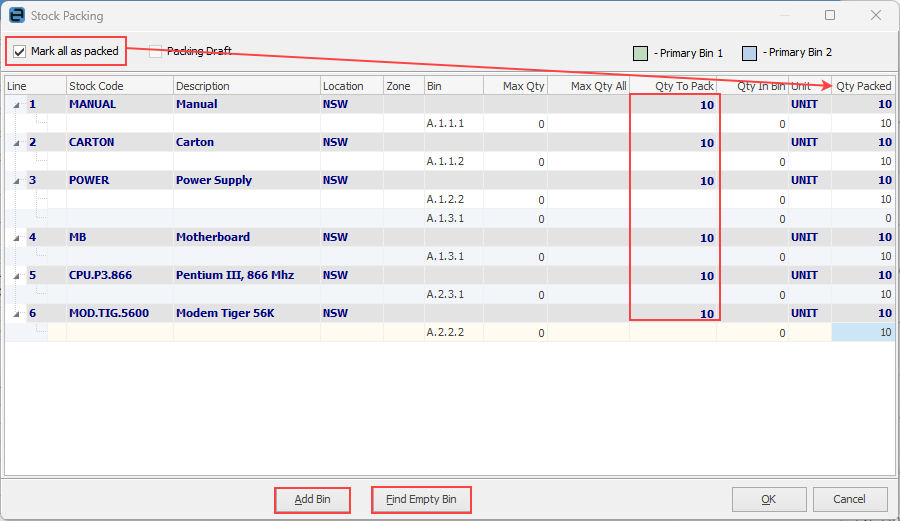 Click OK. A packing slip can then be printed. |
Ticking the Mark all as packed box in the top left of the form enables the option to either not allocate to bins, or only partially allocate to bins.
Clicking OK with this box ticked will send any unallocated stock to the floor. It will then need to be transferred to bins at a later date.
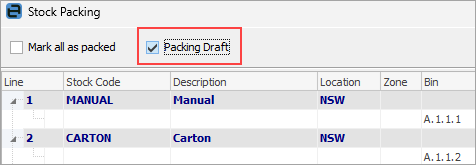
Ticking the Packing Draft box (not enabled if Mark all as packed is ticked) and clicking OK enables printing of a draft packing slip that can be sent to the warehouse, allowing the pack to be confirmed after physical packing has been completed.
 |
Further information