To export stock data for updating stock records including stock descriptions, stock location, stock pricing and report level groups, create a filtered Stock List with all stock to be updated.
|
Whilst you can import Dynamic Kit Stock Codes, you cannot import the stock inside the kit. If this is required, please contact support@happen.biz to obtain an import template. |
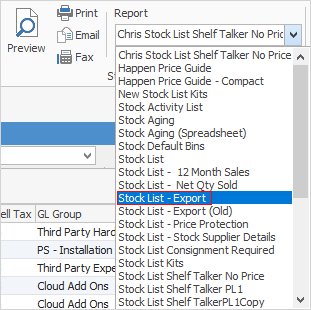
On the ribbon, go to the Report menu and select Stock List – Export. This will export to a spreadsheet including all columns required for importing. See below for the next steps.
The following explains how to update specific stock record information such as vendor pricing, stock pricing, stock descriptions, stock location, procurement.
To begin, go to Stock > Create Stock List on the ribbon and run a filtered list of the stock requiring updating. Export the data from Jim2, using one of the choices below:
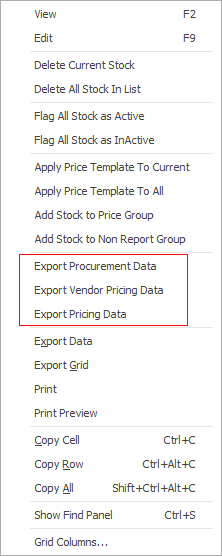
▪Export Procurement Data produces a spreadsheet with the relevant procurement columns, allowing you to make alterations. Columns exported:
Stock Code |
Location |
Min Qty Low |
Min Qty High |
Limit Qty |
Reorder Qty |
Days Supply |
Zone |
Primary Bin 1 |
Primary Bin 2 |
Max Qty Bin 2 |
Attributes |
Config No |
▪Export Vendor Pricing Data produces a spreadsheet with the relevant vendor columns. Columns Exported:
StockSupplierId, Rank, StockCode, Vendor, Unit, Currency, Vendor StockCode, Vendor RRP, Vendor List Price, Vend Discount %, Cost, Exchange Rate, Extra Pcnt, Extra Dollars, Estimated Cost, Last Updated, Due Days, Qty In Stock, Lead Time, Promo Valid from and to, Promo Price Break columns for all price breaks: List Price, Discount, Cost, Extra Pcnt, Extra Dollars, Valid From and to, Price Break Qty.
If you wish to see when the vendor price was last updated on stock, create a filtered stock list, then right click in the grid and select Export Vendor Pricing Data. This can then be saved as a spreadsheet and will include a column named Last Updated, which is the date the price was last updated.
You can also remove vendor rank by placing a -1 in the Rank column of the spreadsheet. Upon synchronising, this will remove that rank from the vendor.
|
You only need the price in the Vendor List Price column. Jim2 will work out the Vendor Last Cost (buy unit price) and Estimated Cost (base unit price) for you based on the Vendor List Price and any discounts after that. If you have an amount in these columns when importing, you are overriding and telling Jim2 to specifically use these prices, which will be an issue if you have stock with multiple measure units and discounts. |
▪Export Pricing Data produces a spreadsheet with all relevant pricing information:
StockCode |
Branch Code |
Price Level |
Card Code |
Price Calc Method |
Base PL |
Currency |
Price TF |
Price TP |
Percent |
Qty2, etc columns along with Price columns |
|
If updating stock percentage column, please ensure to remove Price TF and Price TP, as Jim2 will calculate the new prices upon importing.
If you wish to add further price levels, these must be set up first via Tools Setups > CardFiles > Price Levels, then these new price levels can be added , along with any other relevant information before importing. |
Synchronising requires matching the current stock code, then importing the information that has changed, eg. altered list price, different report level groups, removed bins, etc.
|
In all cases, keep the Stock Code column and remove any other columns that are not being changed. However, there may instances where other data needs to remain in the spreadsheet, ie. when importing vendor pricing data, the Vendor, Rank, Unit and Currency (if used) columns must remain in the spreadsheet. |
 |
When entering numbers that have a leading zero into columns, to ensure Excel does not trim off the zeroes, set the column format to Text. |
Make the changes to the columns required, then re-import into Jim2 following the instructions below.
|
The difference between importing and synchronising is that all columns are removed except for the card code and the columns that are changing when synchronising. |
The process of synchronising requires a mapping file. This file (.j2m) is a file that matches the column headings in the stock spreadsheet to the field names in Jim2. Numerous mapping files can be saved, then reused when synchronisation is required.
The best way to understand data synchronising is to practise. Using the Training database, synchronise stock records.
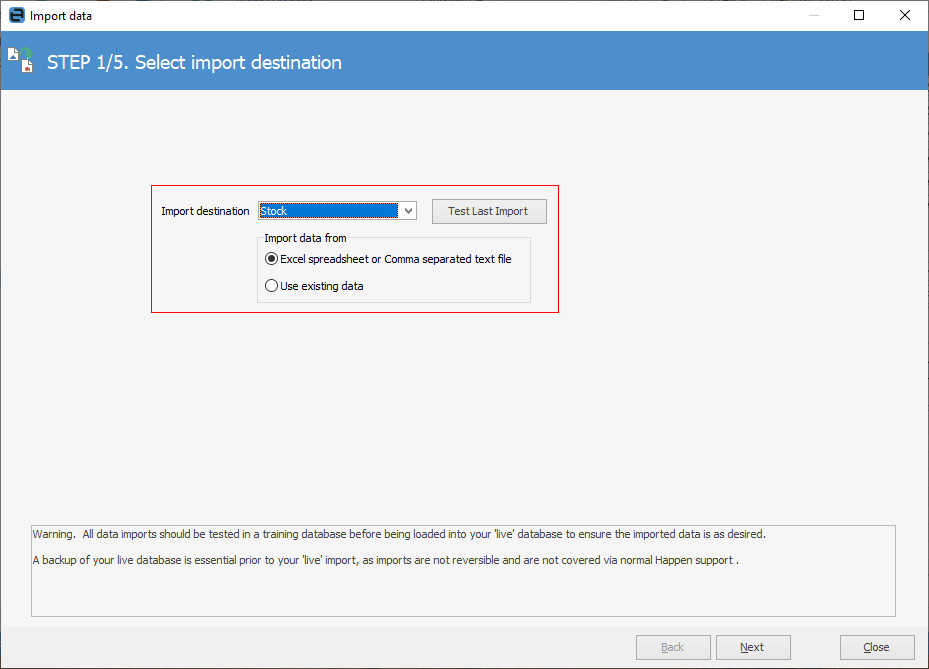
On the ribbon, go to Tools > Import Data. Select the Import destination using the drop down to the right of the field.
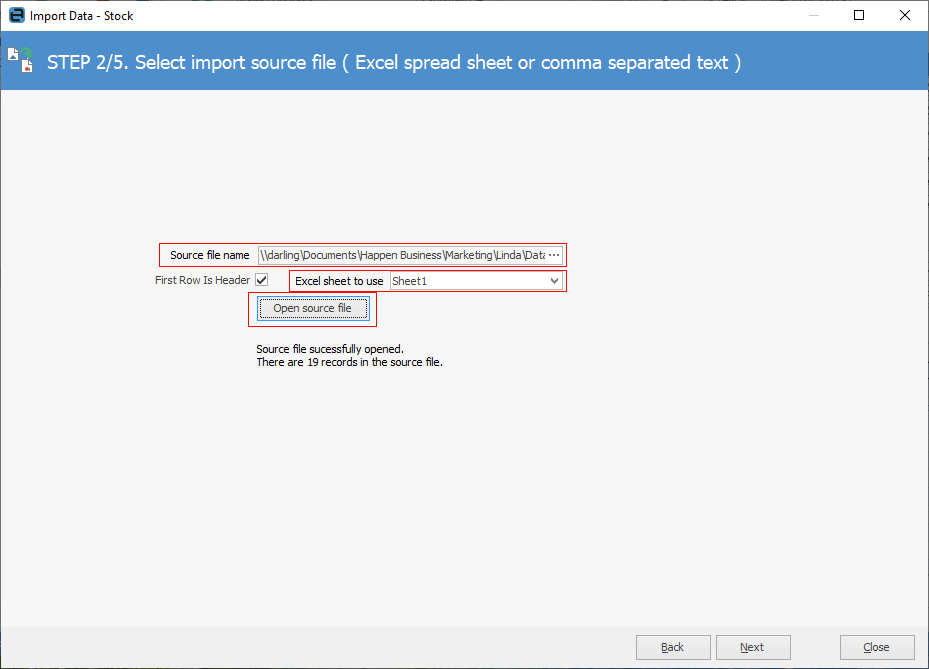
Click Open source file and Jim2 will test the data.
Click Next.
 |
If you receive a warning stating Too many columns, copy only populated cells into a new spreadsheet and try again. |
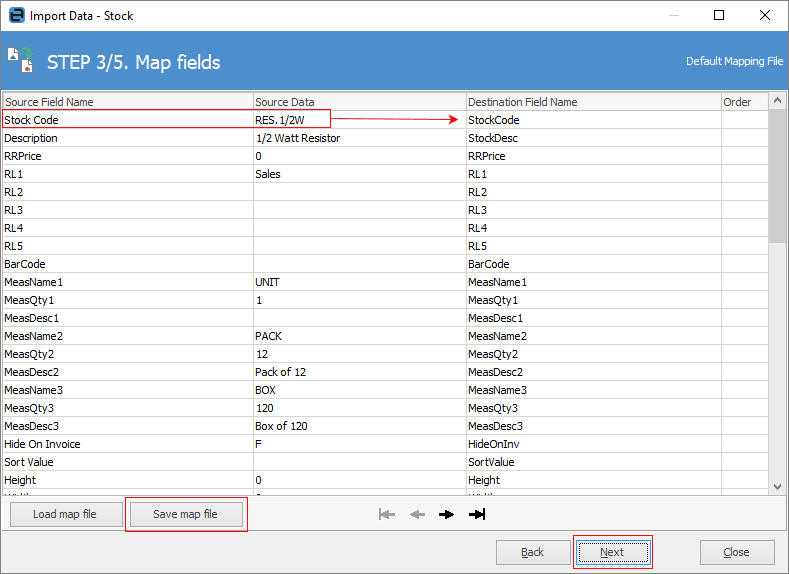
Map the Source Field Name/Source Data to the Destination Field Name, click Save map file to reuse later, then click Next.
Click Load data.
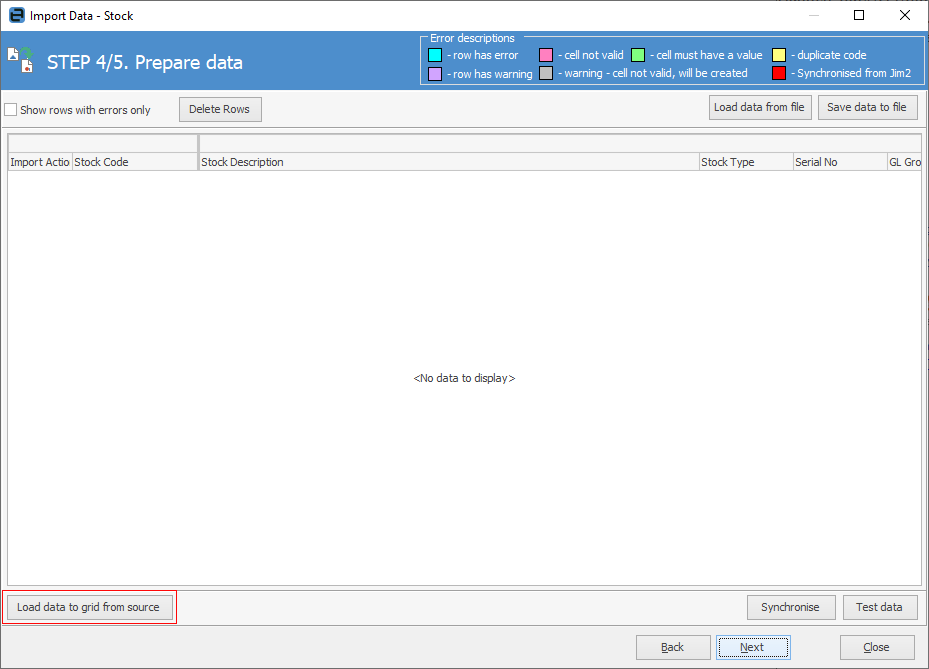
In the example below, the import has failed as the data is for synchronising – it isn't new stock to be added. Importing new stock requires far more information, and the legend at the top of the Import Data screen indicates the issues with various columns and rows. Once satisfied the file correct, click OK, then Synchronise. This will ensure that everything is correct prior to importing.
|
There may be an error about too many cells or too much data. If this occurs, copy only the header cells and those with content from the spreadsheet, then paste into a new spreadsheet. Save that spreadsheet and try the import again. |
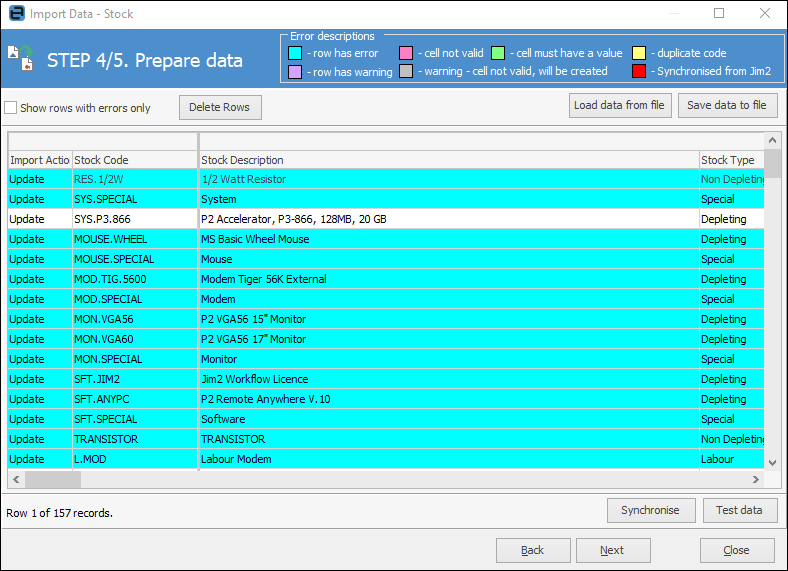
Scroll across the row to view all fields.
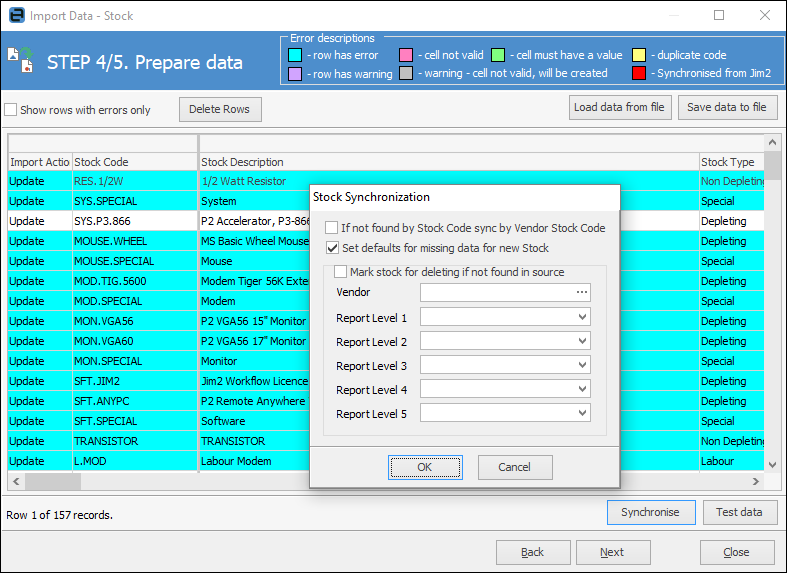
In most circumstances, there will be no need to alter the Synchronise screen, so just click OK.
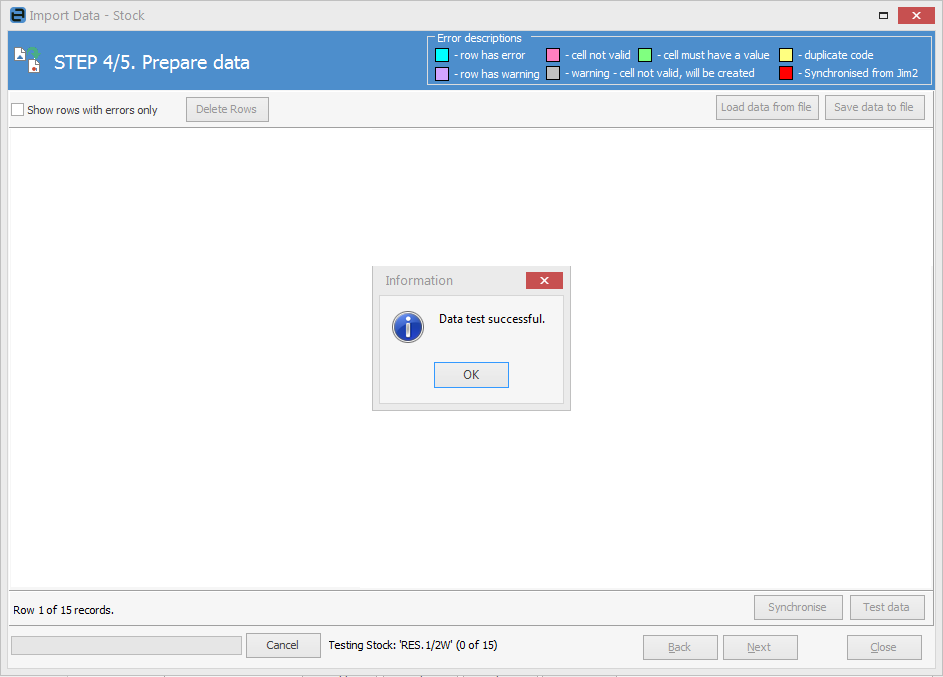
If the data test is successful, click OK.
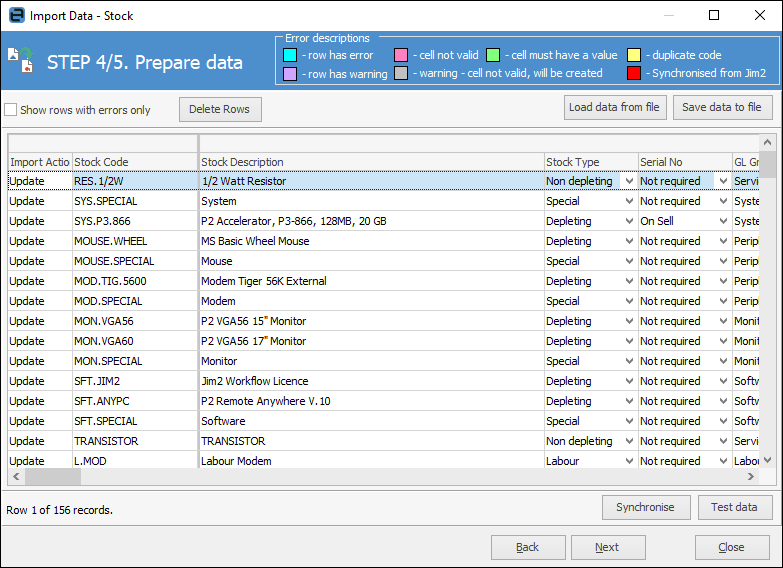
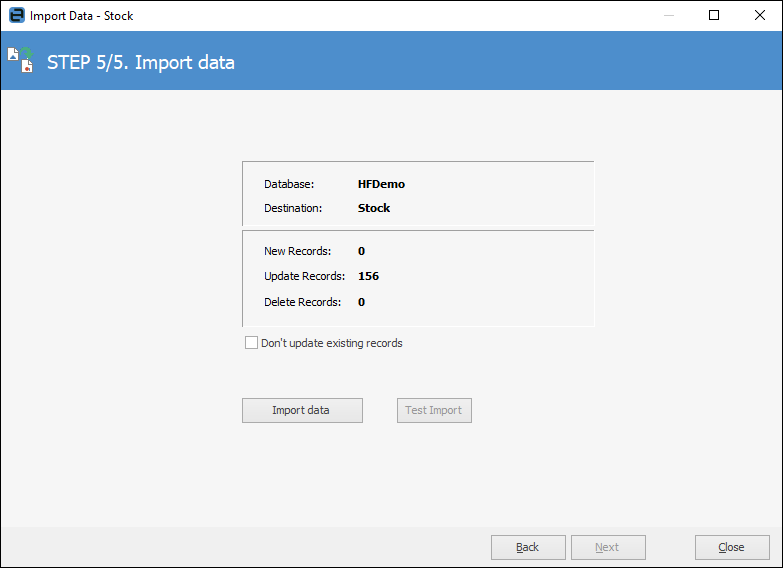
The final screen will advise how many records it will update. Click Import data to complete.
Further information