Auto Scan mode allows for full barcode scanning of stock, straight into the stocktake session. This allows for complete scanning of stock with little or no keyboard interaction.
For example, in a retail environment, you can walk around the store scanning barcodes, and the count will automatically increment by one. As this is intended to be a keyboard free process, and since each scan increments by one, it is important that those doing the counting scan every piece of stock.
In View mode, clicking Add Count displays the Stock Count form with the cursor on the Stock Code field, ready to scan either the stock code or a barcode. Jim2 will automatically add 1 to the count for each scan performed. |
Scan & Count mode enables barcode scanning of the stock. In View mode, clicking Add Count displays the Stock Count form with the cursor on the Stock Code field, ready to scan either the stock code or a barcode.
The focus then automatically moves to the Counted Now field, ready to enter the count and press Enter, ready for the next count. |
Once sheets are returned with the stock counts, they will need to be entered into Jim2.
Open the stocktake session via Stock > Stocktake on the ribbon, then clicking Run. Select the session to be worked on and double click it, or use the View button at the bottom of the screen. The chosen stocktake session will open in View mode.
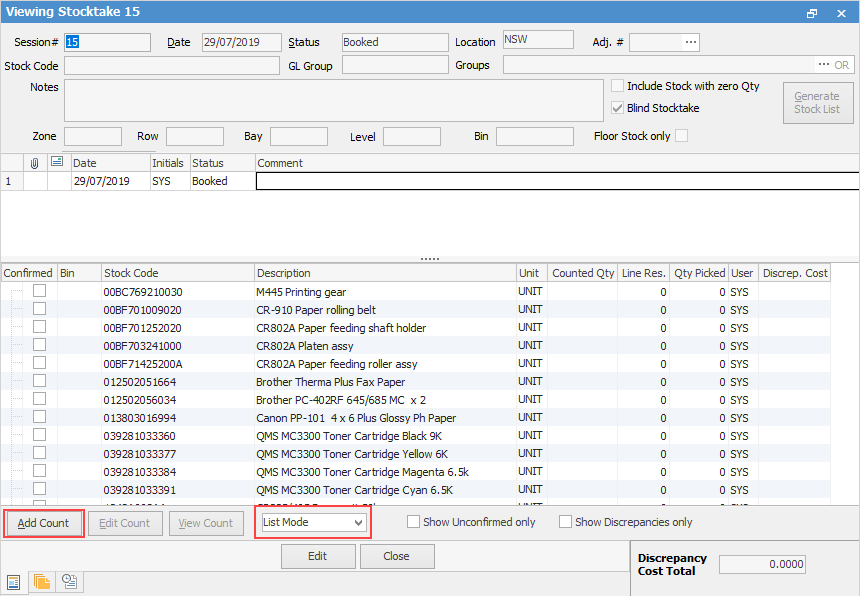
Select List Mode, then click Add Count. The Add Count input screen appears for the first line of stock.
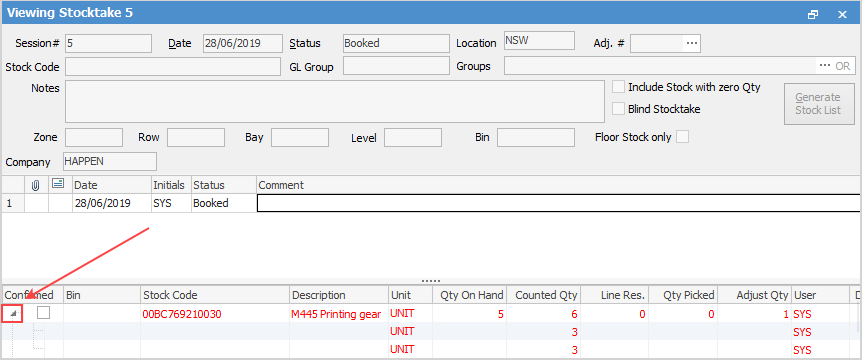
Multiple users from multiple computers can add their counts into the same stocktake session but not the same stock code at the same time. The stocktake session is not edited to add a count. The user right clicks on the relevant stock code and adds their count to the count window. The arrow on the left hand side expands to show the various count records for each stock code.
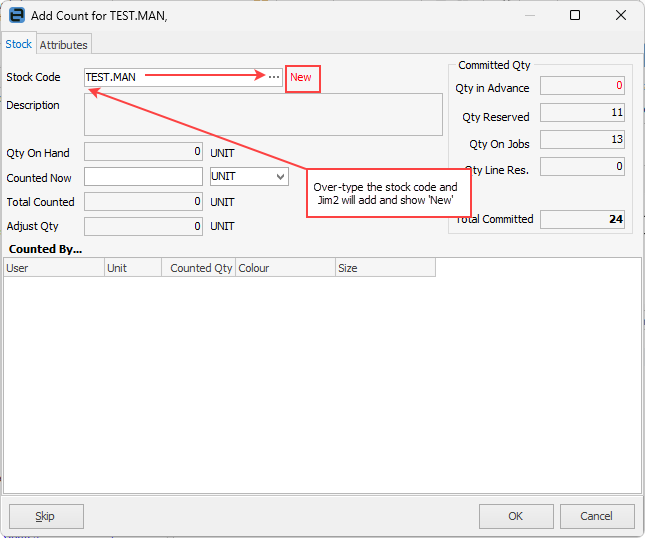
If you have generated a Stock List and Include Stock with zero Qty is not ticked, during the counting process stock may be found which is not on the stocktake list. To record this stock, select Add Count, then enter the stock code (this must be a stock code already in Jim2) and use Enter. Jim2 will add the word New. If the stock is not already in Jim2, add the stock, then go back to the stocktake session and continue as above. This will create a new line in the Stocktake session.
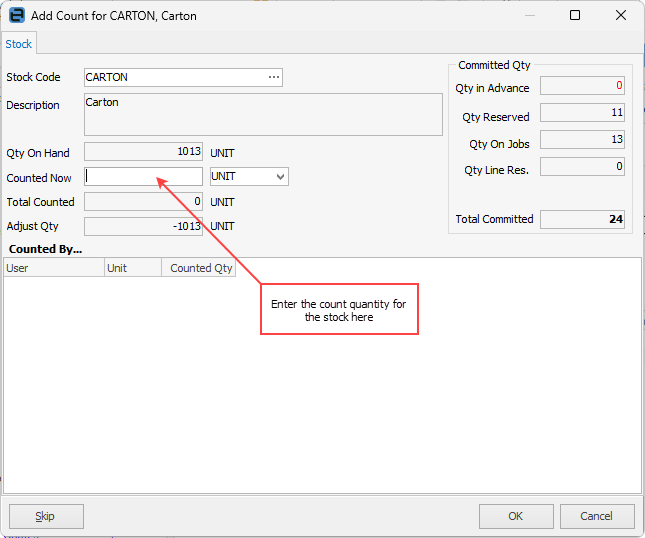
Enter the counted quantity into the Counted Now field, however see important note below regarding certain stock types.
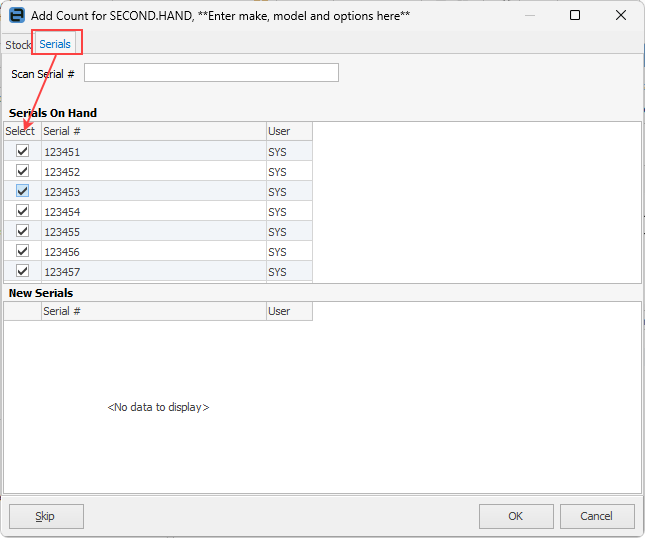
If stock has serial numbers, confirm and tick them here:
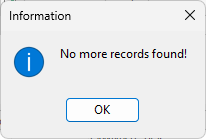
Press Enter to add count and move to the next line of stock to be counted. When the end of the Stock List is reached, the following screen will be displayed.
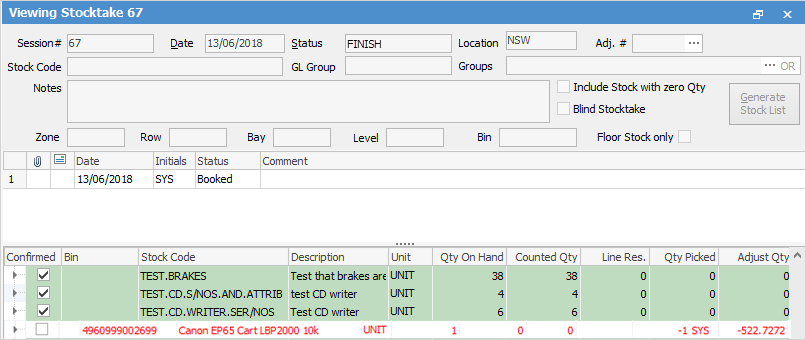
Click OK to close this screen. Correct stock lines are automatically confirmed (ticked and displayed in black text on a green background). Incorrect stock lines are unconfirmed (displayed in red text on a white background). Click Edit and change the status to Finish.
Notes about counts, including the counting of serialised stock: ▪If counters find extra stock in their allocated count area which is not on their count sheet, they should add it to their sheet, providing stock code, description and quantity. Stock added manually to the count sheets can then be added to the stocktake session by overriding the stock code on the Stock Count form and adding the counted quantity. ▪Stock which is listed on the count sheet but can't be found should be entered as Qty Counted zero (0). That line of text in the stocktake session will be coloured red. If happy with the variance, tick Confirmed. When the status is changed to Finish, a stock adjustment will be created. ▪If it is necessary to have more than one person counting the same stock in different locations, ie. multiple count sheets, additional counts can be included later, before finishing. See Edit Count. ▪If serialised stock is included in the session, and Strict Serial Scan is enabled, serial number(s) will be required to be confirmed on the serial tab of the stock count form. See warning below.
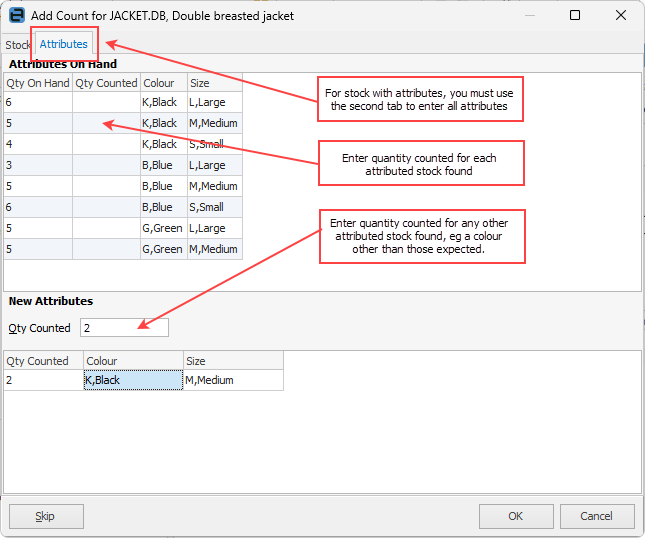
In the example shown here, the stock has attributes (in this case colour), so the form's second tab should be used for data entry.
|


This time-saving feature saves having to confirm each line of stock individually, where the counted quantity equals the session quantity for the whole session, or alternatively, where the majority of the count is okay.
|
1.Open the stocktake session in View mode. 2.Right click on the stocktake session and select Auto Add Count and Confirm. 3.This will automatically make all counts match the stock on hand quantity, then mark them as Confirmed (black text on green). 4.Edit the session, change the status to Finish, then save and close.
|
Auto Add Count and Confirm can still be used in this situation. 1.Open the stocktake session in View mode. 2.Scroll down to find the first stock code for which there is a discrepancy. 3.Click Add Count and enter the count for this stock. Click OK, then Cancel when the next Add Count screen appears. 4.Find the next discrepancy in the Stock List and repeat Step 3. |
1.Right click on the stocktake session and select Auto Add Count and Confirm. 1.This will automatically make all counts not in discrepancy match the stock on hand quantity, and mark them as Confirmed (black text on green). 2.Now, edit the session and manually confirm each stock that's in discrepancy (red text on green). 3.Finally, change the status to Finish, then save and close.
|
Text colour |
Background |
Meaning |
Include in Stock Adjustment |
|---|---|---|---|
Black |
Green |
Count confirmed Count matches |
No |
Red |
Green |
Count confirmed Count does not match |
Positive count will create a stock adjustment Qty + Negative count will create a stock adjustment Qty -- |
Further information