Kits can be added to jobs just like any other stock. Jim2 will enclose the stock included in the bundle with light blue borders.
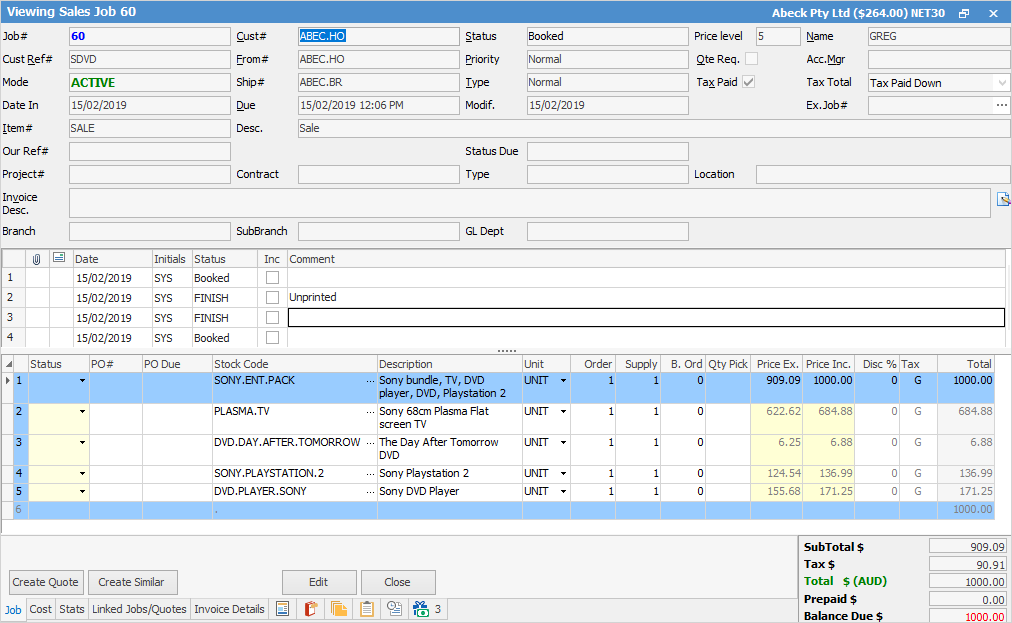
Whilst a job is on anything from Booked up to but not including FINISH, the value of the sell price in the stock rows of the kit will show even if there is no stock.
Upon changing to FINISH, if there is no stock to supply, the value will revert to $0 as there is nothing to invoice for those lines. |
|
Collapse and expand the kit by double clicking on the line number, then double click to expand it again.
 |
|
Note: The blue kit footer line should not display any text. |
There are a number of ways to add extra stock to the kit
Add the stock line under the kit.
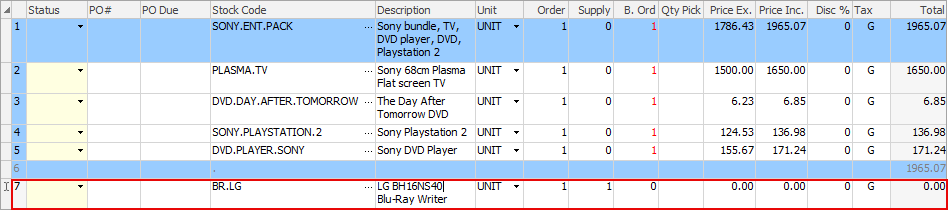
Then select the grey area to the left of the line # and drag the new line up between the kit blue lines. This will enclose it within the kit bundle.
 |
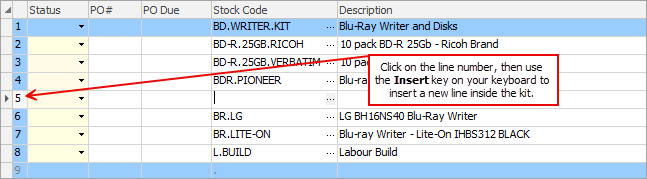
Click on a stockline and use the Insert key on your keyboard to add an empty stock line above the line you clicked on.
 |
Place the cursor ins the blue footer, then press the Insert key on your keyboard. Click on the ellipsis beside the empty Stock Code field.
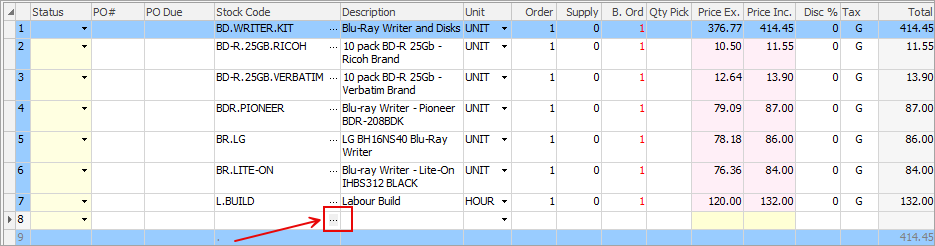
From here, you can select multiple stock to add to the kit. |
Create a stock code called ENTER.STOCK, for example.
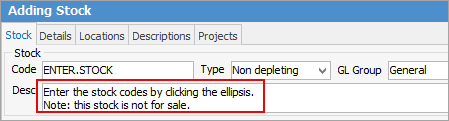
Then you can create a kit using that stock code.

When the kit is added to a job, the user will see this dummy line by default. They can then click the ellipsis (…) button on the dummy stock line to select the actual stock codes needed for the kit.
 |
To swap stock in the kit, delete the stock code to be swapped, then enter the new stock and tab forward for the new descriptions and prices to refresh.
|
The quantity of components within a kit must be divisible by the quantity in the kit header. |
You can have kits in Advanced Warehouse Management, however when you try to pick stock on a job, you won't see the kit header in picking screen. You will only see thecontents.
Further information
Multiple Tax Codes in Kitted Stock