Download the Jim2.Cloud Remote App Client for PC latest build from https://files.happen.biz/downloads/Jim2Cloud/CloudClientSetup.msi (copy and paste into a web browser).
Once the Jim2.Cloud Client Setup file has been downloaded, double click to run the Setup Wizard.

The Jim2.Cloud Client will be saved to the Program Files directory, and a shortcut will be added to the start menu and the desktop.

Click Next.

Click Install.

The Jim2.Cloud Client will install on the computer. Click Finish to exit the Wizard.

The Jim2.Cloud Client shortcut will now be on the desktop.

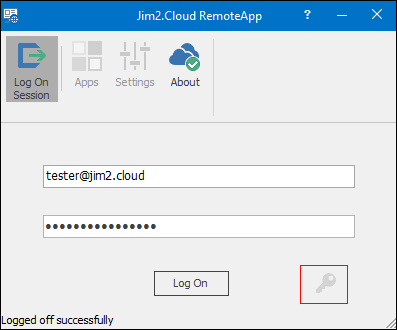
Double click the Jim2.Cloud Client on the desktop. The following will open to log on:

|
Click the key symbol to change the password. |
To save logon and/or password details, go to Settings and tick the appropriate option appropriate.

Enter the username and password supplied by Happen Business, and the following will open to start Jim2:

Double click the Jim2.Cloud icon to launch Jim2. The familiar Jim2 Logon screen will appear. Enter the Jim2 initials/username and password, or the sys details provided by the Happen Business Implementation Team.
The Jim2.Cloud Client is fully portable. It can be copied to a USB and run as required from any computer.
Further information
Jim2.Cloud Technical Requirements
Jim2.Cloud Setup and Access for PC
Jim2.Cloud Setup and Access for MAC
Jim2 Cloud Local Region Setting
Add a Document to Link to On Premises Document
Add a Document Within Jim2.Cloud
Import Files from Your PC to Jim2.Cloud
Open or Save Files from Jim2.Cloud
