
See here for setting up Office 365 email accounts first. These instructions are for both Jim2.Cloud and Jim2 on-premises.
Sending email
The best approach is to have a relay connector created that allows Jim2 to send outbound email without authentication via Office 365. The only requirement is that a static IP address is required for this to be possible.
If you are a Jim2.Cloud customer, please contact support@happen.biz requesting the static IP address of your Jim2.Cloud server.
Setup details can be found here: https://technet.microsoft.com/en-us/library/dn554323(v=exchg.150).aspx (copy and paste into a web browser).
Once the SPF record and relay connector are configured, set up the SMTP in Email Options within Office 365.
Configure a connector to send mail using Office 365 SMTP relay
Your DNS SPF Record will need to be updated to avoid having messages flagged as spam. Add the static IP address (Public IP) of your Jim2 Server to your SPF record in your domain registrar's DNS setting as follows:
v=spf1 +ip4:Your Static IP include:spf.protection.outlook.com -all
Configure a connector to send mail using Office 365 SMTP relay.
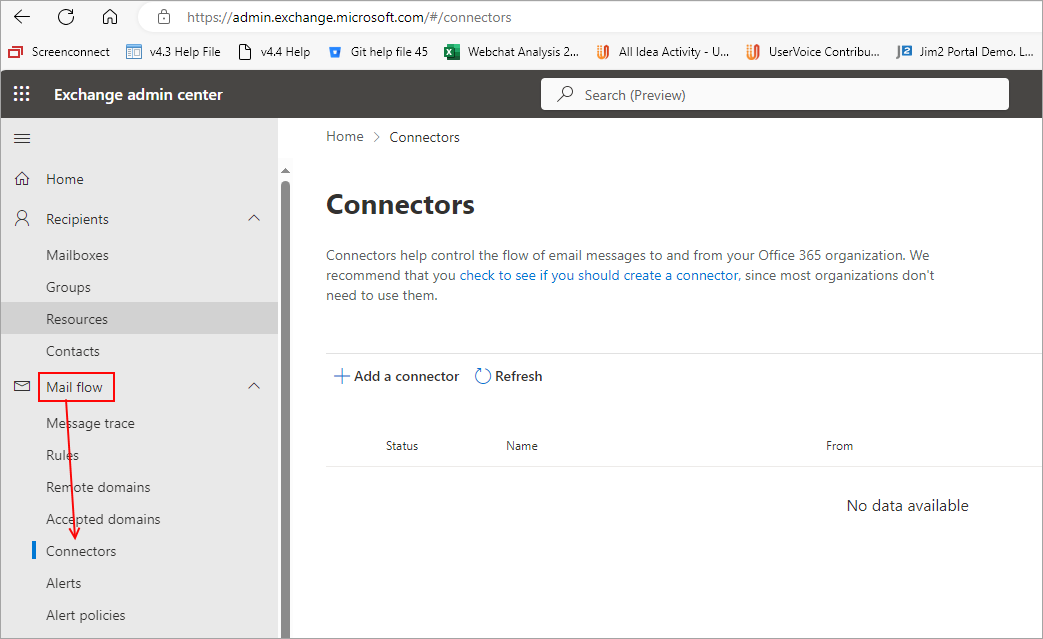
1.Go to the Exchange admin centre. Select mail flow, then connectors.
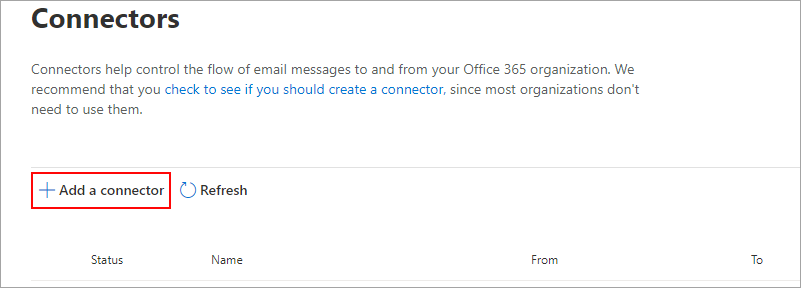
4.Click Add a Connector, then click Next.
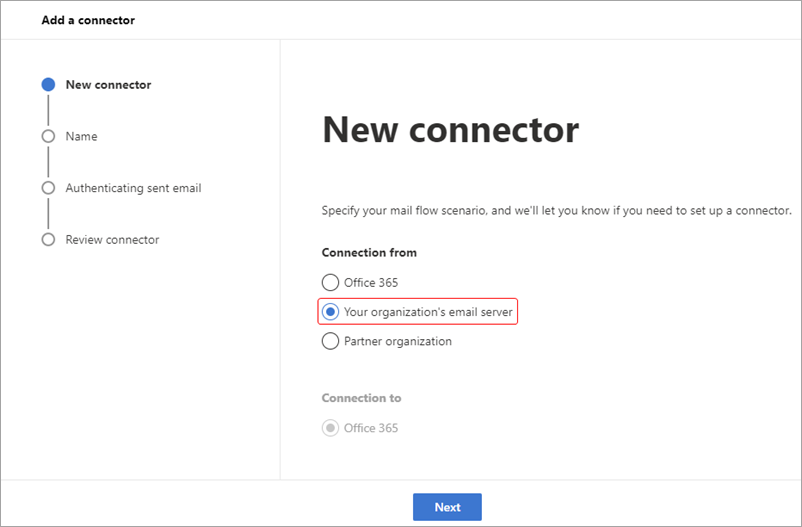
5.Select Connection from your organization's email server, then click Next.
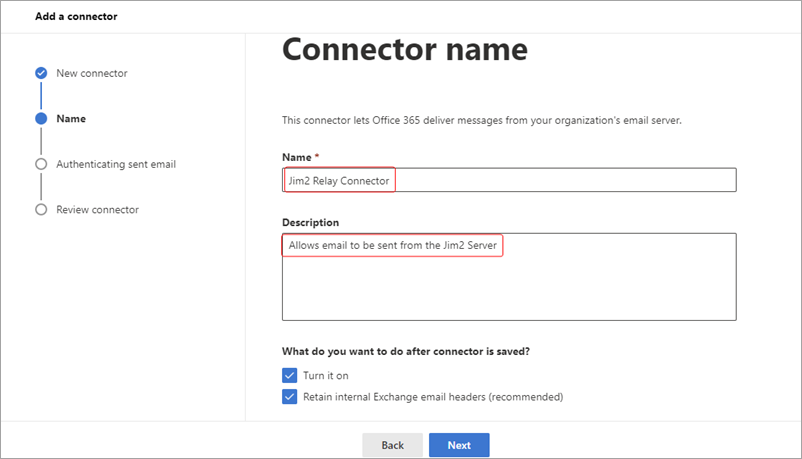
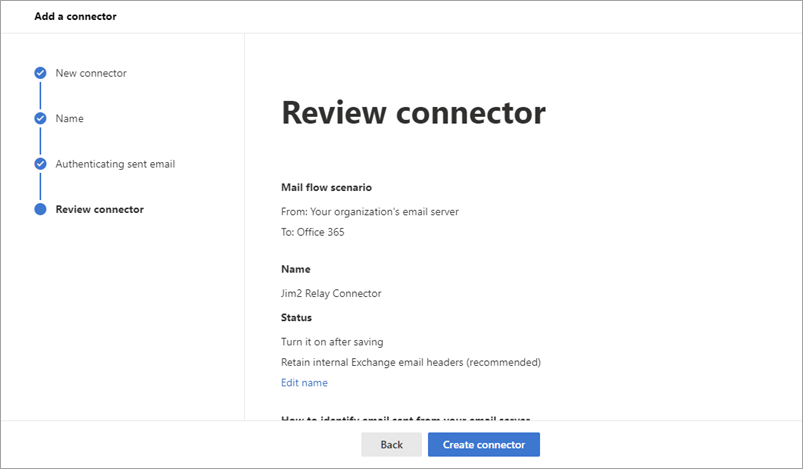
6.Enter a name (eg. Jim2 Relay Connector) and description for the connector, then click Next.
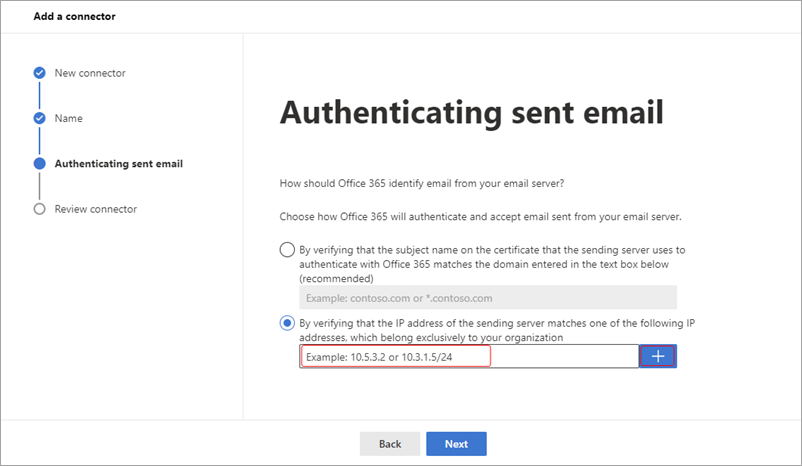
7.Choose to authenticate mail By verifying that the IP address of the sending server matches on of the following IP addresses, which belong exclusively to your organization.
8.Enter the Static IP Address (Public IP) of the Jim2 Server, then add the IP address (click +).
9.Review the settings, then click Create connector.
10.If your Microsoft 365 Tenant was created on or after 1 January 2023, you may receive an error stating that the connector cannot be enabled without contacting support. Please contact Microsoft Support (https://go.microsoft.com/fwlink/p/?linkid=2135368 - copy and paste into a browser) requesting the connector be enabled for the purpose of sending mail from Jim2:
Once the relay connector has been set up, SMTP needs to be disabled on all O365 mailboxes individually in Jim2:

|
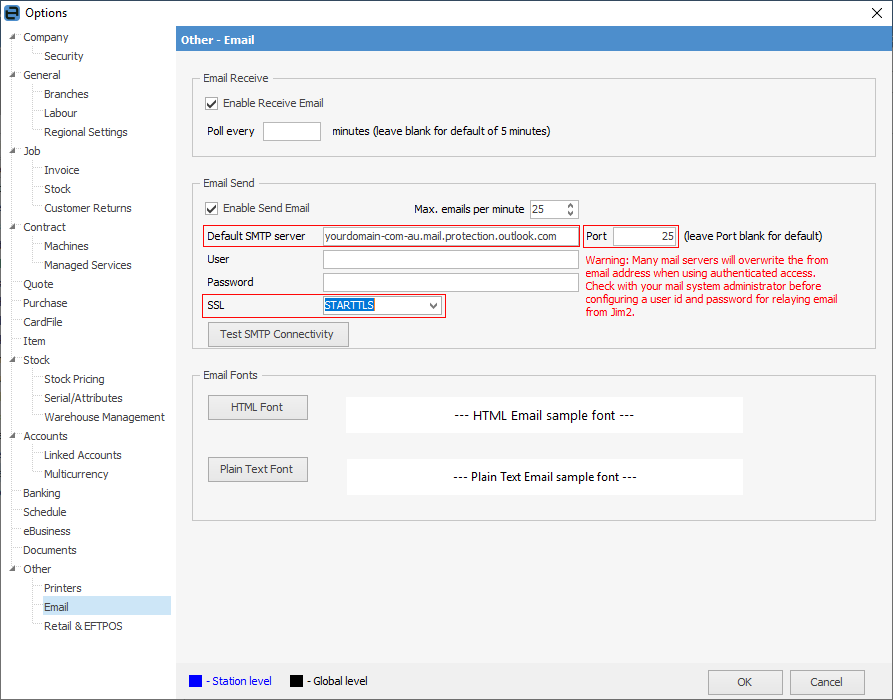
Once complete, update the default SMTP server to use office 365 via Tools > Options > Other >Email:
Default SMTP Server, eg. yourdomain-com-au.mail.protection.outlook.com
Enter the default SMTP Server, select Port 25 and us STARTTLS for SSL.
 |

Retrieving email
See here for further information.
 |
Office 365 shared mailboxes do not require a separate licence, so are ideal for Jim2 managed email addresses. However, please note that all users who access the shared mailbox must have their own Office 365 licence. |
Setup