Please use these links for specific information on updating pricing and procurement data:
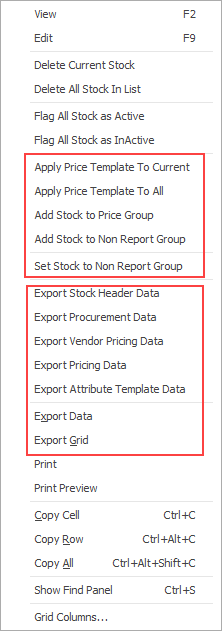
There are a number of ways to update stock records, among which are the right-click choices below.
 |
Note: Updating pricing will only affect new jobs, quotes etc. Any objects prior to the update will not have their prices updated. |
Scroll down to see how to update other areas of stock records.
Price templates can be updated in bulk in two ways. 1.From a stock list filtered by the codes to be moved to a new price template, you can right click and select Apply Price Template to All. This will update the entire list with the price template selected: 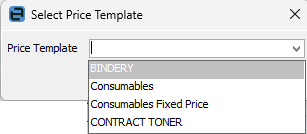 You can also click on one stock code and select Apply Price Template to Current to change the price template for that one stock code. 2.You can update price templates via exporting a stock list, changing the price template then importing the stock and synchronising. See here for more information on synchronising stock. |
|
To export stock data for updating stock records including stock header, stock descriptions, stock location, attribute template, and report level groups, create a filtered stock list with all stock to be updated.
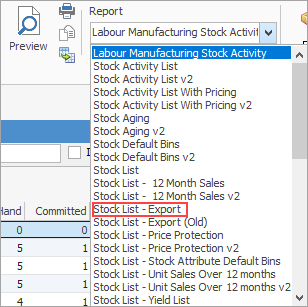
On the ribbon, go to the Report menu and select Stock List – Export. This will export to a spreadsheet including all columns required for importing. See below for the next steps.
Follow these links for specific information on updating: vendor pricing, stock pricing, stock descriptions, stock location, procurement.
To begin, go to Stock > Create Stock List on the ribbon and run a filtered list of the stock requiring updating. Export the data from Jim2, using one of the choices below: ▪Stock List - Export report in the ribbon (as above). ▪Export Stock Header Data produces a spreadsheet for editing and reimporting that includes information in the header of the Stock, Details, Locations Descriptions, Attributes and Contracts (including macro descriptions) tabs, along with stock report level, brand and price groups, reorder and avg sold methods, avg days, extra qty pcnt, Exclude attributes in procurement. When importing, select Stock (Header only) as the Import destination. ▪Export Attribute Template Data produces a spreadsheet for editing and reimporting with the following columns: Stock Code, Attribute Template Code, Attribute Template Description, Attribute Name 1 and 2, Attribute Value 1 and 2, Barcode, Manuf. Part# and Vendor Code. When importing, select Stock Attribute Templates as the Import destination.
Remove all columns except the Stock Code and whichever columns are being changed. Make the changes to the columns required, then re-import via synchronising into Jim2 following the instructions below.
The process of synchronising requires a mapping file. This file (.j2m) is a file that matches the column headings in the stock spreadsheet to the field names in Jim2. Numerous mapping files can be saved, then reused when synchronisation is required.
The best way to understand data synchronising is to practise. Using the Training database, you can synchronise stock records.
Synchronising requires matching the current stock code, then importing the information that has changed, eg. altered list price, different report level groups, removed bins, etc.
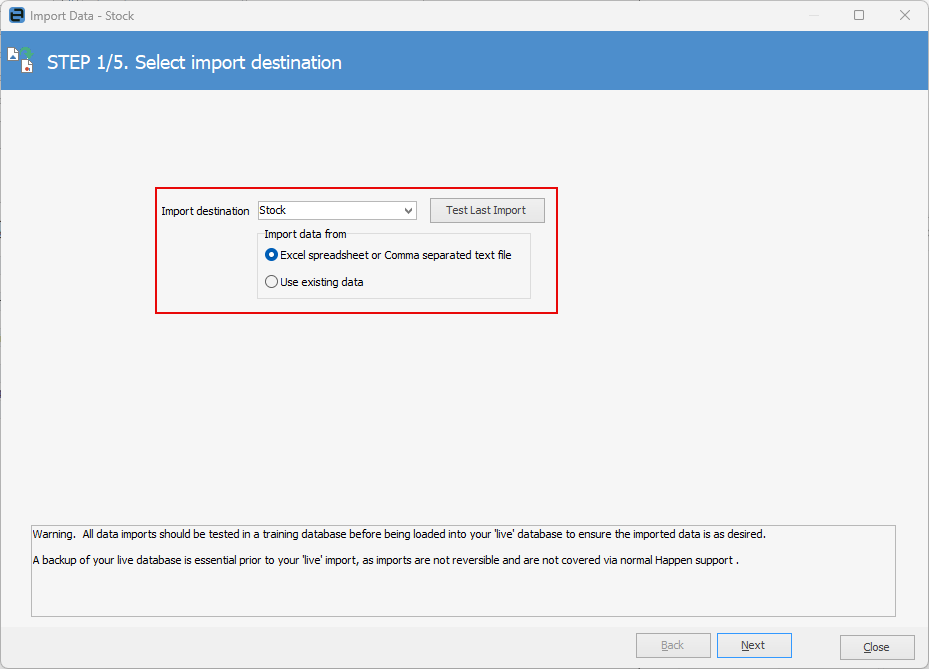
On the ribbon, go to Tools > Import Data. Select the Import destination (refer to the above for the correct Import destination to use) using the drop down to the right of the field.
Click Open source file and Jim2 will test the data.
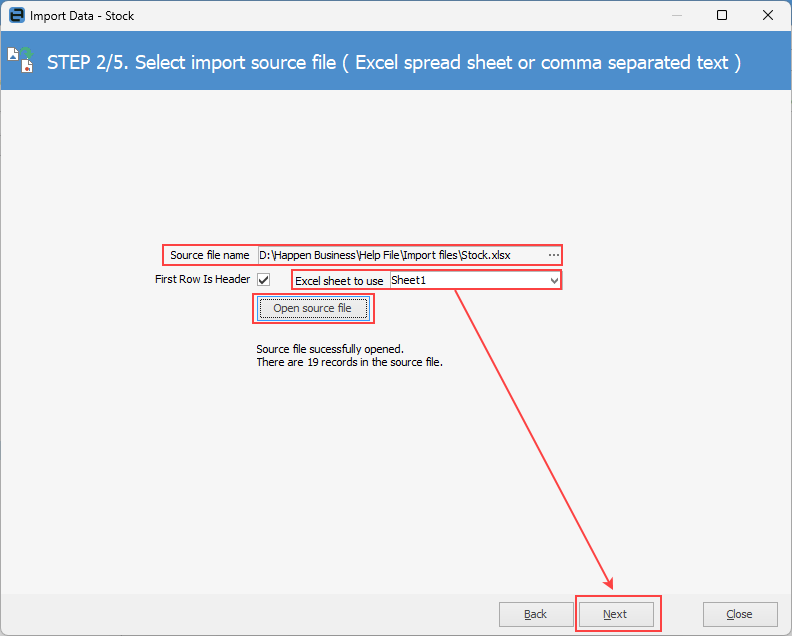
Click Next.
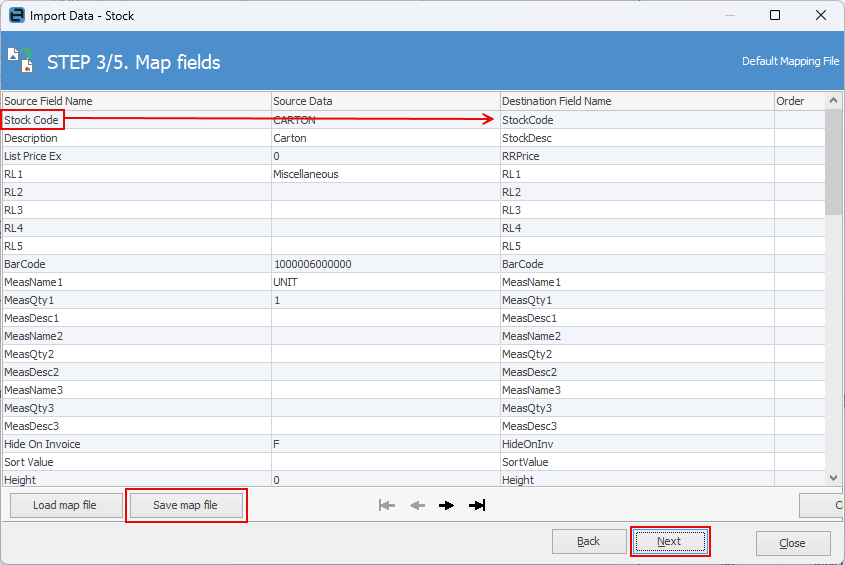
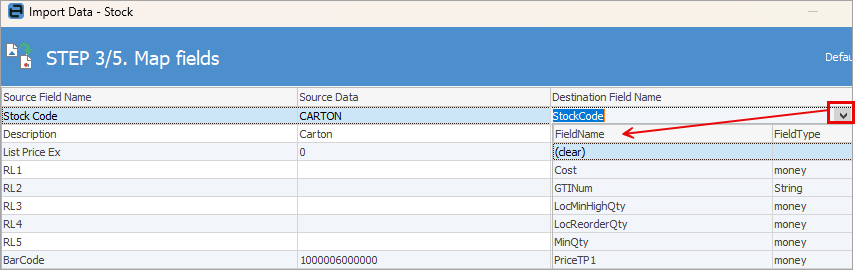
To change Destination Field Name, from the drop down list in that column select the corresponding field in Jim2:
Map the Source Field Name/Source Data to the Destination Field Name, click Save map file to reuse later, then click Next.
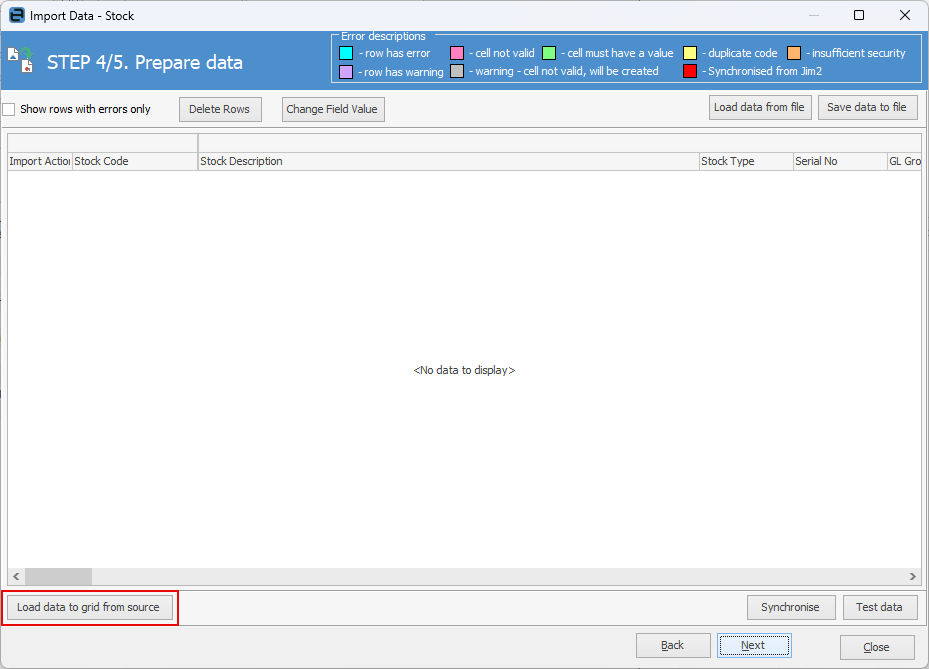
Click Load data from grid source.
The import will fail as the data is for synchronising – it isn't new stock to be added. Importing new stock requires far more information, and the legend at the top of the Import Data screen indicates the issues with various columns and rows. Click Synchronise. This will ensure that everything is correct prior to importing.
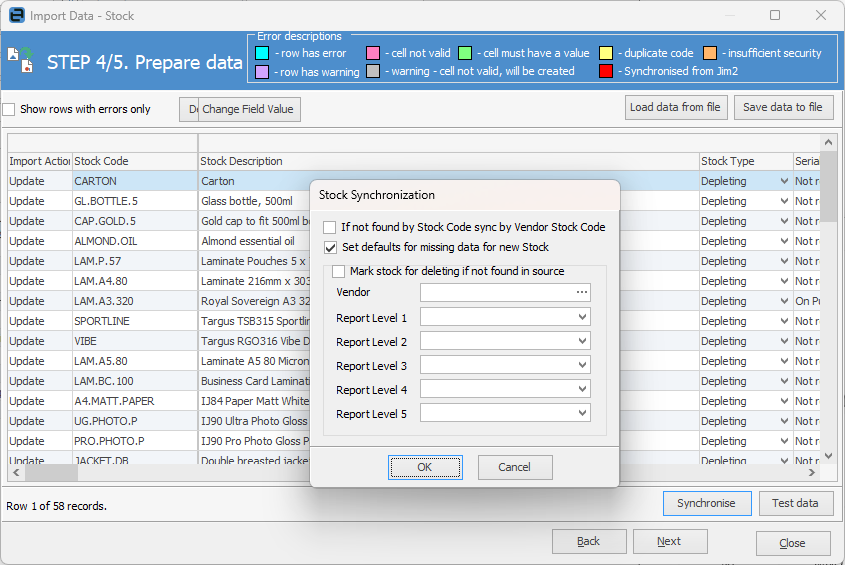
In most circumstances, there will be no need to alter the Synchronise screen, so just click OK.
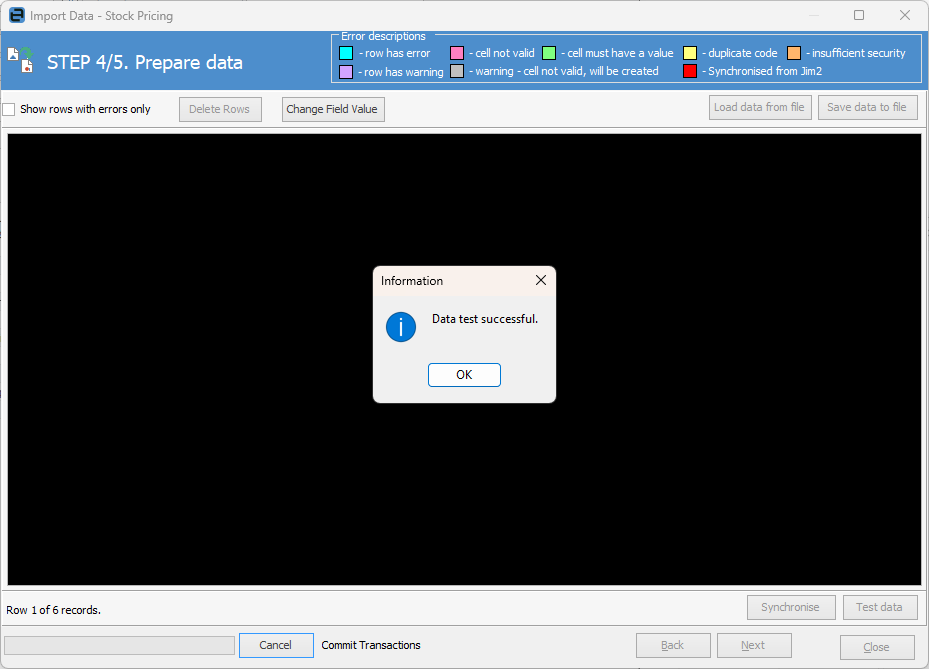
If the data test is successful, click OK, then click Next.
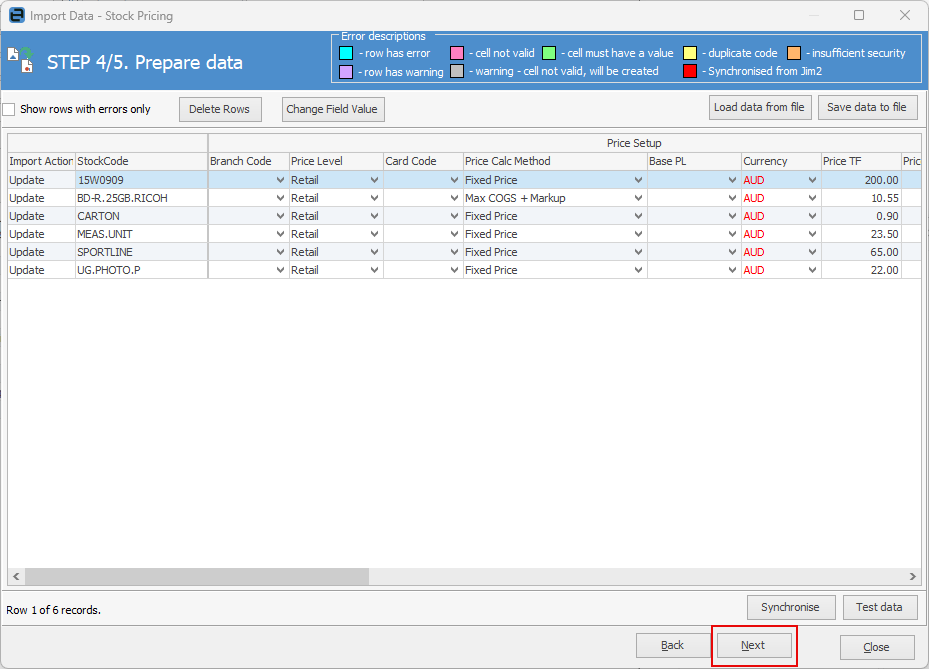
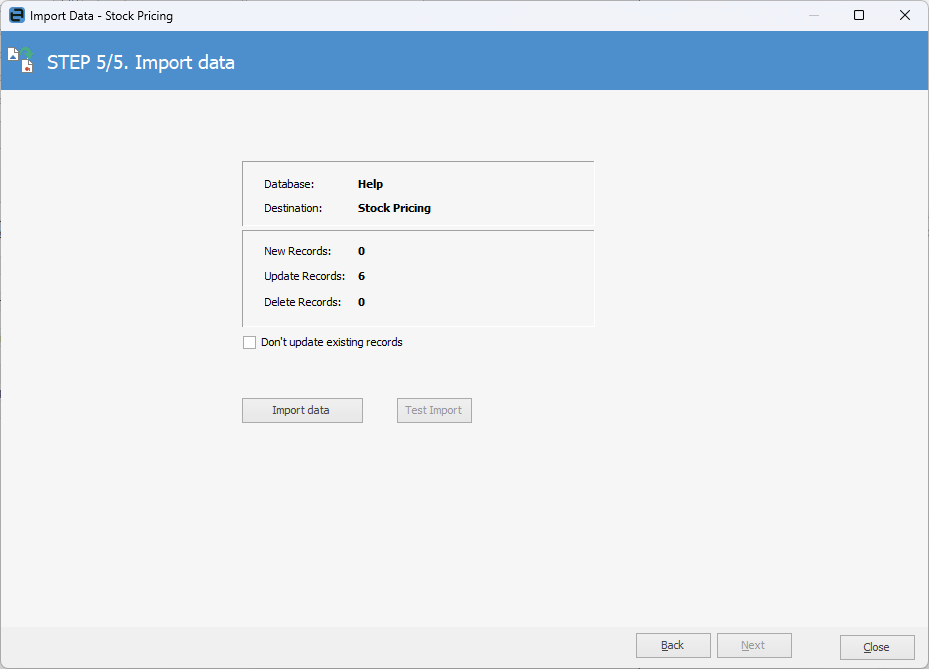
The final screen will advise how many records it will update. Click Import data to complete.
 |

Further information
Backfill Stock Sold in Advance
Buy and Sell in Different Measures
Change a Serial Number on a Stock Record
Export a Stock Report to Spreadsheet
Generate Backdated Stock on Hand Report
Move Stock from Depleting to Asset
Stop Users From Giving Discounts
Update Existing Vendor Pricing