
Till reconciliation only applies to those who have licensed Retail Point of Sale as part of their Jim2 subscription. Tills must be set up via Tools first.
Money received/recorded at the point of invoicing at each POS workstation will typically be stored in their respective Tills (cash drawers). This includes all payment types (cash, cheques, EFTPOS, etc.). A complete record of each payment can be found in both the Till reconciliation and unbanked funds.
The contents of a Till can be reconciled against recorded payments at any time. Typically, this would be an end of day routine, but could be done to coincide with banking sessions, eg. when you go to the bank with cash, cheques, etc. Till reconciliations give you the opportunity to monitor accuracy at the POS, and make any under/over corrections prior to actually banking the funds.
The process of Till reconciliation works very much the same as a Banking Session. The purpose of the Till reconciliation is to compare recorded takings to actual Till takings.
To complete a Till reconciliation:
▪In the Nav Tree, right click on Accounts and select Till Rec.
or
▪On the ribbon, go to Accounts > Till Rec.

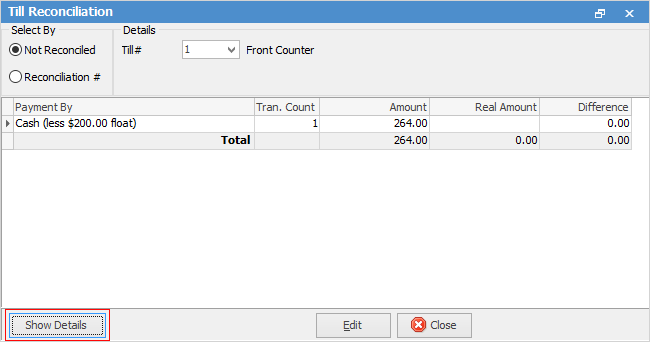
By default, the Select By criteria for viewing transactions is set to Not Reconciled, ie. you will be able to edit a list of all transactions recorded against the nominated Till that have not been reconciled.
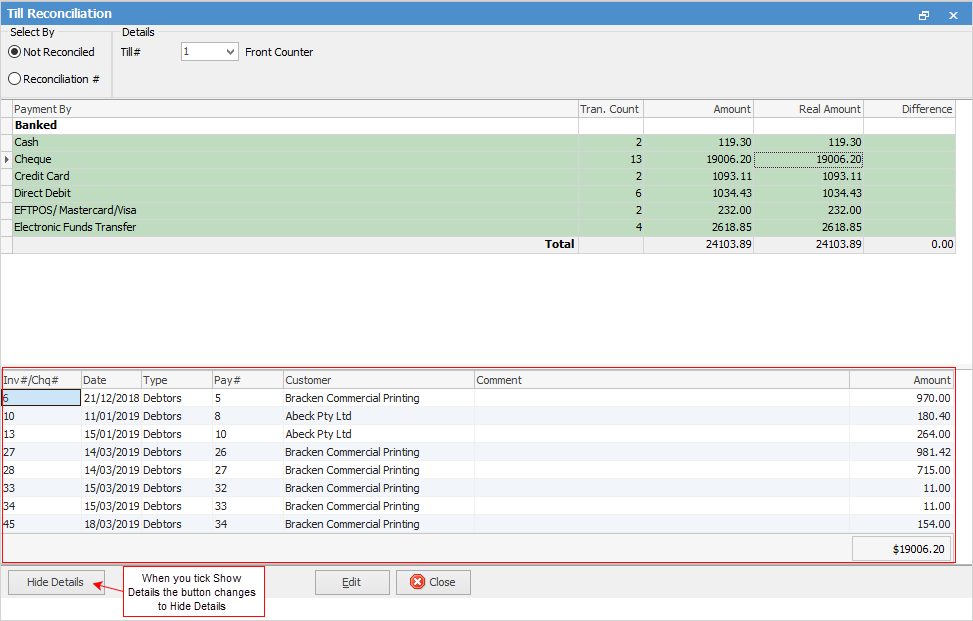
Nominate the Till# you would like to reconcile and click Edit. A summarised list of all transactions, grouped by their payment types and with a transaction count for each type, will be showing with a total for each payment type. If you would like to see a breakdown on the total for any payment type, click Show Details at the bottom of the screen.
Having added/counted each payment type total in the Till, record the real amount in the column with that header. If the Amount column matches the Real Amount column exactly, the line will turn green – indicating a fully reconciled total. If the real amount differs from the recorded amount, the difference (+/-) will be calculated and placed in the Difference column.
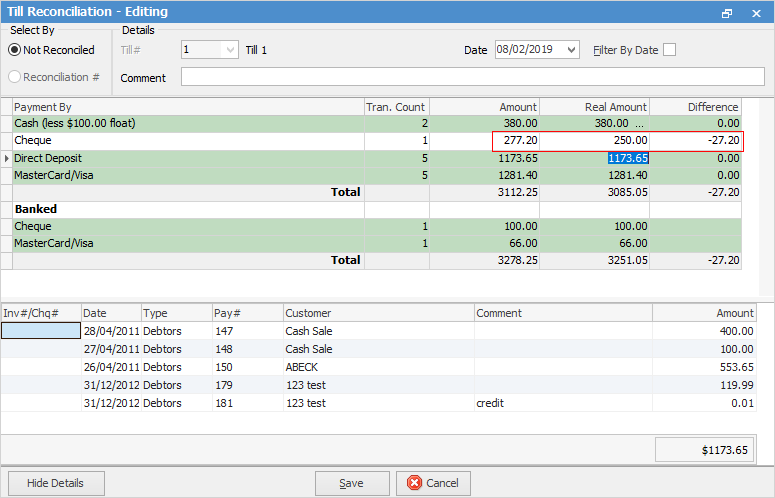
This difference will become an unders/overs expense, and the + or – amount will now be showing in your Unbanked Funds.

Sorting, searching and grouping are all available as per other lists in Jim2. Click on the column header in the grid you wish to sort, then drag it to the Group By area to group.
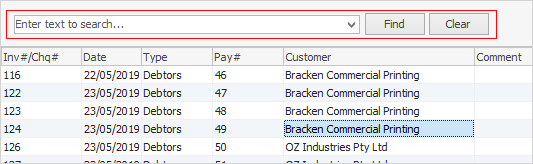
You can also right click in the lower grid and select Show Find Panel where you can enter search criteria.
To finalise the reconciliation, click Save.
 |
To view previous reconciliation sessions, change the selector to Reconciliation # and choose a previous reconciliation session from the drop-down options.
 |
If a payment is not in the Till Rec, but is appearing in bank deposits, it means that the payment was processed at a workstation that is not linked to the Till.
You can either:
▪accept that there is less in the Till (don't create an under amount from this in the Till Rec), but include that payment in the banking session so the overall money deposited into the bank is correct, or
▪unallocate and delete the payment, then re-enter it at a workstation that is linked to the Till.
|
If you want to undo and change a Till reconciliation, you will need to have an adequate security level to do so. Recall the Till reconciliation that you want to change using Reconciliation #. Once the session is in view, choose Delete Reconciliation. If the money has been banked in the meantime, they will automatically show as green (fully reconciled). |
If your security allows it, you can right click within the list grid, select Export Data and save the list information as an XLSX file.
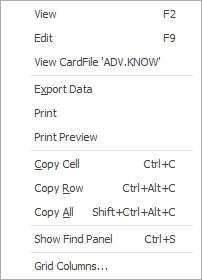
As you can see from the above image, you have a number of other useful right-click options, all self explanatory.
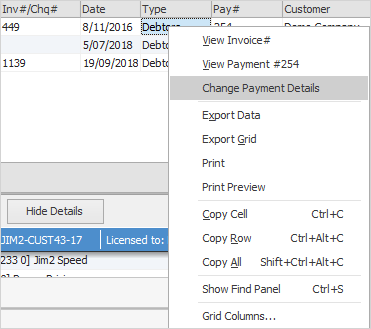
From within a Till Reconciliation, you have further right click options by line:
Right Click Option |
Explanation |
||
View Invoice# |
View the related job/invoice. |
||
View Payment# |
View the payment number via the debtor record. |
||
Change Payment Details |
Provided the payment has not been banked or reconciled, you can change the payment type here.
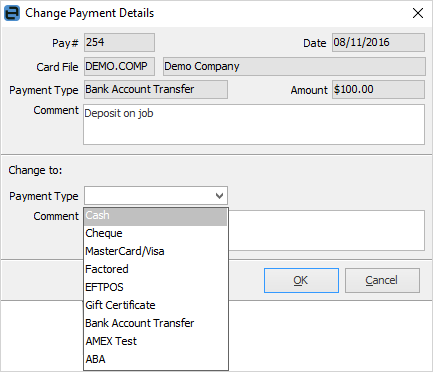 |
||
Export Data |
Exports data from the grid to a spreadsheet file. |
||
Export Grid |
Exports the grid to a spreadsheet exactly as is. This is particularly useful if your grid has more than one header row, as it will export all header rows. |
||
Print the list. |
|||
Print Preview |
Preview the list to be printed. |
||
Copy Cell |
Copy the cell you have clicked on. |
||
Copy Row |
Copy the entire row you have clicked on. |
||
Copy All |
Copy all, which can then be pasted into a spreadsheet |
||
Show Find panel |
Show/hide the Find panel:

|
||
Grid Columns... |
Allows you to select more columns to add to the grid. Extra columns: Archive, Card#, Contact, Delivery Status, Group Tag, Object Tag, To, User. |

Further information: