To assign Groups to a particular stock record, start by clicking the ellipsis [...] at the end of the Groups field.

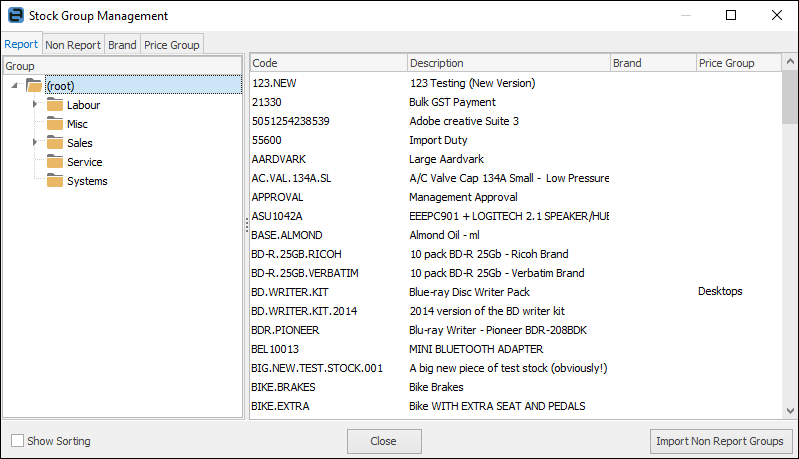
The Stock Group Management screen will appear, showing a list of all groups that are currently available. Use the scroll bar (hover over the scroll bar area and it will appear) and arrows to select the desired group/sub-group. When finished, click Select.

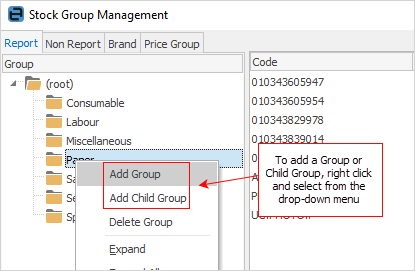
If a suitable group is not available, a group can be added while still in this screen. To do so, right click and select Add Group, or Add Child Group, from the dropdown list. Select the codes to add to the group and drag onto the new group name. Use the Ctrl and Shift keys to multi-select.

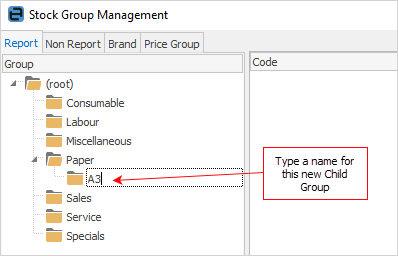
A new, empty text line will appear. Enter the new group or child group name, then use Enter. From the (root) all stock codes will show in the Code screen. The new group will now be available and applied immediately by clicking the  symbol to move the new group to the Selected Groups side of the screen.

When all the appropriate groups (report, non report, brands etc.) have been applied to the stock, click Select.
|
When adding report level groups to stock, only have one group at each level assigned to that stock. The groups must be consecutively ascending, ie. to assign a level 2 group, a level 1 group must have been assigned first. Above, Service is level 1, and On Site is level 2. The simplest way to do this is to select the final group the stock is in. |
