
1. Configure Jim2 Options
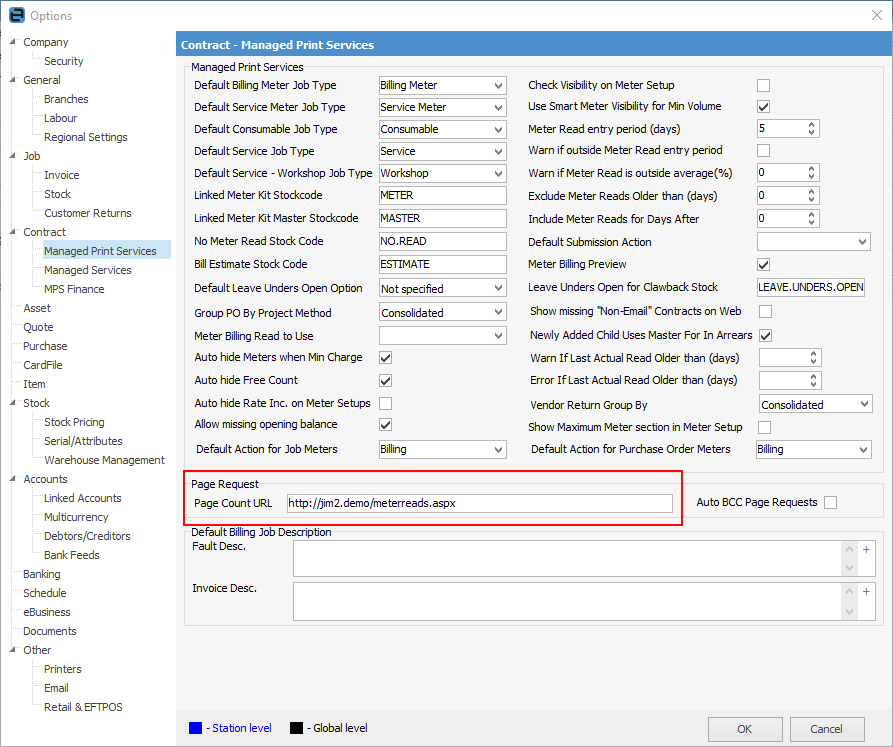
On the ribbon, go to Tools > Options > Contract > Managed Print Services, and enter the web address for the meter reads (this is set up via eBusiness Service). Tick Auto BCC Page Requests to receive them via an email address as well.
Set up web user security to allow access to the web page.
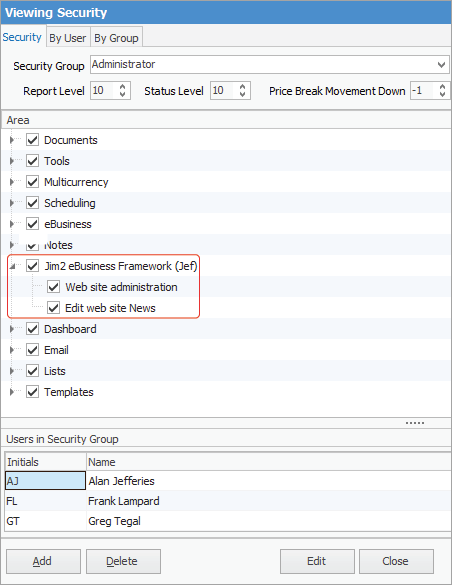
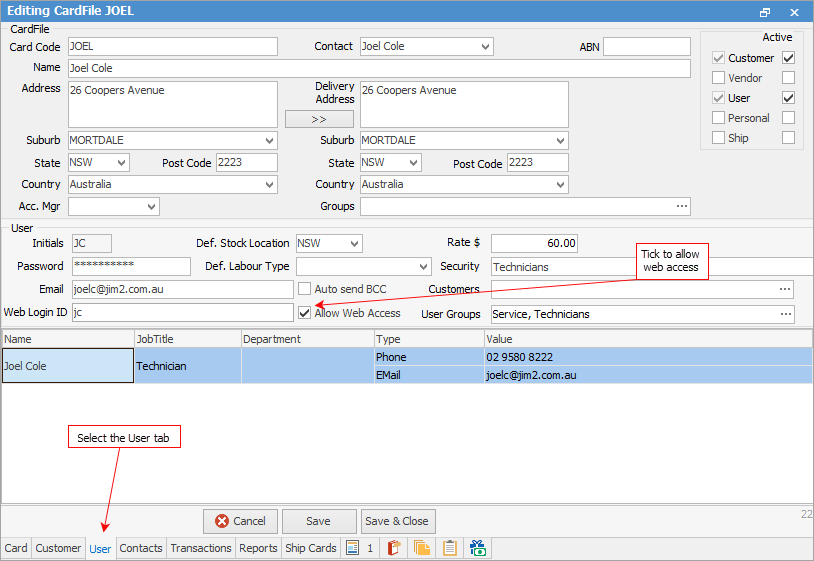
Set up an administrator to have Jef Administration access, and/or enable a user for a web account.
2.Set up Jef for Page Counts (Meter Reads)
|
In the installation, there is a sample site which already has a photocopier website set up. it is recommended to use/modify this to set up rather than perform manual configuration. |
Log on to the website as an administrator. Go to Site Admin > Manage > Pages, go to the Meter Reads page, then click Edit on the right hand side. Tick Anonymous, then select the template eBusiness No Logon.
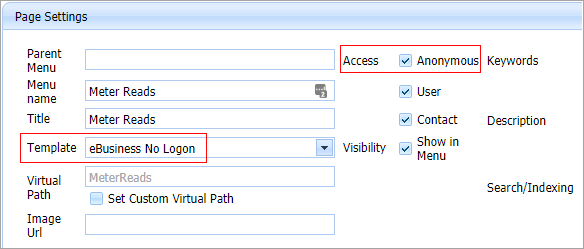
Publish the pages to ensure this change is live on the website.

3. Set up Individual Customer CardFile for Welcome Email
On the Contacts tab of the customer cardfile for the person who will be entering the meter reads (Request By on contract see here for more information), enter details as shown here:
4. Send the Welcome Email from the Customer Card File
|
The SMTP Email Server must be set up in Jim2 Options. Do not send the email until the Jef installation has been completed/confirmed. |
The Welcome email provides username and password to log on to the portal to submit reads.
The next step is to set up the password email template via Email > Email Templates on the ribbon..
Use the %WebLogon@ and %Password% macros within the email body.

On the ribbon go to Email > Email Editor Rules and create a rule as below:
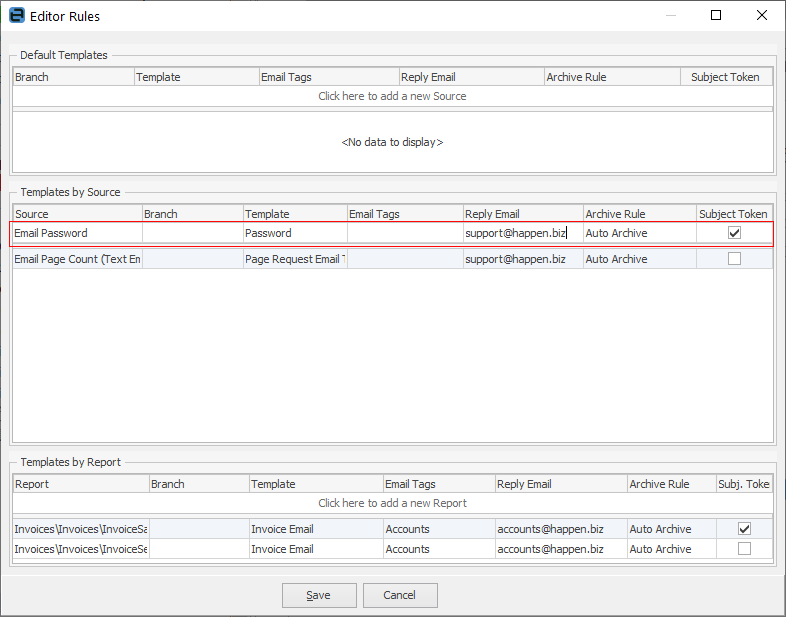
To send the email, go to the customer cardfile Contacts tab (as above) and click Email Password. This will send the Welcome email template based on the rule above.

3. Set up Page Request Email Templates
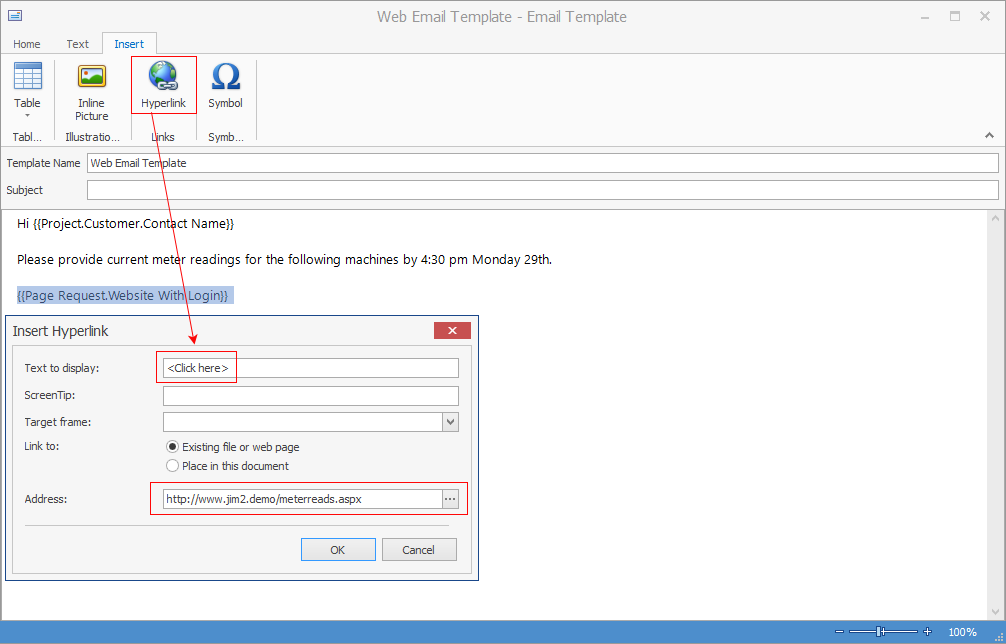
Email Templates need to be set up using macros for page requests.

The following shows how to add a hyperlink to the web portal:

5. Set up Contracts for Request by Web Email
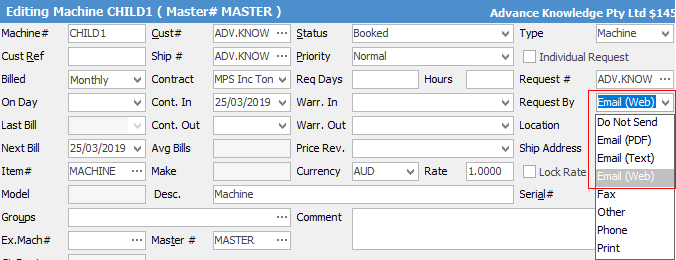
a.In each contract, select Request By. Change this to Email (Web).
b.Set up an individual contact that will receive the page requests and web logon as well.
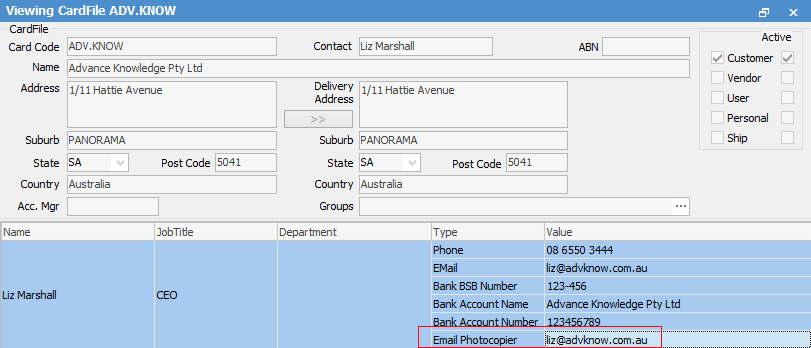
c.In CardFile, set up the Email Photocopier for each contact, including the primary contact.
Set up Contracts for E-Meter Requests
Run a contract list, and filter as required (ie. select a particular cardfile, etc.). Select Report > Contract List – E-Meter Read Setup.

Click Preview, tick Change contract's Request By method to Email (Web), then click Run.
|
It is important to select the correct Request By method, otherwise, if left blank, it will run a list of all contracts. |
On the ribbon, select the Report Contract List – E-Meter Read Setup.

Click Print.
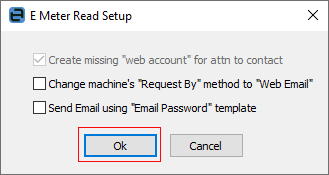
Click OK (do not tick any other boxes).
Go into one of the contracts and ensure that Request #, Attn: and Request By have been properly populated.

Once complete, then request meter reads either via a list, or via a contract. Select the Contract – Page Request Form report, then click Print.
The email according to the template set up earlier (see point 3 above) will open.

Click Send.
Further information
Managed Print Services Edition
Refurbishing and Replacing Machines


