Stock Locations are flagged as belonging to a specific company. It is also worthwhile ticking InterCompany to ensure you can perform intercompany transfers.
Stock locations belonging to different companies can be used together on the same job, purchase order, quote, etc.
In Tools > Setups > Stock Locations, add stock locations for each company.
|
|
Note: There will be transfer locations (stock in transit) already set up for each company.
|
|
|
|
Code
|
Enter a code for this stock location, which can be up to 4 characters. Tick active to use this location.
|
Description
|
Enter a description for this stock location to easily identify where it is.
|
Branch
|
Choose a branch (if using branches).
|
Company
|
Select the company for this stock location.
|
Bulk Location
|
Tick if this is the bulk location.
|
Warehouse Management
|
Tick to use warehouse management.
|
Exclude from Procurements
|
Tick if this location is not to be used in stock procurement.
|
Default for branch
|
Tick if this is to be the default location for the branch.
|
Allow Intercompany Transfers
|
Tick this so the location can be used for intercompany transfers.
|
Stock locations need to be set up prior to adding company information to the company cardfiles. This setup allows the use and tracking of multiple stock locations for each company. These might be internal to the company premises or geographically external (such as a different building or city). Stock locations can even be set up for temporary locations (such as a technician's vehicle) for added accuracy. See Stock Locations for more information.
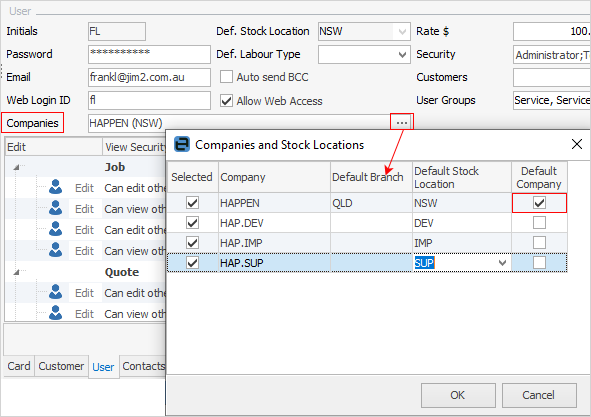
Edit all user cardfiles to show which companies they belong to. Users can belong to more than one company. When selecting the company, select the default stock location, as well as which company is the default for that user.
|
|
Ensure all companies are added to the sys cardfile.
|
|
|
|
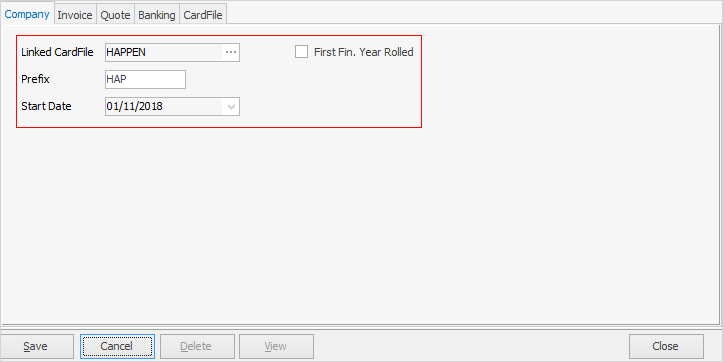
Select the cardfile to be linked to this company. Select a start date for this company. All companies should ideally have the same start date. Tick First Fin. Year Rolled, if it has been rolled.
Enter a Prefix (up to 4 characters). This prefix will be appended to all invoice numbers for this company.
|
|
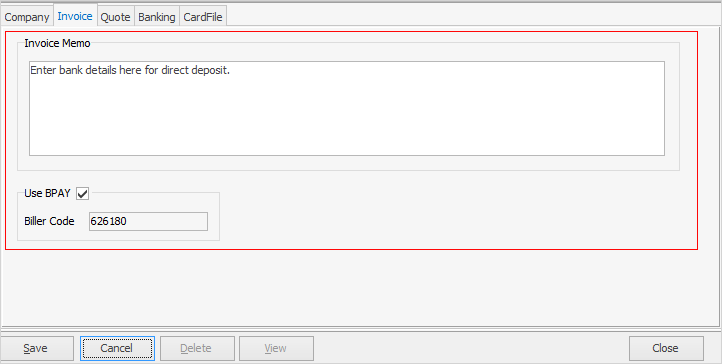
Invoice memo: The text message entered in this field will always be printed on all invoices produced for this company. Using this option, tailor a text message to suit marketing needs, define company terms and conditions, or convey seasonal greetings. This message can be changed at any time via this option. This is also where to enter or change bank details to appear on the invoice for customers to pay via direct payment.
Use BPAY: Tick to use BPAY for this company, and enter the appropriate Biller Code.
|
|
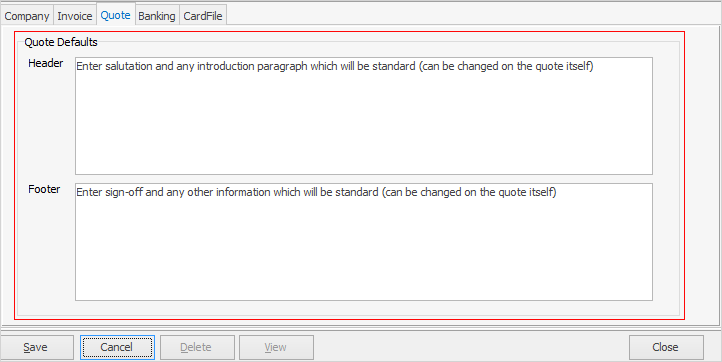
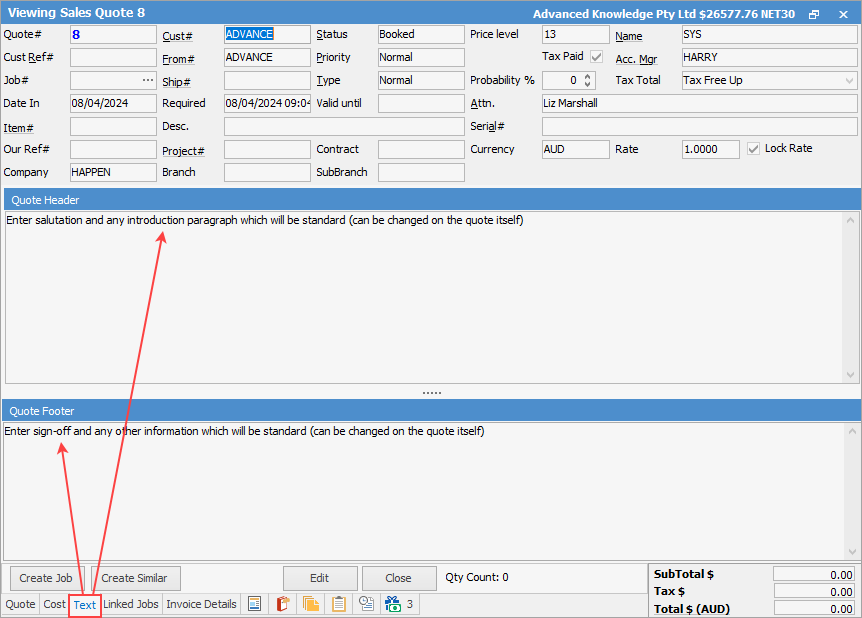
This is where to enter the default information for both the quote header and footer – standard information that will appear on all quotes for this company.
The quote header can be set to display a specific salutation and opening paragraph on every quote created. Enter that default header text here.
The quote footer can be set to display a specific sign-off, including trading terms and conditions on every quote created. Enter that footer text here.
Both the quote header and footer can still be changed on the quote itself (from within the Text tab) at any time. You can also add acceptance to a quote information for signing.
|
|
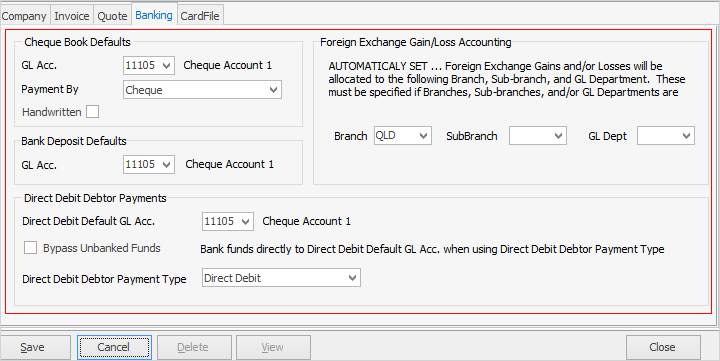
Each company can specify cheque book, bank deposit, debtor payments, foreign exchange gain/loss (if licensed for Multi-Currency), along with branch (if Branches are enabled), sub-branch and GL Department.
|
|
|
GL Acc.
|
The general ledger account selected here will be the default used in the cheque book. Only general ledger accounts that are set up as either a Detailed Cheque or Credit Card account can be used.
|
Payment By
|
Select a default Payment By for those times when writing cheques, deposits, creditors cheques, etc. The options are: Cash, Cheque, Direct Debit, EFTPOS, Electronic Payments, MasterCard/Visa. The default selected here can be changed within each cheque.
|
Handwritten
|
Tick Handwritten if most or all of the cheques drawn from the business are handwritten. The default selected here can be changed within each cheque.
|
|
|
|
|
GL Acc.
|
The general ledger account selected here will be the default used in bank deposits. Only general ledger accounts that are set up as either a Detailed Cheque or Credit Card account can be selected.
|
|
Payment types must be set up prior via Tools > Setups > Banking > Payment Type. Direct debit debtor payments cannot be deleted – they can only be reversed.
|
|
|
Direct Debit Default GL Acc.
|
The default general ledger account to be used. This is typically a 1-XXXX asset cheque/bank account with bank information set up. Bank info can be set up by selecting Accounts > General Ledger, editing the general ledger account and selecting Bank Info.
|
Bypass Unbanked Funds
|
If there are direct debits in unbanked funds, turning on Bypass Unbanked Funds will produce a warning advising these cannot be banked if this option is turned on. It is still possible to continue if desired.
▪Ticked: Funds will go from Trade Debtors straight to the account specified in Direct Debit Default GL Acc.
▪Unticked: Funds will go from Trade Debtors to Unbanked Funds. |
Direct Debit Debtor Payment Type
|
Once a payment type has been associated with direct debiting, any payments made using the selected payment type from the Invoice screen will behave as specified here.
|
|
|
|
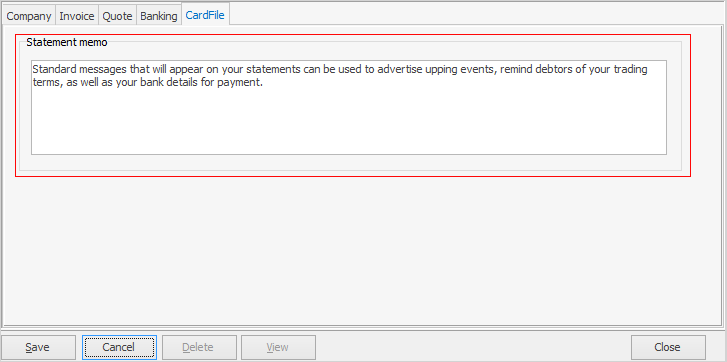
This field is where enter a standard message that will always be printed on the debtor statements for this company. Typically, this memo would be a marketing message appropriate to the season, or details of preferred payment methods, etc. It can be edited only via this Options screen and is limited to 8,000 characters.
See Company Accounts for more information.
|
|
Further information
Multi-Company Options
Multi-Company Setups
Company Logos
|


