Within the Schedule the Task List icon on the ribbon opens the Task List screen.
 |
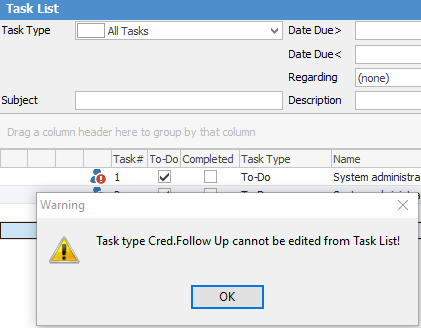
Task types cannot be edited as they have encoded relationships (eg. job is related to job, etc.). These relationships are limited and fixed with the code base, and also affect the behaviour of the task (eg. editing a job task will lock the job). |
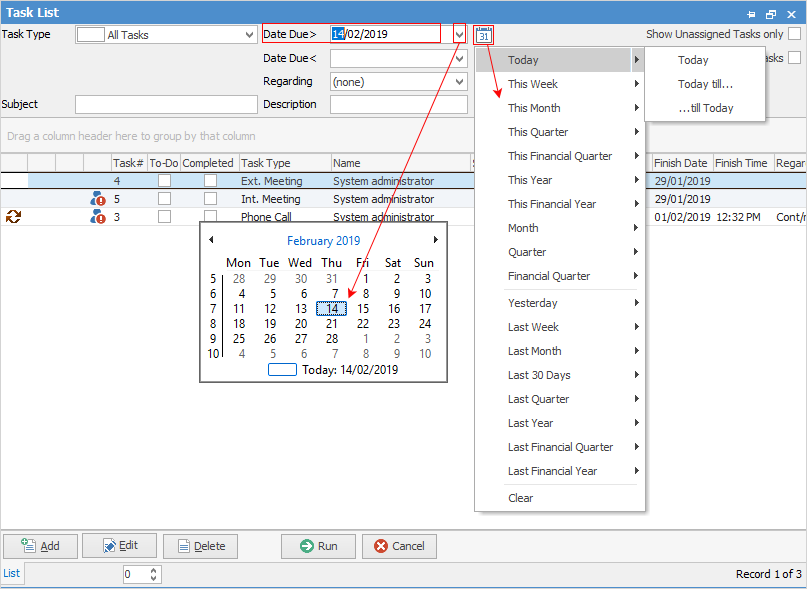
When first opening the Task list, the Date Due> field is set to the current date and the User field displays the current user. A query can be run straight away, or a different user can be chosen from the drop down list. The date and other fields can be changed or filtered, as outlined below in the second image.

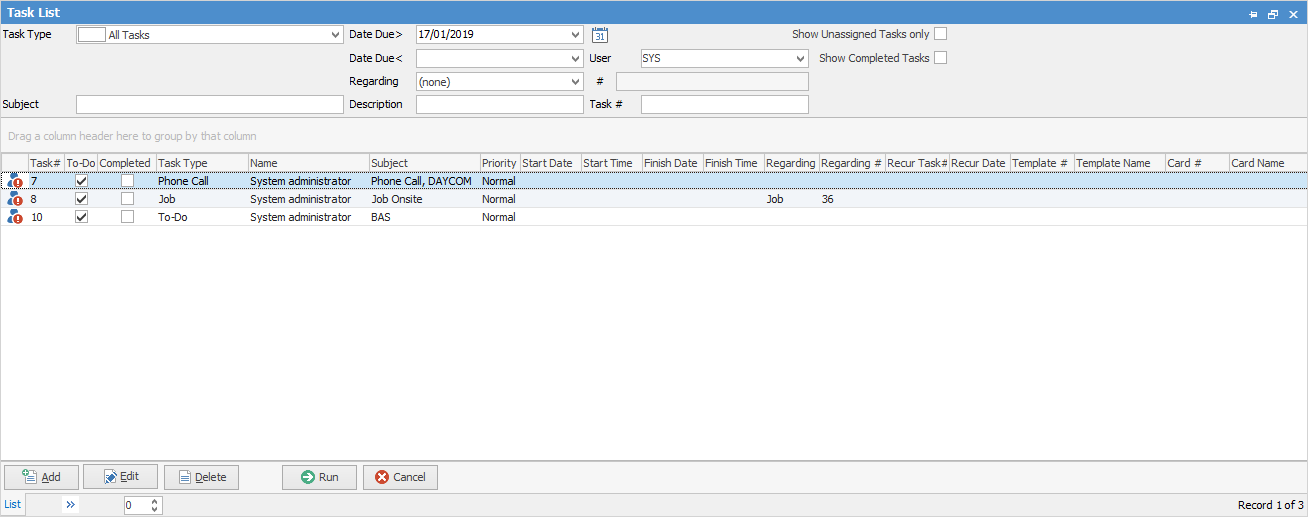
The red exclamation mark over the people/person icon indicates that the task has not yet been confirmed by the user.
Adjust the Task Type and Regarding drop down fields to suit.
If necessary, the dates in the two Date Due fields can be adjusted in a couple of ways:
1.Enter the desired date by entering it directly into the Date field(s).
2.Choose from the drop down next to the Date field(s) and select the date from the calendar (highlighted above in blue). Click the Calendar icon  and choose an appropriate time period from the drop down list, or clear any values already in the field(s).
3.Click Run.
The results of each query are displayed in the Task list, as shown in the example below.

Task list includes columns indicating if tasks are recurring, have reminders, have multiple resources assigned, and have been confirmed.
Additional features include:
▪Hint over recurring tasks displaying the starting recurrence.
▪Name defaults to current user.
▪Date defaults to current date.
▪Support for Managed Service job tasks
▪Job related task type (displays both Job and Managed Service Job task types).
▪Includes a Show Unassigned Tasks selection criteron. Simply tick to filter tasks that have not been assigned to resources.
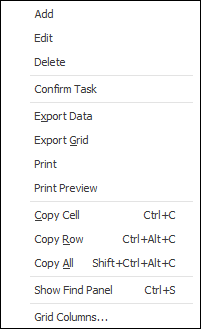
If user security allows it, right click within the list grid, select Export Data and save the list information as an XLSX file.

Right Click Option |
Function |
|---|---|
Add |
Add a new task. |
Edit |
Edit the highlighted task. |
Delete |
Delete the highlighted task. |
Confirm Task |
Confirm the highlighted task |
Export Data |
Exports the list to a spreadsheet. |
Export Grid |
Exports the grid to a spreadsheet. This is particularly useful if the grid has more than one header row, as it will export all header rows. |
Print the list. |
|
Print Preview |
Preview the list to be printed. |
Copy Cell |
Copy the highlighted cell. |
Copy Row |
Copy the highlighted row. |
Copy All |
Copy all, which can then be pasted into a spreadsheet |
Show Find panel |
Opens the Find panel:
 |
Grid Columns... |
Allows adding more columns. Also allows removal of columns. Select the column to add, then drag it to the position required in the columns within the grid. To remove, click and drag to the Grid Columns... window, or drag down away from the header area. |
|
An object within the Task list cannot be edited. This needs to be performed within the object the task is on.
 |
Further Information