First, decide if you need to add to this template specifically, and what can be left alone to use inherited values.
Click Edit to make the changes.
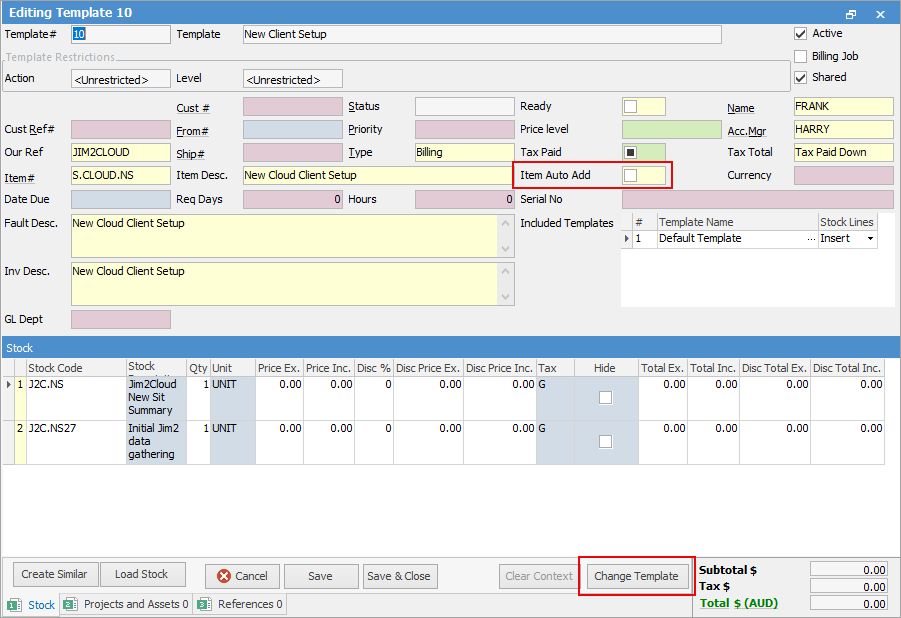
The following image shows the template in Edit mode (after clicking Edit, click Change Template):
|
When an Item is added to jobs using Project templates, auto-add stock is only triggered if configured in the template to do so. |
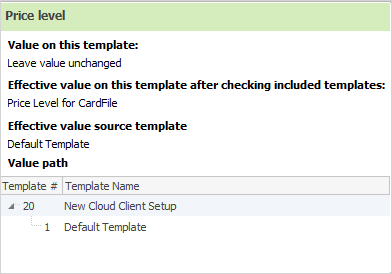
When clicking on the icons in the fields in the header, an explanation of where the value is coming from will appear. For example, highlighted Cust Ref# pop-up explains it is coming from the customer card code on the Project.
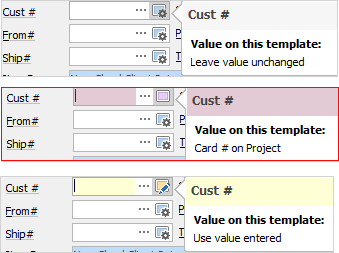
Yellow – The value here is set at the template level.
Red – The value is being inherited from either the Project, or a higher-level template association.
Green – The value is coming from the default on the cardfile.
Blue – The value is coming from a default source such as stock code, Item code or logged on user.
White – There is no value, and the value on the job will have no value when created.
There are some other important settings
Active – Whether the template is active, and can be used.
Billing Job – Ticked only when the template is being used for billing job creation.
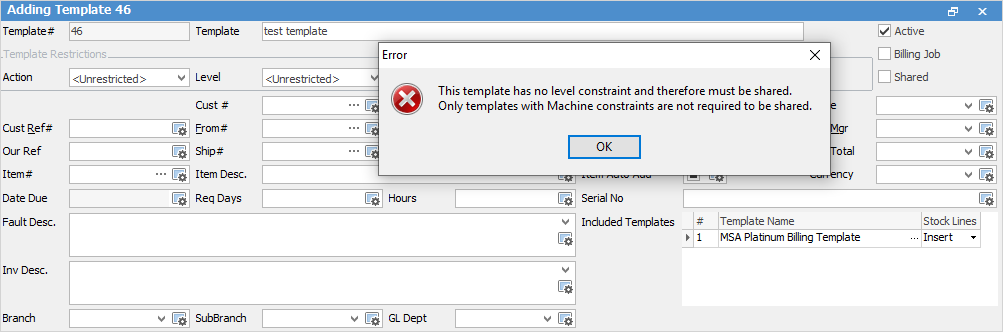
Shared – Whether this template can be shared, and potentially used by many Projects. If there are no Level restrictions, this must be ticked.
Not Shared – Generally used by billing jobs with Project specific settings and stock.
Action and Level Restrictions
Action – This template can only be associated to the action specified here.
Level – Further restriction of where the template can be used.
▪Asset – can only be used on a specific Asset.
▪Action – can only be used with the action specified.
▪Project – can only be used on a specified Project.
▪Project Type – can only be used on a specified Project type.
▪Project System Type – very high level, ie. can only be used for Managed Service types.
|
Note: If Level is left at Unrestricted, the template must be shared.
 |
Further information
Generating Jobs Using Project Templates
Non-Billing Template Setup and Usage
Project Template Creation Example 1
Project Template Creation Example 2