
Prior to performing a return from customer, set up a stock location for RFC as, say, Faulty. This will ensure the stock is not included in stock availability.
1.On the ribbon, go to Jobs > Return from Customer.

2.Select Add.

Several fields are automatically populated, including the Return#, Date In, and Status.

|
Some letters in the field names within the header are underlined, eg. Cust#. Using Alt+ the underlined letter will jump to the field beside that heading. |

3.Tick or un-tick Strict Return. See Return from Customer for an explanation of Strict Return and Non Strict Return.
3.Select a customer in one of the following ways:
▪Enter the Inv# (if strict return) and Jim2 will populate the Cust#.
▪Begin entering the customer name. Jim2 intuitive type will begin to pre-empt the choice of names from the card code list based on what is being entered.
▪Select the ellipsis [...] beside the Cust# field to display the full list of customers, then choose from the list.
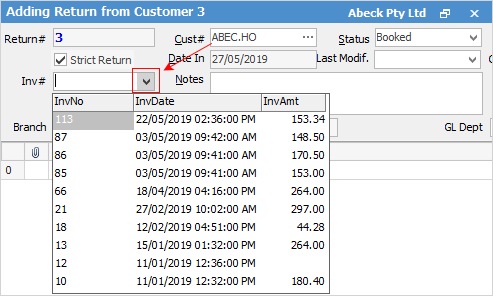
4.Select an Inv# either by entering the Cust# then selecting from the dropdown list in Inv#, or if the invoice number is known enter it directly here. If a customer has been entered, choose from the drop-down in the Inv# field. Jim2 will provide the complete list of invoices relating to that customer. Select which invoice the stock is being returned from. When the Inv# field is selected, current invoices are at the top of the list.
5.Move to the Reason field. Using Return From Customer Types, choose the type of return from the drop-down options, for example, Faulty. These types should be set up in Tools > Setups > Jobs > RFC Types first. This is a useful means of tracking why goods are being returned.
8.Enter more information about why the stock is being returned in the Notes field.
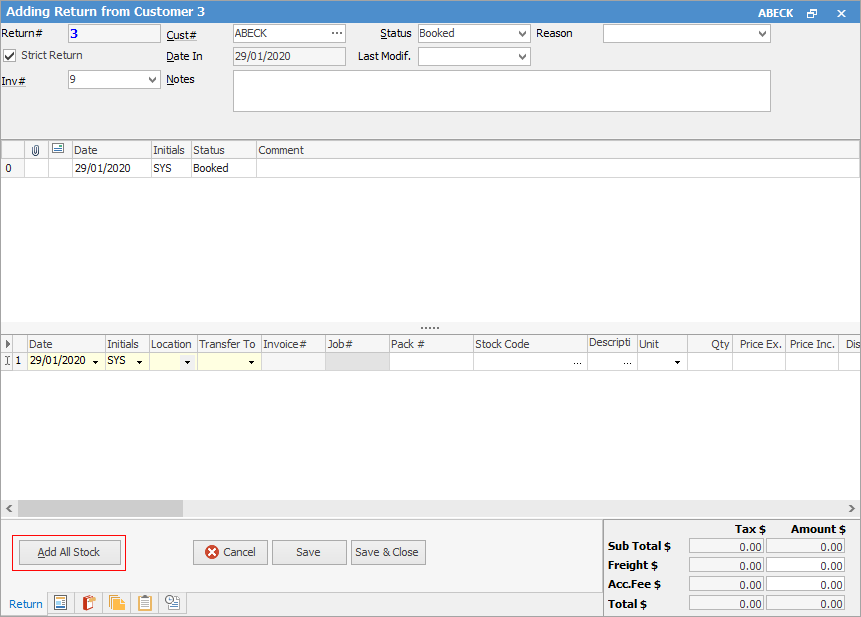
6.Move to the Stock Code field and select the stock being returned. Repeat as necessary for additional lines, using the Enter key to navigate along the stock grid. Select the solid arrow at the top left of the grid to show the Location and Transfer To fields. These are used further through this process.

Stock can be added in one of two ways:
i.If the customer is returning all stock on the original invoice, select Add All Stock.
 |
Selecting Add All Stock will ensure that all the stock supplied on that invoice will automatically be inserted into the return stock grid. This default information can be overridden by using the tab key or mouse to move the cursor to any field to make the required changes. |
ii.If the customer is returning only part of the stock sold, select the ellipsis [...] in the Stock Code field in order to select the stock code required. This will open a Select Stock screen displaying all stock and job numbers that belong to that invoice. Select the Location. Select which stock is being returned by double clicking on it. Repeat this process if more than one line of stock is being returned.
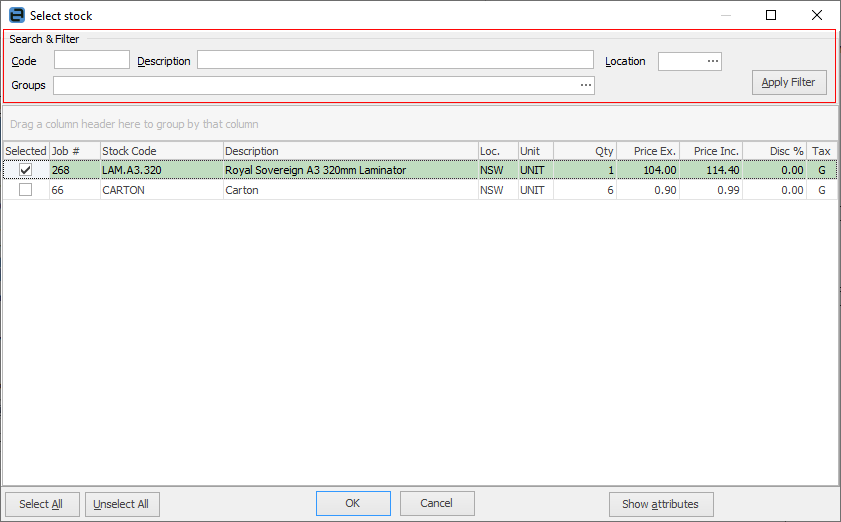
The Select Stock screen will only display a list of stock sold on the original invoice. Use the Search and Filter fields in the screen header to locate which stock the customer is returning. Simply enter any relevant values into the filter fields, then select Apply Filter (top right) to refine the search.
To select a particular stock line, either double click or highlight it and select OK – this will add the stock line to the stock grid.
|
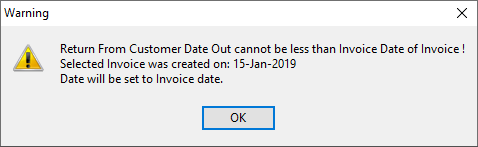
If an invoice has been forward dated, and a return from customer is processed earlier than the original invoice date, upon saving the return from customer where the status of Finish is used, the following message appears:
 |
7.Select the Faulty location as set up above if either depleting or special stock. This will automatically create a stock transfer once the return is finished.
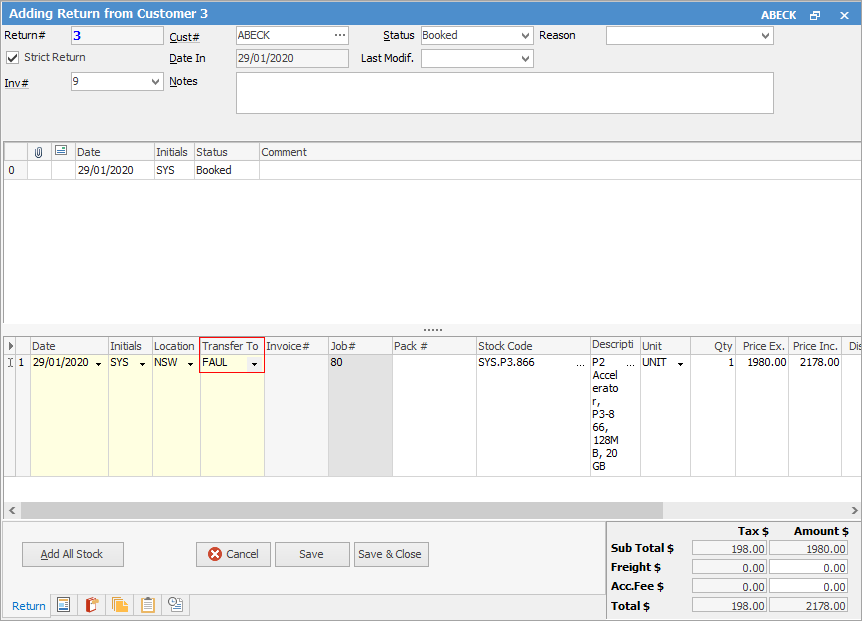
Upon completion of the return, open the stock transfer and set to FINISH.
8.Check the Price fields and amend if necessary.
11.Move to the Status field and amend to Finish. When the RFC is amended to Finish status, the stock has been returned to stock on hand and a credit has been added to the customer debtor record.
12.Select Save or Save & Close once the stock has been returned.
To ensure damaged stock doesn't get used on any other jobs, perform a stock transfer to the quarantine/faulty location. This isolates the stock and allows better control for the Return to Vendor process.
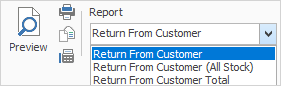
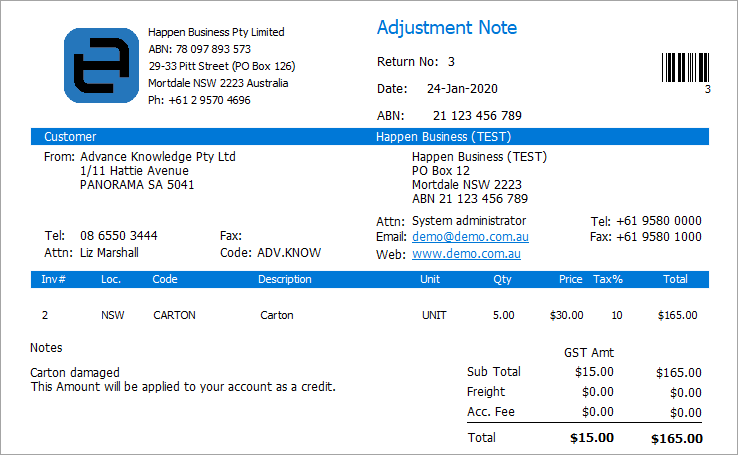
A credit note can be generated to send to the customer from the Report menu on the ribbon:
|
Once the return has a status of Finish the return cannot be edited. It must be unprinted first to be able to edit or cancel it. |
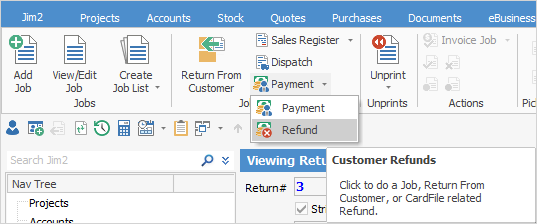
To refund the payment to the customer from a Till, while viewing the return go to Payment > Refund on the ribbon.
In the following screen tick the line to be refunded, then select the Payment By method:
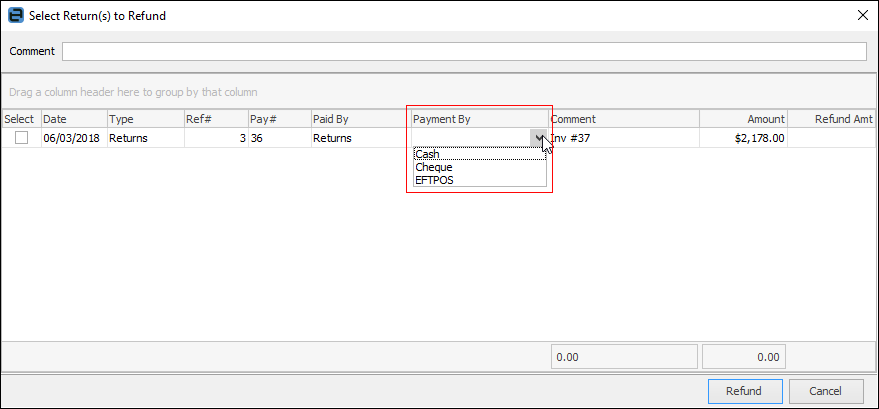
Select Refund.
Further information:
|
Add a Return From Customer Against Multiple Jobs Return a Package From a Customer
|
|
Return From Customer Stock Grid |