

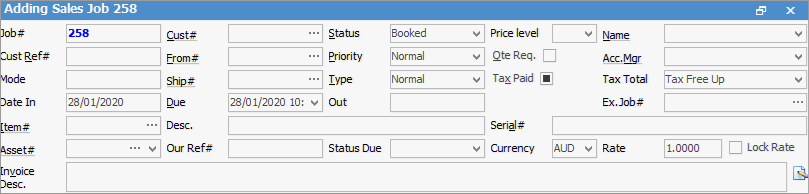
On the ribbon, go to Jobs > Add Job. The Adding Service Job (or Sales Job, depending on what is set up in Options) screen is displayed, showing a job form made up of a header, comment grid, stock grid and footer.
|
The job form will include the fields selected to show/hide (again, determined by choices selected in Options). As well as this, Jim2 will automatically convert or change job forms (from service to sales and vice versa) when entering the Item.
 |

|
Some letters in the field names within the header are underlined, eg. Cust#. Using Alt+ the underlined letter will jump to the field beside that heading. |

|
Jim2 automatically adds a unique job number and records the date in. These fields cannot be edited by users. Jim2 also updates the fields of Status, Priority, Type, and the Date Due (using the information selected in Options) |
Jim2 places the cursor at the appropriate fields that the user is required to complete. The Enter key will move the text cursor to the next user input field in the job entry path. The path follows:
▪Customer Card Code#
▪Customer Ref#
▪Ship#
▪Item#
▪Desc.
▪Serial# (if required)
▪Fault Desc. as supplied by the customer if it is a service job. Invoice Desc. if it is a sales job.
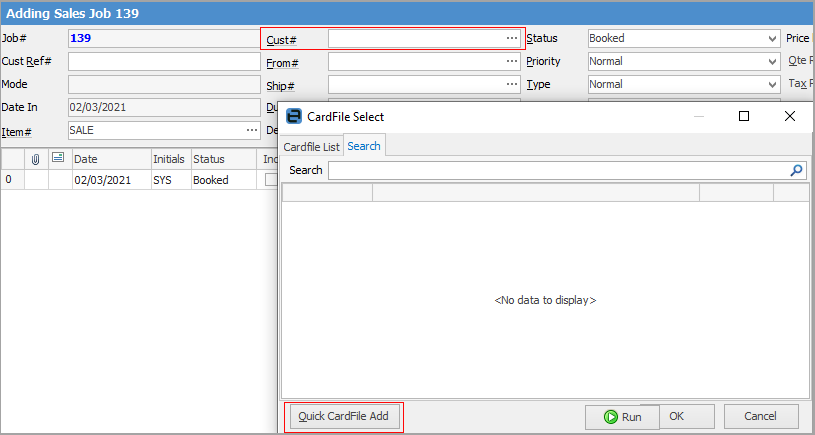
Select a customer in one of the following ways:
▪Start to enter the customer name. Jim2 intuitive type will begin to pre-empt the choice of names from the card code based on what is being entered.
▪Click the ellipsis [...] beside the Cust# field to display the full list of customers, then choose from the list.
▪If there is no cardfile for the customer, when in the Cust# field use F5 select Quick CardFile Add to enter a new cardfile. This can then be used on the current job.
|
When accessing the CardFile Select screen via the ellipsis, the Search tab will automatically be selected if current Cust# is the default as assigned by Tools > Options > Job > Cust#. This is useful in a retail situation, to quickly search for another customer. |
Jim2 provides the ability to use one customer contact for billing purposes and another customer contact for shipping purposes. Select a billing card in the Cust# field and a different shipping card in the Ship# field. It is also possible to obtain a list of the child (ship) cards for the parent customer.
Jim2 uses the information from the customer's cardfile to set the price level, From#, Ship #, due date and the tax paid information. However, this default information can be overridden by using the Tab key or mouse to move to that field, then highlight and edit.
Enter a customer reference (for example, name of the person who requested the job, or a specific number the customer supplies) in the Customer Ref# field.
|
Note: A Cust Ref# must be entered before invoicing is allowed. |
This alpha/numeric reference should be supplied by the customer so that they can match this job with their own internal procedures, personnel, purchase orders or work orders. If multiple jobs are required for the same reference number (work order), use a Job List to monitor the progress of the work order, and choose to invoice each job separately or all on one invoice – depending on the customer's requirements.
Select the Item that is attached to this job (remember Item is the prime objective of a job) and the Desc. field will default to the text description as set up in that Item record.
Items can have stock such as status sensitive tests or checks apply to them. When entering an Item where such stock applies, that stock (with a stock status) will automatically default into the stock grid for every job, unless the Auto Add box is not ticked on the Item record.
Enter the serial number (if required) in the Serial# field.
Enter the fault description as supplied by the customer (this informs the user about the problem) in the Fault Desc. field (in a service job only). If no fault description is supplied, select a generic term suited to the Item – for example, reset or upgrade to factory specification.
Enter an Invoice Desc. if that field appears.
|
Note: If these fields appear, a description must be entered in both these fields before invoicing is allowed. |
Use the Ex.Job# field or the Quote# field to link to a quote (or a previous job) to this particular job so that it forms a link to the whole work history of that Item.
|
Whether Ex.Job# or Quote# is shown is governed by what has been selected in Tools > Options > Job. Choose to show Quote# instead of Ex.Job# here. This setting can be changed at any time. |
If an Item has accessories or inclusions, move to the Comment grid and tick Inc to add a description of those inclusions in the Comment field.
This job, as the status indicates (all new jobs default to Booked), is now booked in and becomes part of the Jim2 workflow. Now add comments or stock to this job. Click Save or Save & Close if processing immediately is not required. Once the job is saved/closed, it is available to other users.
|
When saving the job and certain fields are not completed (Cust#, From#, Ship#, Cust Type, Item# and Item Desc.), Jim2 will prompt the user that These fields should not be left empty but do you want to save anyway? |
Add a basic service job
1.On the ribbon, go to Jobs > Add Job The cursor will be positioned in the Cust# field.
2.Click the Cust# ellipsis (...).
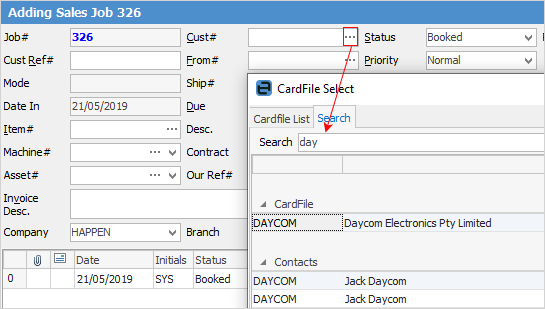
3.Enter a key word from the cardfile name or address. In this example, use the keyword day. Press Enter or select the magnifying glass at the end of the Search field.
4.Double click on the cardfile of choice or, if the required cardfile does not exist in the database, select Quick Add CardFile and complete the fields, then save.
5.Press Enter. Note the From# and Ship# fields will populate, and the cursor will move to the Cust Ref# field.
6.Enter a customer order reference. Press Enter.
7.Click the Item# ellipsis [...].
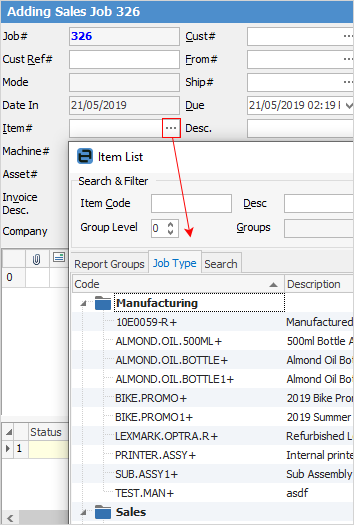
8.Double click on the applicable Item (service). Press Enter.
9.Edit the Description field (if applicable). Press Enter.
10.Enter a serial number in the Serial# field (if applicable). Press Enter.
|
The serial number requirement in the header of the job is related to the Item you are servicing on the job. Iit isn't about what you are selling, it is about what you are servicing, and assists you in building a service history |
11.Enter a Fault Description and Invoice Description if these fields are showing, as these are mandatory fields.
12.Move to the stock grid and, using the ellipsis [...], select the stock for the job, along with quantities required.
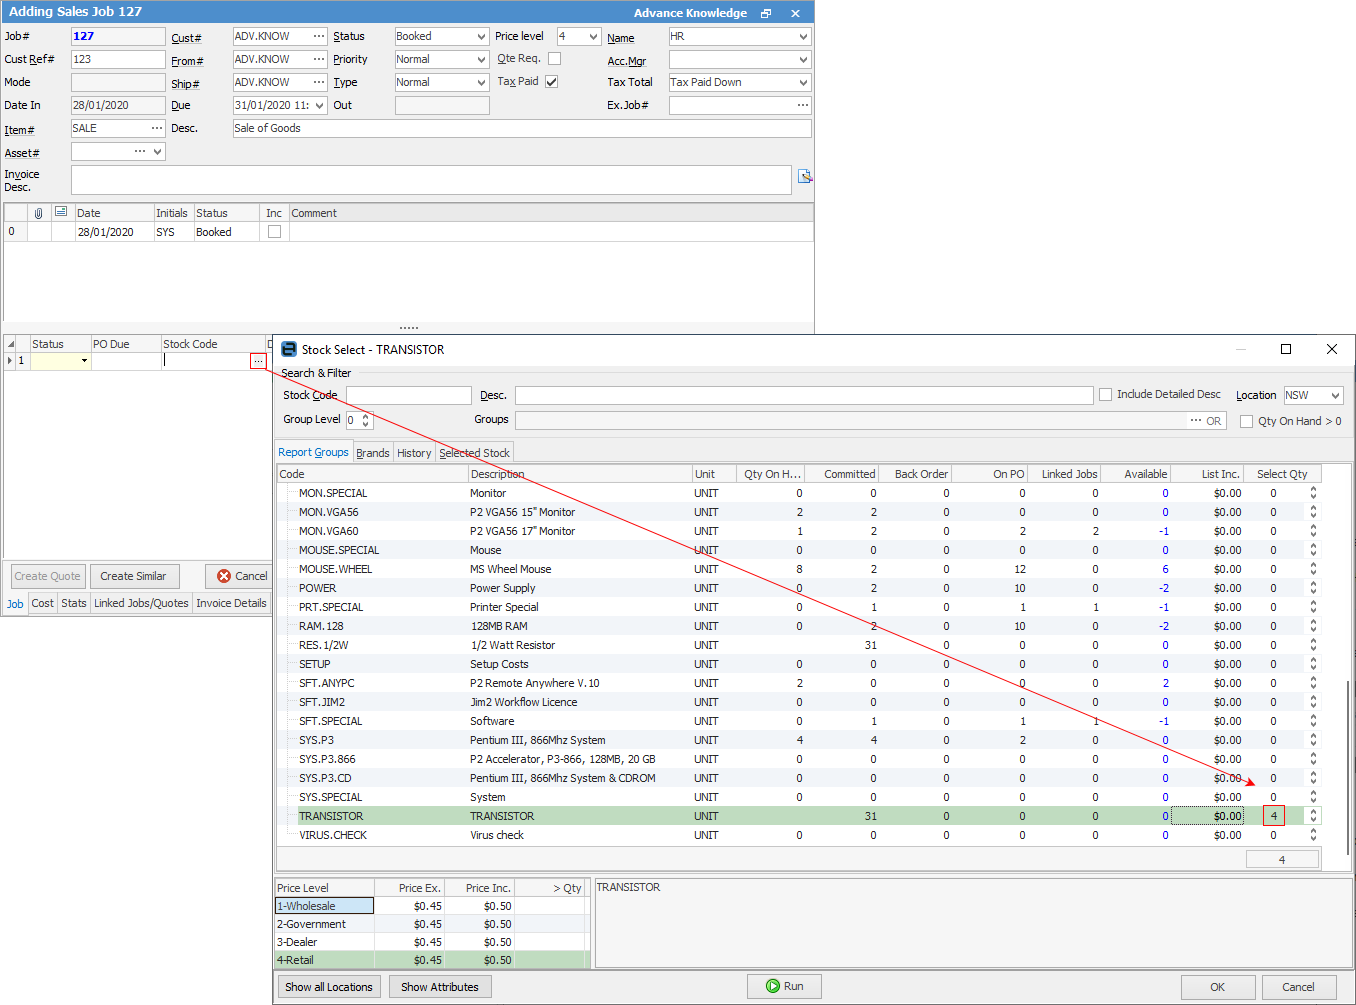
|
If adding multiple stock lines to the grid, tab to the end of the line, then press the Enter key to go to the next line in the grid, ready to insert another stock code.
To add a stock line above another stock line, select the line, then use the Insert key on the keyboard – this will insert a new line directly above the line selected. |
13.Click Save.
|
If a job has been cancelled accidentally, it can be edited to change the status to whatever is required.
If in Add mode when entering a job, selecting Create Similar will save the current job (but it will remain open in the Nav Tree) and present a new Add Job screen. This is particularly when entering a number of jobs for, say, the same stock but for different customers. |