
Labour timers (in the bottom status bar on the right-hand side) provide a way to add actual labour to an object (job, quote etc.) via a start/pause/stop timer. When ending a timer, the actual time is logged against the object.
Timers are also accessible by selecting Timers from Switch Windows on the ribbon’s quick access toolbar, or when open directly from the right hand side of the Jim2 task bar at the bottom of the screen.

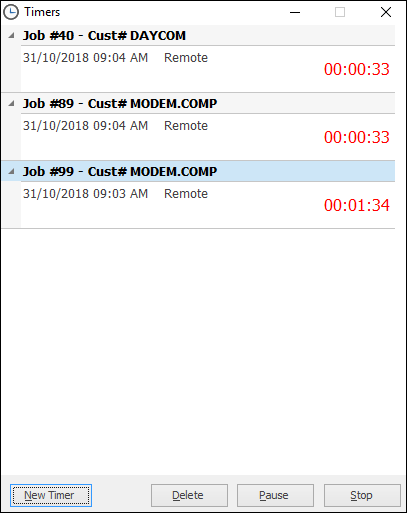
Clicking the Labour Timers icon displays the Timers form. A list of active timers will be displayed.

From this screen, new timers can be added and existing timers paused, stopped (completed) or deleted.
The caption on the Labour Timers icon displays the number of active timers you (the logged user) have running. In the image below, there are three timers running.

Timers are server side, meaning they continue to run when you exit Jim2.
 |
If a timer is accidentally left on after invoicing a job, the only way to stop the timer is for the user to log in, select the timers icon on the bottom right of screen (as above) and stop it via the above screen. |
Timers can be created, paused and stopped from any device. For example, you can start a timer via Jim2 Mobile, then complete it via the Jim2 client when returning to the office. Timers can also be paused. For example, you are onsite from 9am to 5pm with one hour paused for lunch. Jim2 records the timer as a single labour entry as follows:
Start time |
9am |
End time |
5pm |
Actual Labour |
7 hours |
Paused time |
1 Hour |
Adding a Timer Directly From an Object
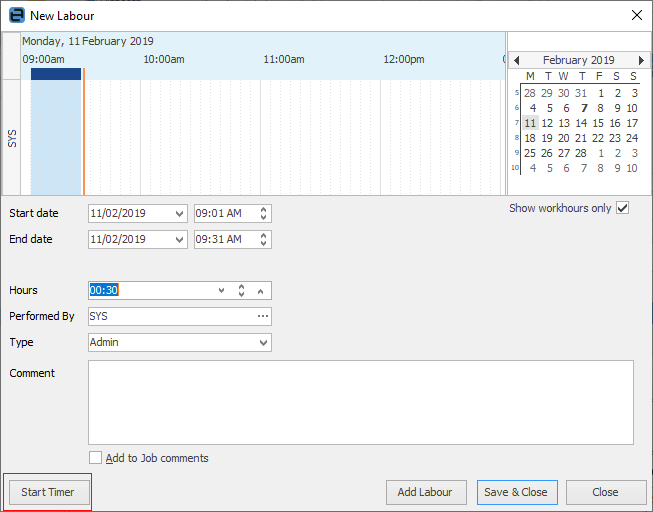
You can also add a timer directly from an object (job, quote, etc.) by selecting the object’s Labour tab, and clicking Add Labour.
The New Timer screen will then be displayed. Rather than adding a labour entry, click Start Timer.

The screen will close, and a new Timer will be created.
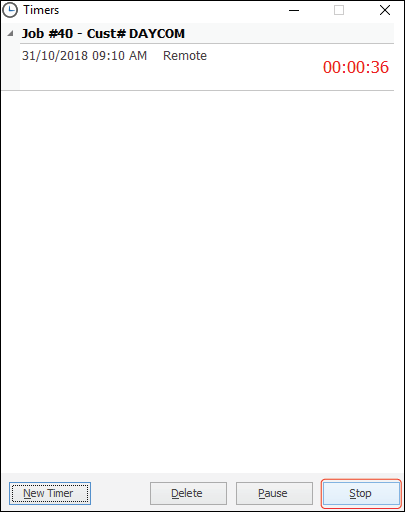
To stop a Timer, select the Timers icon at the bottom right of the Jim2 task bar, highlight the timer you wish to stop, and click Stop.

Further information: