
The Jim2 User Interface is intuitive and easy to use. The ability to efficiently access and view live information is achieved using familiar Windows techniques, including left/right mouse click, double click, drag and drop, and drop-down list.
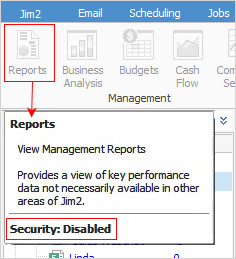
Throughout Jim2, the hover over functionality will bring up a screen tip relating to the object you are hovering over.
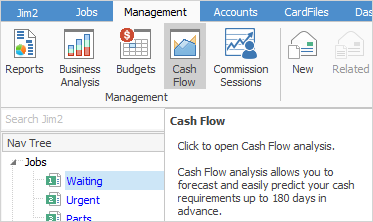
These screen tips will also give you information on your security level.
There are four main areas in the user interface: the Quick Access Toolbar, the Ribbon, the Nav Tree and the Work Area (the large grey area in the image below).
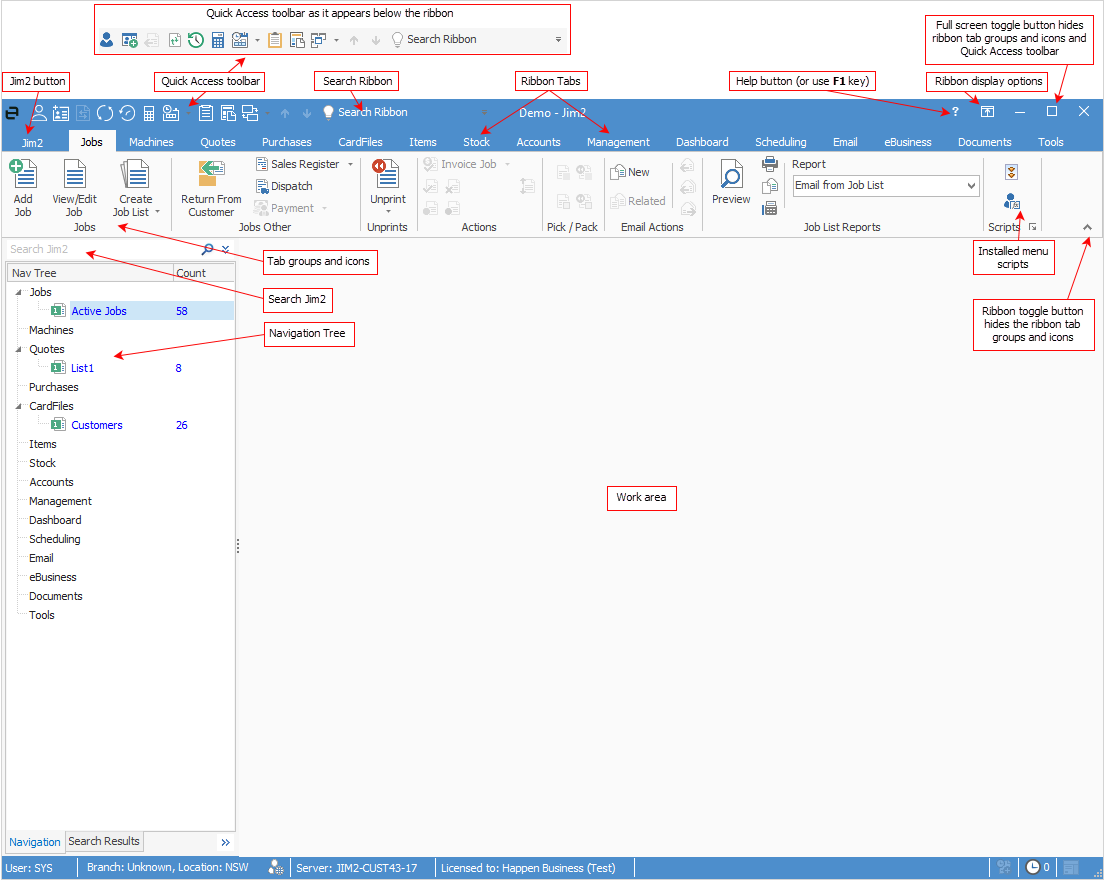
1.The Quick Access Toolbar displays a series of easy one-click icons for frequently used functions in Jim2. These icons are explained in detail here.
2.The Ribbon acts as the main gateway to the most frequently used operations in Jim2. The various headings represent the different tabs in Jim2. Contained within each tab heading are the tab groups. Each icon represents the different actions that can be taken. For example, Jobs > Create Job List (select the Jobs tab, then select Create Job List icon).

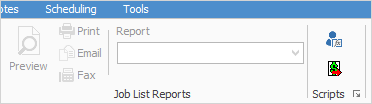
3.The ribbon also contains print and unprint options, the context specific Report toolbar, and any menu scripts that have been installed.
4.The Navigation Tree (Nav Tree) sits to the left of the screen. The Nav Tree displays all open tab activities and lists that are currently in use. You can switch between these by selecting the appropriate name in the Nav Tree. Lists and operations will remain in the Nav Tree until closed, even if logging out of Jim2. By using drag and drop, you can rearrange the order of lists, and move an object to another position within the Nav Tree. When you move objects in this way the Ribbon tabs will be reordered to match. Double clicking on any object in the Nav Tree will collapse all other object lists and leave this one open. This is further illustrated in Navigation Tree.
▪You can reorder within lists themselves. For example, you may have several job lists, with the last one being your Urgent job list. Much like reordering root nodes above, simply select your Urgent job list and drag it above the first job in the list into position one. The job list icons will automatically renumber to match your new layout. This is further illustrated in Lists.
4.The space to the right of the Nav Tree is utilised as the Jim2 Work Area. This is where object lists and individual forms are displayed.
 |
Jim2 will organise the layout of your screen view in relation to the resolution of the screen that you are using. Jim2 is optimised for 1280 x 1024 minimum resolution (1920 x1080 preferred). |
You can use any of the following general navigation methods to access information:
▪The Ribbon containing tabs and icons.
▪The Nav Tree displaying all tab activities and lists in view.
▪Right clicking on a sub-heading in the Nav Tree will provide the same icon options as found in the ribbon tab groups along the top.
 |
Throughout Jim2, scroll bars are hidden until you hover over the area:
 |
|
Like Windows, you can tab across from field to field within Jim2, or you can press Enter, which will take you to the next logical field in Jim2. |
ALT Key Shortcuts
Pressing the Alt key will display the onscreen keyboard shortcuts that you can use.

See ALT Key Actions for a full explanation of the above shortcuts.
Other Useful Functions
To automate as many functions as possible, Jim2 includes useful features such as:
▪Global, workstation and user-sensitive defaults.
▪Intuitive/predictive type (as you start to type, Jim2 will pre-empt your entry and begin to fill in relevant text).
▪Drag and drop sorting by selected headings.
▪Find function.
▪Search function.
▪Cut, copy and paste text.
▪Create Similar functions.
▪Standard Windows print menu options (with context sensitive reports).
▪Online Help (F1 function key).
▪Save and publish lists at a group and/or user level.
 |
At the top right of the screen is the shortcut (or you can use the F1 key) to context sensitive help for the object you have in focus at the time. If you have a job open, then Help will open at the Jobs section. If it's a card file, then help for CardFiles will be displayed. |
 |
The Change User Location icon, located at the bottom left of screen, changes the default stock location (or branch) of the current user. This is helpful when entering a number of stock transactions for a location that is different to your default. |
You can also change the user branch, sub-branch, GL department or location by going to the Jim2 icon on the ribbon and selecting Change Location.

This will display a grid showing all the available branches, sub-branches, GL departments and locations. What will show depends upon what you have set up in Options.
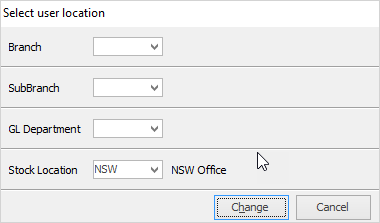
To change, simply use the  in each field and select the required branch, sub-branch, GL department and stock location, then click Change.
Once a user logs off, any changes made in this way will revert to the default for that user, as set on their card file.
|
You cannot change font sizes within Jim2 itself. The only way to do so is to change the font size within Windows. However, this may result in pixelated/overlapping text/blurry text/images. |
Further information: