

On the ribbon, go to Purchases > Return to Vendor.
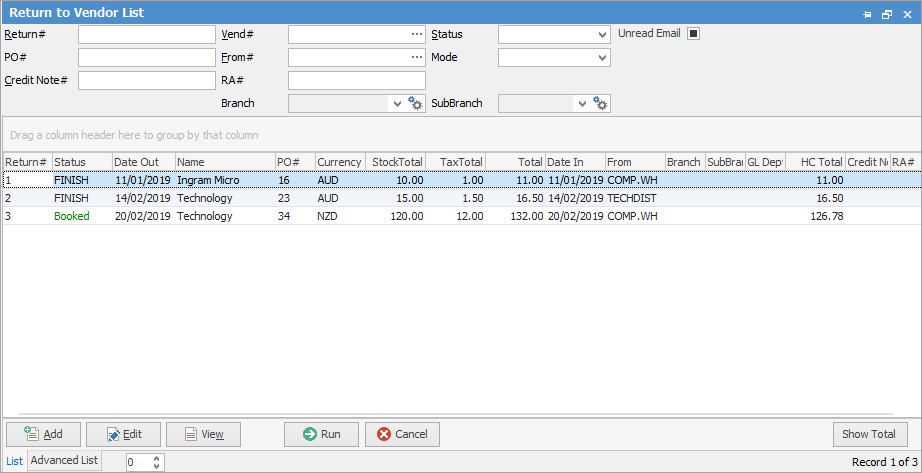
The Return to Vendor list is displayed. Click Add at the bottom of the list.
|
Some letters in the field names within the header are underlined, eg. Vend#. Using Alt+ the underlined letter will jump to the field beside that heading. |
|
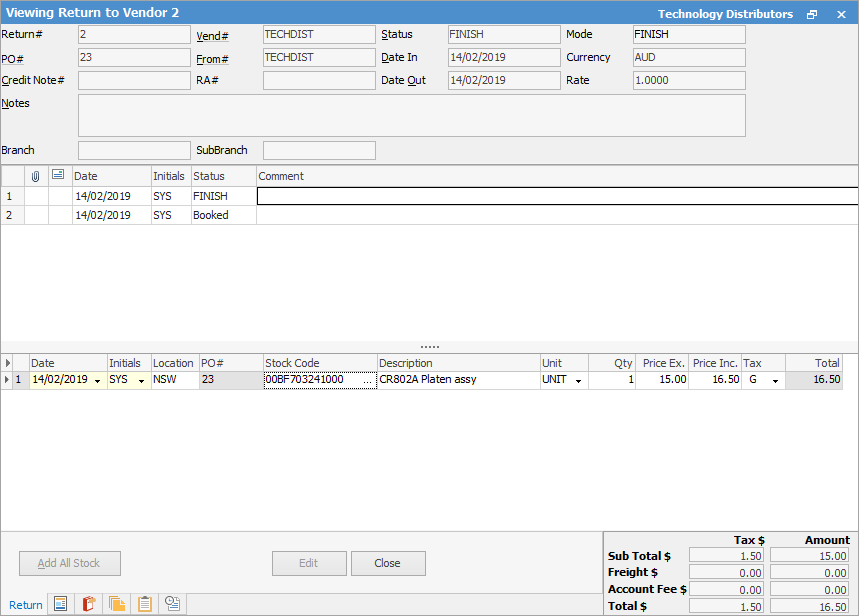
Some fields will have information defaulted automatically by Jim2, including Return# (cannot be edited), Date, and Status. |
The Adding Return to Vendor form is displayed. Select a vendor in one of the following ways:
▪Start entering the vendor name. Jim2's intuitive type will begin to pre-empt the choice of names from the card code list as information is entered.
▪Click the ellipsis [...] beside the Vend# field to display the full list of vendors, then choose from the list.
Select the stock in one of two ways. Either by stock code or by purchase order number. When entering a stock code, a list of all purchase orders will be displayed. If a purchase order number is entered, the Vend# field will be filled in automatically.
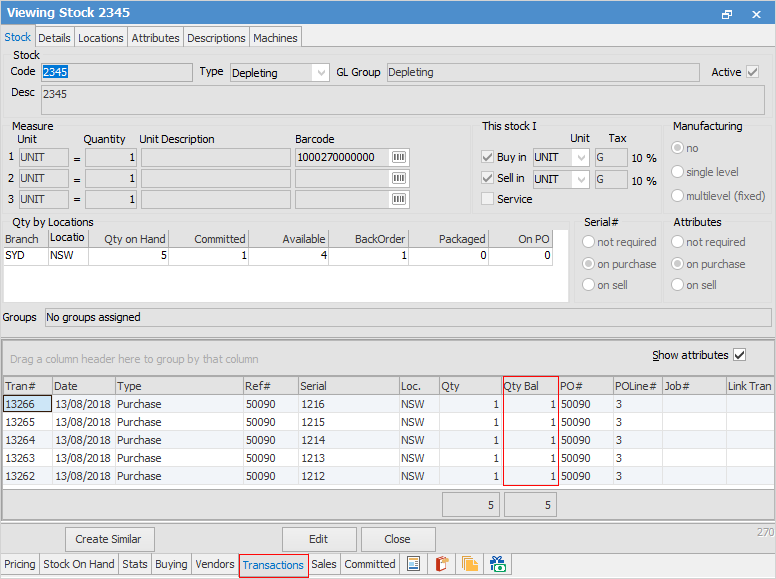
If the stock is not showing, open the stock record and go to the Transactions tab at the bottom of the screen to see which purchase order has stock on hand in order to add to the RTV.
Choose from the dropdown  in the PO# field. Jim2 will provide the complete list of all purchases. Select which purchase order the stock is being returned from.
When selecting the PO# field scroll down to find the purchase order (the current purchase orders are listed at the top of the dropdown).
|
Note: If the PO# is entered in the header field, only stock from that PO# can be added to the stock grid. |
Enter the vendor's credit note number, which will be carried over to the vendor's creditor record.
Enter the vendor's RA number, if they have provided one.
Enter the details about why the stock is being returned in the Notes field. This can form part of the quality record.
To select the stock that is being returned, click Add All Stock, or the ellipsis [...] in the Stock Code field.

If Add All Stock is chosen, all the stock relating to that purchase will automatically default to the stock grid. However, this default information can be overridden by using the Tab key or mouse to move to that field, highlight and re-edit.
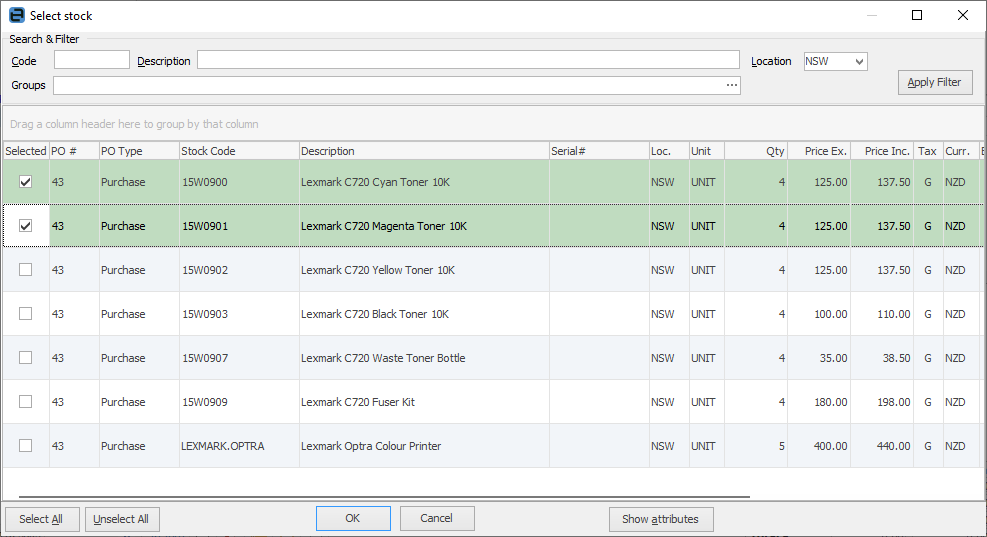
Clicking the ellipsis will bring up the Return to Vendor Select Stock form, which will display all stock and purchase order numbers.
Select which stock is being returned by double clicking on it. Repeat step 8 if multiple stock is being returned.
Click Save or Save & Close once finished returning the stock to the vendor. However, the status of the return must be set to Finish. This will update the stock records, the general ledger account, and creditors record.
If the vendor selected in this return to vendor is different to the vendor on the original purchase order, the following confirmation message will appear when finishing and saving the purchase order.
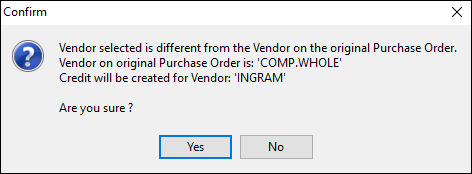
If the vendor is changed after the stock has been loaded, the following message will appear and the stock will need to be re-entered:

|
The return cannot be edited once it is on a status of Finish. It can only be unprinted to be able to edit or cancel it. |
Consignment stock can be returned via a Return to Vendor as well.
|
Return to Vendor cannot be used against an expense order. Create a negative expense order instead. The quantity is entered as a positive amount, but the dollar value is entered as a negative. See Add a Negative Expense Order.
An RTV cannot be finished if the original purchase order is still on Received. |
Restocking fees on return to vendor
Restocking fees can be treated in two ways – either the value of the credit is reduced, or an expense order is added.
The value of a credit from a vendor can be amended prior to moving the RTV to Finish. This is usually what is performed, as it mirrors the value of the credit.
Finish the RTV for the full value, add an expense order against the vendor for the restocking fee.
Entering a vendor credit note when no return of stock
Create an Expense order linked to the original purchase order, then use a non depleting stock stock code (create one if necessary) that points to the desired GL account.
Entering a vendor credit note when no reference
Add a negative expense order to a specific GL account. This will generate a credit on the creditor record and in the selected GL account.
Further information
Add a Return to Vendor Against a Different Vendor
Add a Return to Vendor Against Multiple PO's
Add Restocking Fees on a Return to Vendor
Add Stock to a Return to Vendor
Handle Stock Returned on a Debtors PO
View or Edit a Return to Vendor


