Scan Stock into Jobs

Back Top Previous Next

Go to Tools > Options > Job > Stock Grid > On new line and tick Scanner Mode.


scannermode2


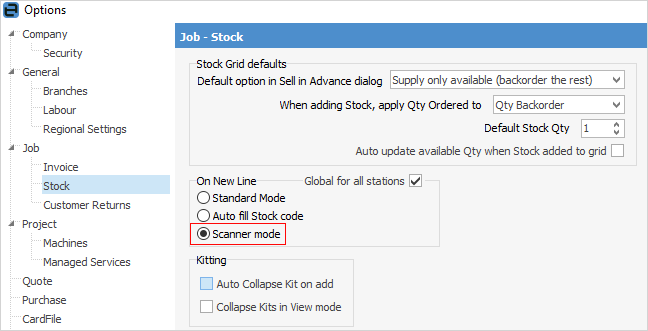
This means a product can be scanned when adding a job, then move to the next line to scan the next product. If Default Stock Qty is set to 0, you will have to scan the barcode, then enter the quantity. If Default Stock Qty is set to 1, Jim2 will add that stock quantity and move to the next line.


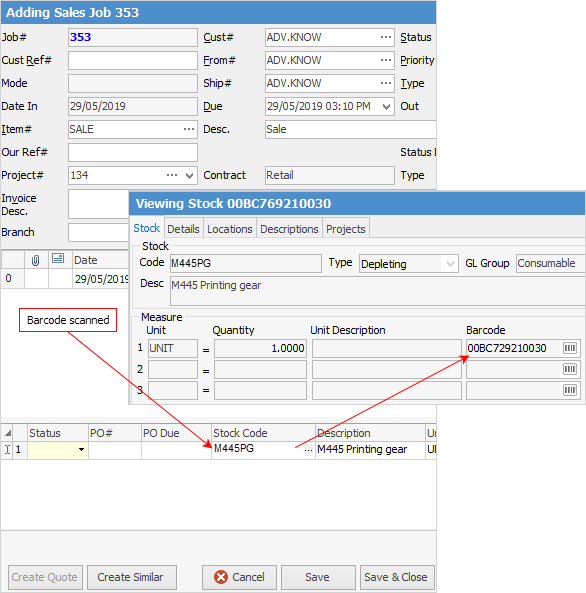
Jim2 can also create its own barcodes when setting up stock (within the unit measure area of the stock header fields).


To scan stock into a job, place the cursor in the Stock Code field and scan the product.


scanbarcodejob


The stock code and description fields will populate. Once the first line has been finished, add a new stock line and place the cursor in the Stock Code field of line 2, then scan the next product.


barcodescanned


Continue in this way until all stock has been added.


How to

Add a Job

Add Comments to a Job

Add Discount to a Job

Add Document to Job

Add Freight to Jobs

Add Multiple Jobs

Add Stock by Multi-selection

Add Stock to a Job

Add Stock to Job When Insufficient Stock

Auto create purchase orders from Jobs

Charge a customer a restocking fee

Create a Job from a Similar or Previous Job

Create a Job Template for Recurring Jobs

Create Back order

Credit an Overcharged Customer

Handle Part Delivery of Jobs

Import Jobs


Job/Order Prepayments/Refunds

Mark a Job as Ready

Print a Job

Rent Stock to a Customer

Reserve Stock for a Job

Select Serial Numbers on a Job

Stock Availability Allocation Process by List

Stock Availability by Location on the Fly

Take Deposits from Customers

Unallocate stock from a job

Unlink a Job

Unmark a Job as Ready

Unprint a Job

Unreserve Stock for a Job

Use Comments to Track Work in a Job

Use Stock Lookup and Select

View or Edit a Job